
Introduction
The Bambu Lab P1P and X1-Carbon are consumer grade FDM printers that are a step above the Prusa MK3S with automatic bed leveling, AMS connectivity, and up to 20000 mm/s² acceleration. Faster, more detailed, and better suited for remote monitoring, these powerful printers are best used for long, detailed, or multi color PLA prints.
-
-
In order to use any Bambu Labs printer, you must first install their slicer app, Bambu Studio. The download link can be found here
-
-
-
Once you've downloaded Bambu Studio, the app should look like this.
-
Navigate to the Login/Register option. and click on it. Create your own account using your @umd.edu email.
-
The Bambu Printers in the AFL are set to Local Area Network (LAN) mode. This means that as long as the computer you are using is connected to the Terrapin Works AFL Wifi, you should be able to send prints directly to each of the printers from BambuStudio.
-
-
-
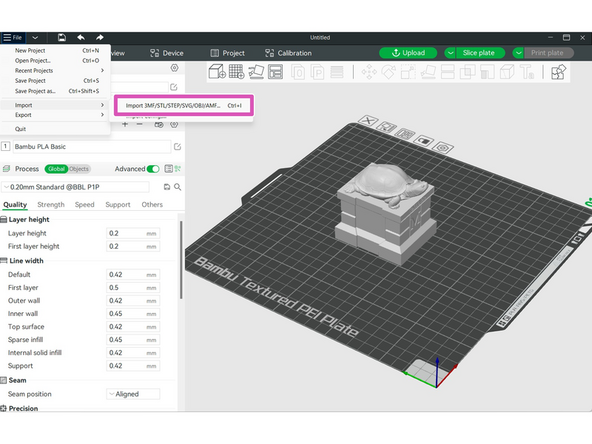
Navigate to File>Import>Import 3MF/STL/STEP... to import your file
-
One of the advantages with Bambu Studio is that it can read color data, as well as create it, which we will get to later.
-
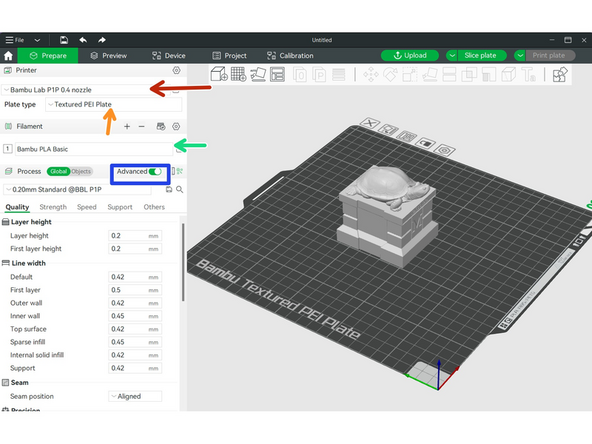
Select the correct printer and nozzle type. We use 0.4mm for the P1P, P1S, and X1
-
Select the correct plate type, we have multiple so ensure you are using the correct one for the correct materials
-
Select the filament type. Note that certain filaments require an enclosure and can therefore only be printed on a P1S or X1.
-
Make sure you have the advanced button turned on, and take a moment or two to look around through the rest of the settings. They are fairly intuitive, and similar to PrusaSlicer
-
-
-
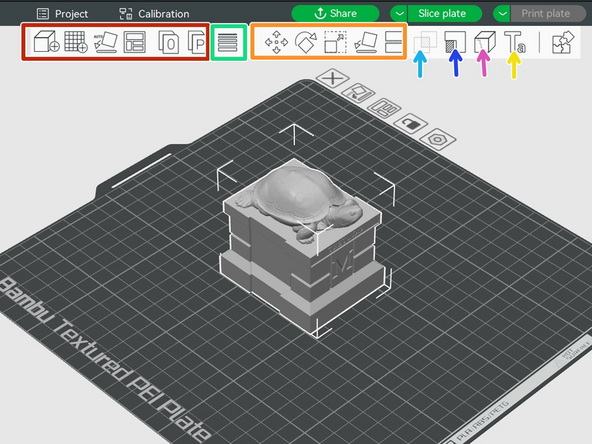
The menu at the top of Bambu Studio is used to arrange, assemble, and customize the print along with many other features. Primarily the same as other FDM slicers, this guide will briefly go over the old, and explain the new.
-
In order from left to right are the add, add plate, auto orient, arrange, split to object, and split to parts buttons
-
Continuing is the move, rotate, scale, lay on face, and cut buttons
-
Variable layer heights are a powerful tool that would allow you to take less time and attain a higher detail where desired. This also exists on other slicers, but is often skipped over
-
-
-
This is a Mesh Boolean button, which can be used to combine multiple objects.
-
This is where you will find the paint on supports feature, which works identically to the prusa feature
-
The seam painting feature can be useful when ultra-high detail is required. It allows you to paint on the print where the seam is, which is where the layer starts and ends
-
This button is used to add text to prints. Useful for labeling things but rarely needed
-
-
-
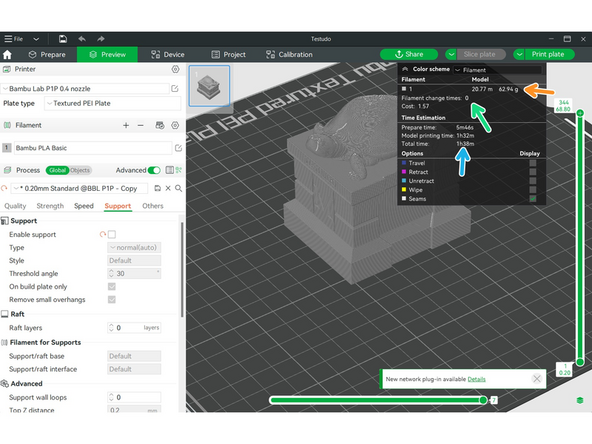
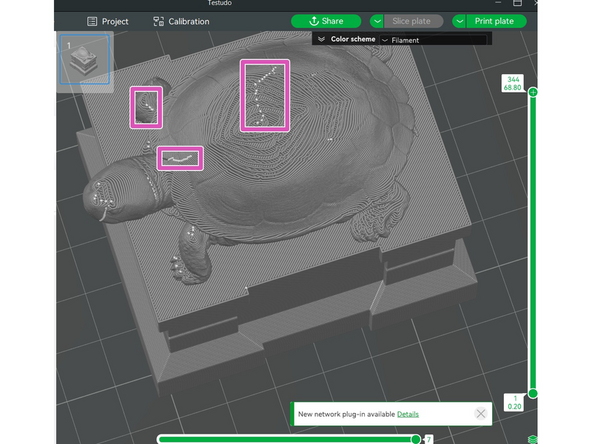
Hit the "Slice Plate" button to slice the plate
-
Some important things to pay attention to:
-
This shows the total mass of filament used
-
This shows the amount of color switches, which should be at 0, but more on that later for multicolor prints
-
This shows the total time
-
One thing to note is that you can see where the seams are, and if they look super messy or are in critical areas they can manually be painted using the seam painting tool
-
-
-
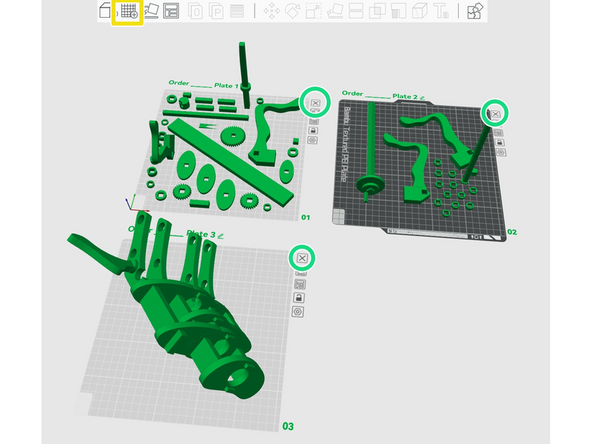
Sometimes prints on the Bambu require multiple build plates. In order to add a new plate, press the add plate button.
-
To delete a plate, press the x button on the plate you want to delete
-
When you hit slice, you will be able to see all of the stats for the combined plates here, this is what you should be putting into papercut
-
In order to print the plates, you must first click the plate you want, and then select print plate
-
Note that each individual plate can be started on a different printer without reslicing,
-
Having 2-4 plates in the same file has potential for confusion, so make sure to rename the plates using the pencil icon.
-
-
-
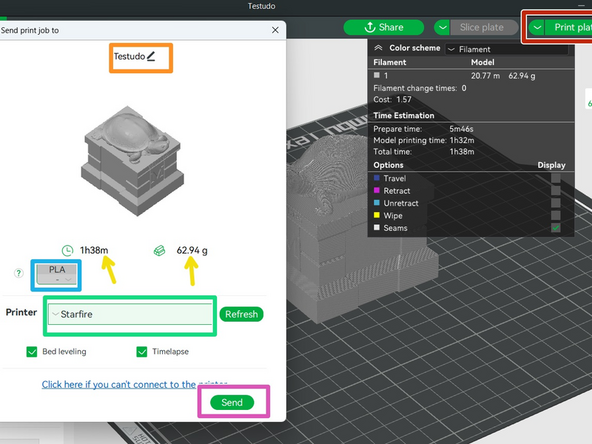
Once hitting the print plate button, the popup on the left should appear
-
The file name can be edited here if not done so already
-
Make sure this has the order number and the customer name
-
The total mass and total time are also displayed again. These are the numbers that you put into papercut
-
Verify that you are printing in the correct material and that it is loaded into the printer
-
Select the correct printer. Starfire, Beastboy (AMS), Raven and Cyborg are all on the far right of the shelves, and any can be used.
-
Finally hit the send button, and let the part print!
-
In order to submit the file onto papercut, save the plate and upload the .3mf file to papuercut.
-


Cancel: I did not complete this guide.
3 other people completed this guide.