-
-
There must be at least one other person in the lab with you while operating the surface grinder.
-
Wear safety glasses.
-
Inform the staff that you are going to use the surface grinder.
-
Read ALL WARNING NOTES in this dozuki.
-
-
-
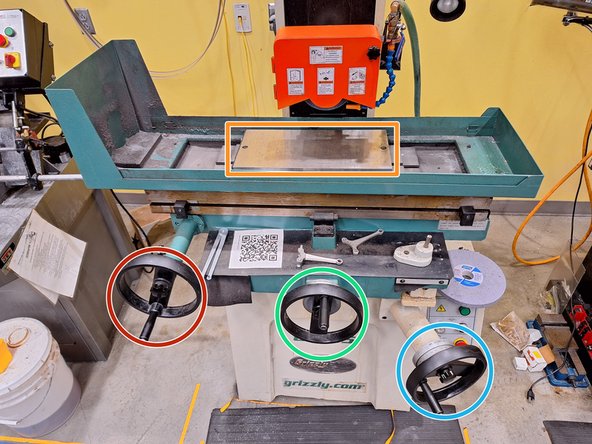
This is the magnetic plate that will hold your stock while you are grinding. It has 2 axis movement, forwards/backwards and left/right.
-
This left wheel controls left/right movement.
-
This middle wheel controls forwards/backwards movement.
-
This right wheel controls height of the grinding wheel.
-
This is the grinding wheel.
-
You always want to make sure the wheel stops moving before reaching near the wheel.
-
This is the coolant flow valve.
-
-
-
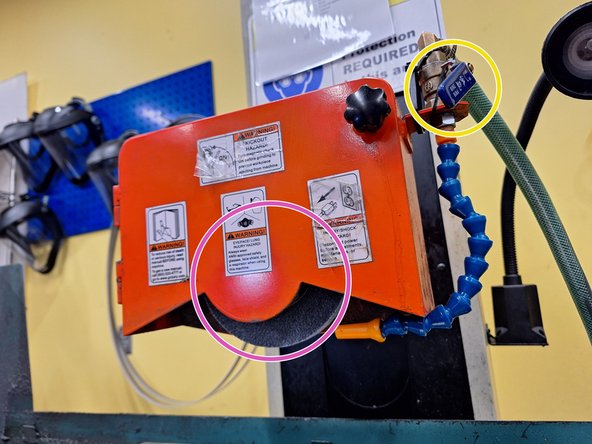
The front panel controls the power of the machine as well as the coolant state.
-
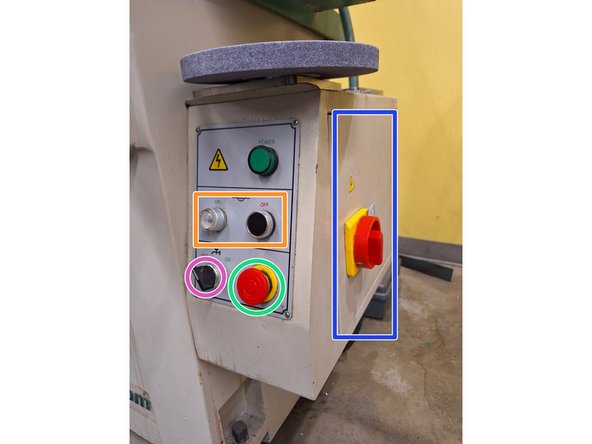
To POWER ON the machine, push in the electrical panel and then turn the red knob clockwise. To POWER OFF the machine, just turn the red know counterclockwise.
-
The CLEAR button powers ON the grinding wheel. The BLACK button powers OFF the grinding wheel.
-
Emergency Stop Button!
-
Coolant on/off switch. Rotate the switch to start or stop coolant flow. You have to adjust the amount of flow with the coolant valve.
-
-
-
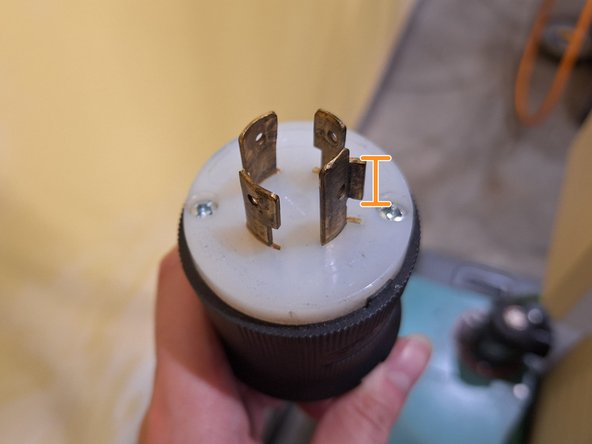
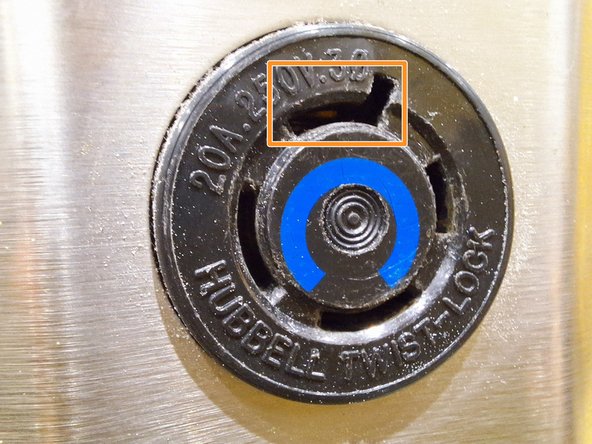
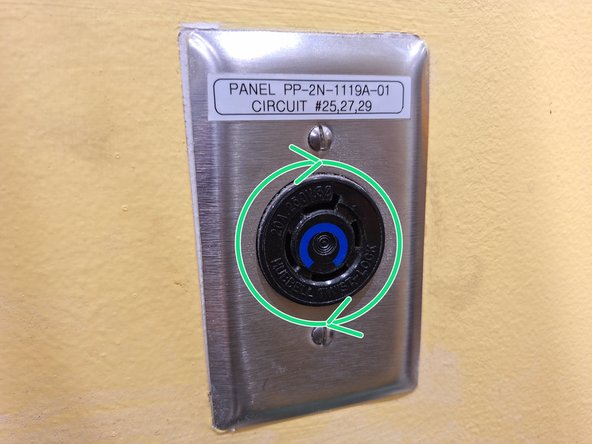
The plug and outlet for the machine has an odd shape.
-
Make sure you align the prong of the plug to the correct hole of the outlet.
-
Once you have inserted the plug, make sure to turn clockwise to lock the plug in place.
-
To power on the machine, use the control panel. Reference "Step 3 - Surface Grinder Anatomy II" for more information on the control panel.
-
-
-
You'll need to dress the wheel with the diamond tipped dressing rod before you do any surface grinding.
-
Make sure just the TIP of the rod is making MINIMAL contact with the wheel.
-
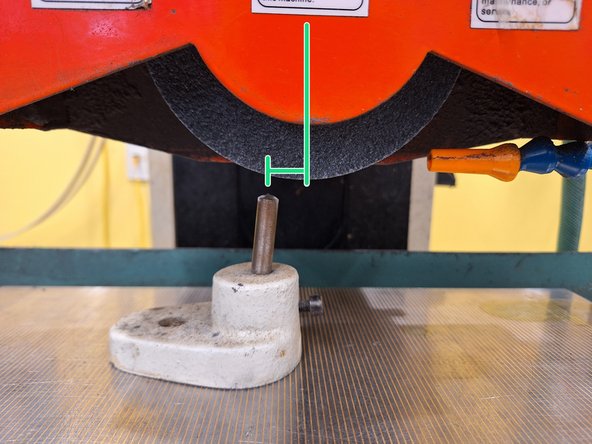
Fix the rod about 1/2 in. off from the center of the wheel in the direction of the rotation of the wheel. In this case, 1/2 in. to the left of the wheel.
-
Flip the lever to the right to active the magnetic clamp. Flip the lever to the left to unclamp.
-
Ensure that the tool has been properly clamped down by trying to remove it from the plate. If you cannot, then the tool is clamped correctly.
-
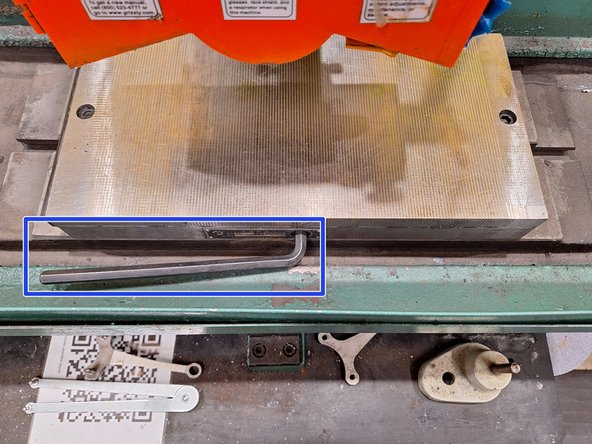
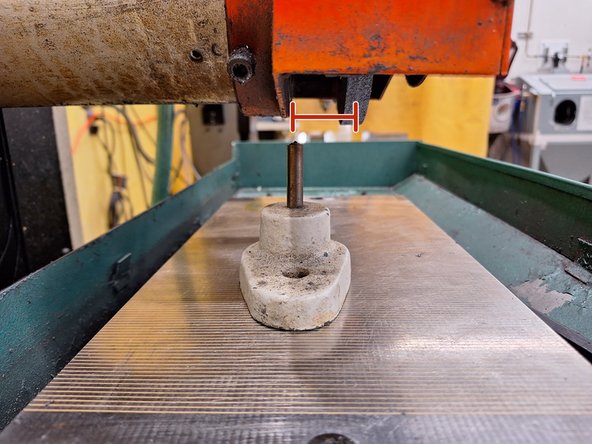
Make sure the tool's angle is positioned as shown in the 1st image.
-
-
-
Make sure the height of the wheel is BARELY in contact with the tip of the dresser.
-
ONLY use the MIDDLE wheel. When dressing you should only be moving in forwards and backwards motion. DO NOT touch the left hand wheel.
-
ONLY move the z-axis handle (right-most handle) at MAX 0.001 inches or 0.01 mm. NEVER take more than that for dressing the wheel.
-
Make sure you start the dressing process with the wheel positioned off of the dressing tool.
-
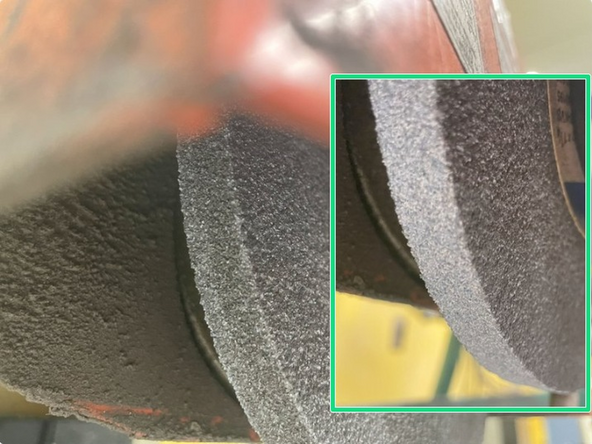
This is what a dressed wheel should like like.
-