-
-
Switch to the manufacture tab in Fusion 360
-
Change units to your preference
-
Click icon in order to begin your first set up. (The first set up will contain all of the tools and tool paths for the first operation). Some models will require 2 or more setups.
-
-
-
This is the coordinate system for the first operation. It is automatically set up from the CAD coordinate system. The coordinate system will usually need to be changed in order to optimize efficiency and easy of machining
-
This window will be used to edit the piece's setup.
-
The stock will initially be placed within the center of its generated stock piece.
-
CAM coordinate system
-
Changes made to the Work Coordinate system (WCS). Ensure that the Z-axis is pointing up.
-
It is normally better to set the z-axis zero on the bottom of the stock. (In case something goes wrong and the z needs to be referenced again) The x and y axis can be set anywhere that easy to reference.
-
-
-
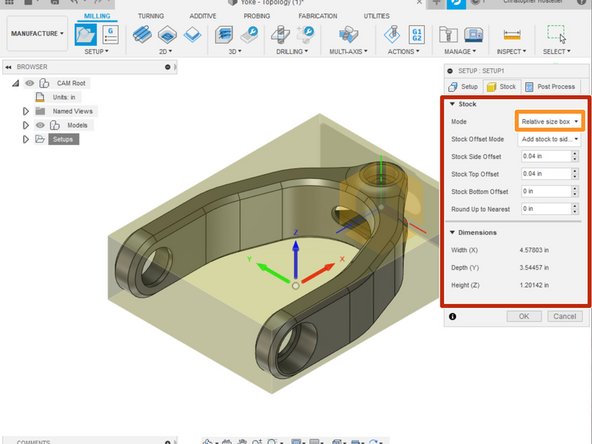
Set the stock size
-
Customers will usually come with their own stock. It is ideal to measure the stock and set it to that size
-
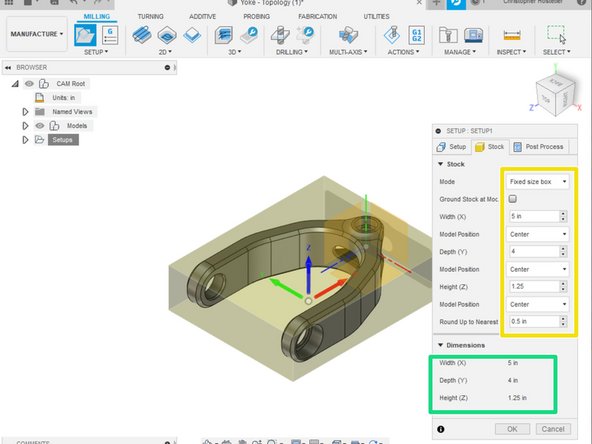
We can change the mode in order to reflect the best stock size set up method.
-
We choose "fixed size box" since we know the exact size of the stock.
-
We can see the full dimensions of the stock material. This will be more useful if your "mode" is set to relative or addition stock to sides
-
-
-
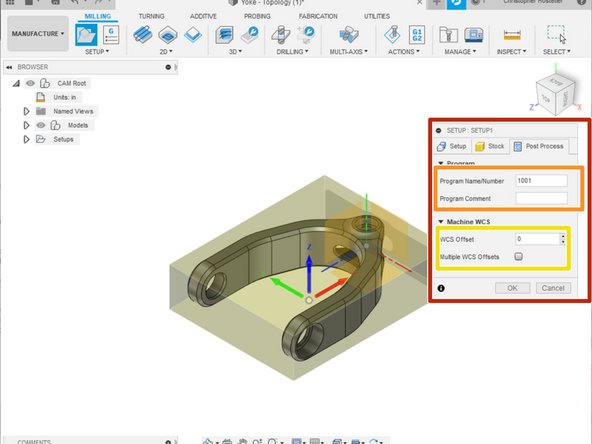
This is the post processing tab which we will come back to once we finish the CAM
-
The program name/ number is what the file name will be. Some CNC machines are strict with how this file it set.
-
Program comment can be any comment that will appear once the .gcode is opened. It usually will contain a description of the part and the operation.
-
Some CNC machines can be programmed with multiple work coordinate systems at the same time. This is where you would inset the WCS number (1 or 2 or 3...etc.)
-
For the router we only need to put in a program name and comment. The name can be whatever.
-


