
Introduction
CorelDRAW will be used as an intermediate step between a CAD package and KCAM (the machine’s setup software). It can also be used on its own as a powerful design tool for both technical and artistic projects. This tutorial will cover common uses such as importing from .dxf, .png, image tracing, and basic file manipulation.
Tools
Parts
No parts specified.
-
-
Open CorelDRAW
-
Click File > New Document
-
Name the file
-
Select RGB color and 600dpi
-
The Kern has a default template so these settings only apply to other lab computers
-
-
-
Click File > Import or ctrl+I
-
Navigate to the TW network drive and go to AFL > _Lab > Kern > Training
-
Select "training_outline.dxf"
-
Verify dimensions then select OK
-
Left click to place
-
Select the text and press the delete key to remove it
-
-
-
Go to Windows > Dockers and select "Properties", "Objects", and "Join Curves"
-
Open the Join Curves Docker
-
Click and drag around the whole shape to box select everything
-
Click Apply
-
Box select everything then press Ctrl+G to group the geometry together
-
By joining the curves it creates a single path for each curve. This decreases cut time and improves cut quality.
-
-
-
Press Ctrl+I to Import
-
On the TW Network drive navigate to AFL (Clark) > Kern > _Lab > training and select "tw_pictorial_bold.png"
-
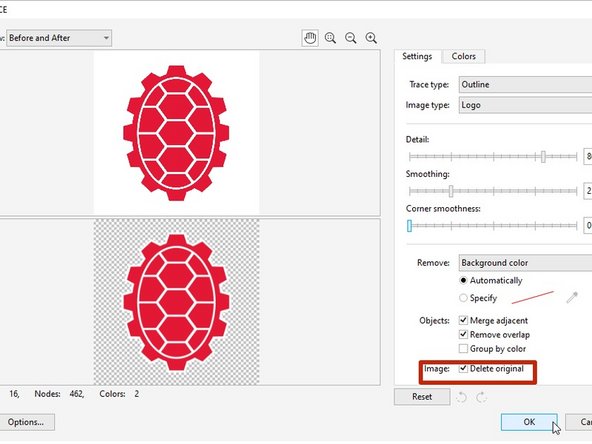
Right-click on the shell and select Outline Trace > Logo
-
Make sure Delete original is selected and click Okay
-
Left click on "none" to remove the fill
-
Right click on "red" to set stroke (lines) to red
-
-
-
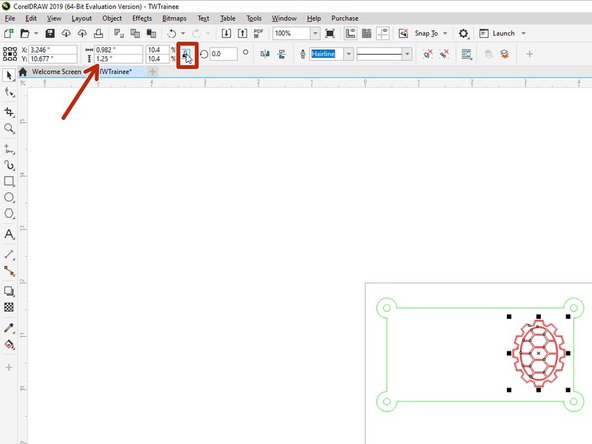
Lock ratio and set height to 1.25"
-
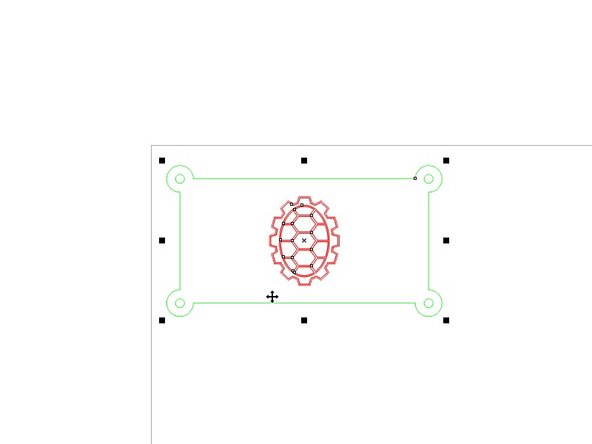
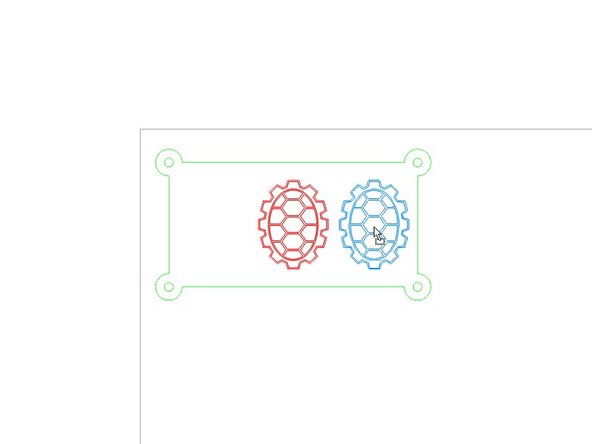
Select the shell, then hold shift and select outline. A bounding box will appear around both objects
-
Press "C" align the centers vertically
-
Press "E" to align centers horizontally
-
Select just the shell and start to drag to the right. Hold the "Shift" key to keep it snapped to the horizontal
-
Place the shell on the right side of the outline
-
-
-
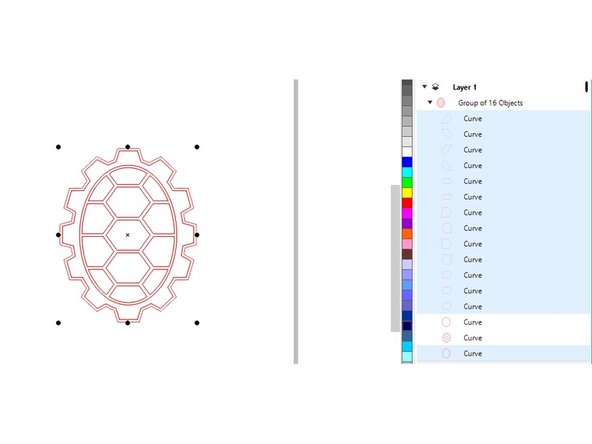
Delete the highlighted curves
-
These are duplicate lines created when we did the logo trace
-
If you forget to do this, each of these lines will be cut twice, causing the shell to be cut all the way through and fall out
-
-
-
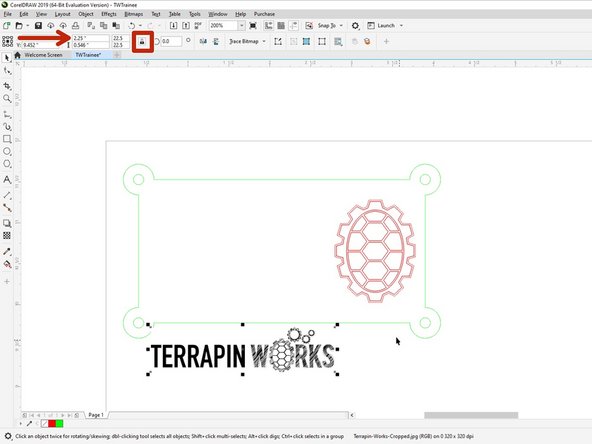
Press Ctrl+I to Import
-
On the TW Network drive navigate to AFL (Clark) > Kern > _Lab > training and select "Terrapin-Work-Cropped.jpg"
-
With the ratio locked set width to 2.25"
-
Click the logo then shift click the shell and press "B" to align the bottoms
-
Drag and hold shift to place horizontally (just like when you dragged the shell to the right side of the nametag)
-
-
-
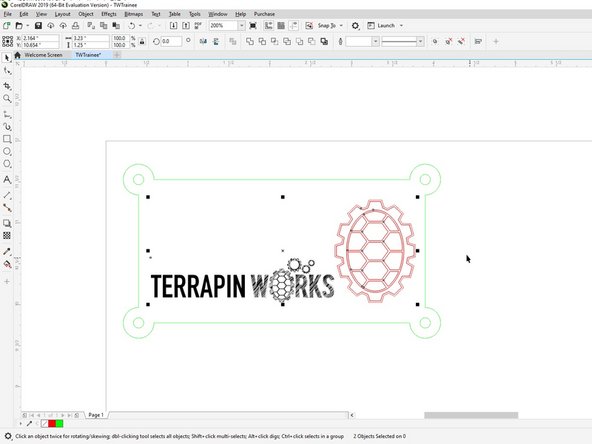
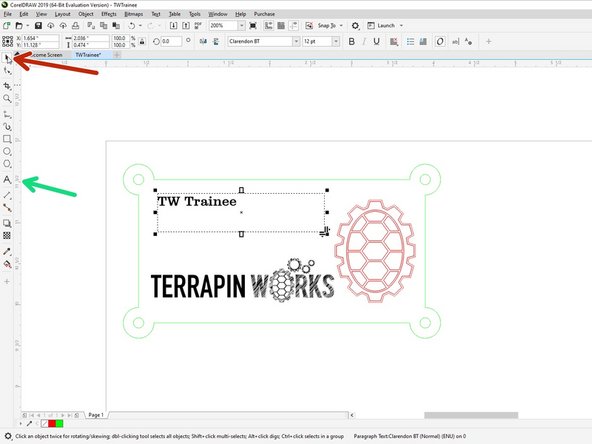
Using the Text tool drag out a text box
-
Type out your name and choose a font
-
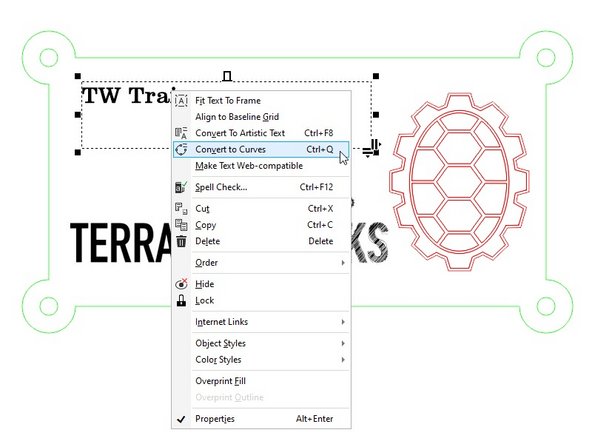
Select the Pick tool again and right click on the text box
-
Click Convert to Curves
-
With the ratio locked, change the width to 2.25"
-
Click your name then shift click the TW logo, press "L" to align left. Deselect both items
-
Click your name then shift click the shell, press "T" to align top
-
-
-
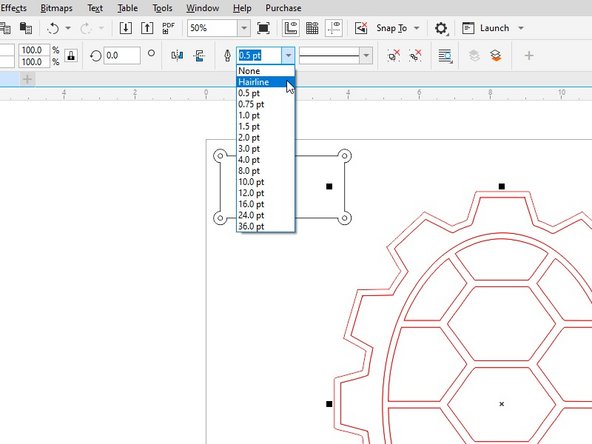
To be treated as a vector by KCAM, lines need to be "Hairline" width. Set the shell and the outline to hairline
-
Different colors can be assigned different laser profiles. In this case, red can be used for a quicker "engraving" while the black can be used for cutting.
-
Any vector line that is not Hairline will be engraved, along with any fills or images.
-
-
-
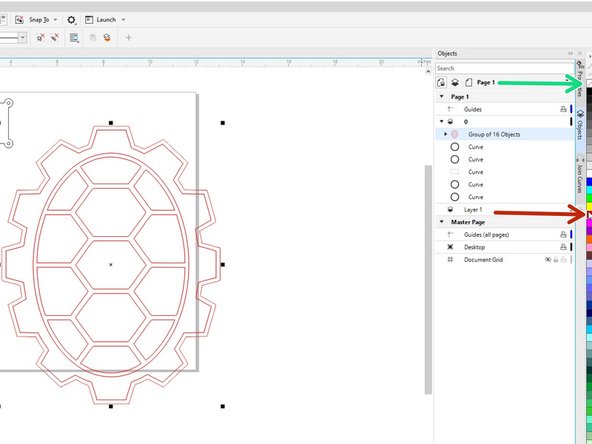
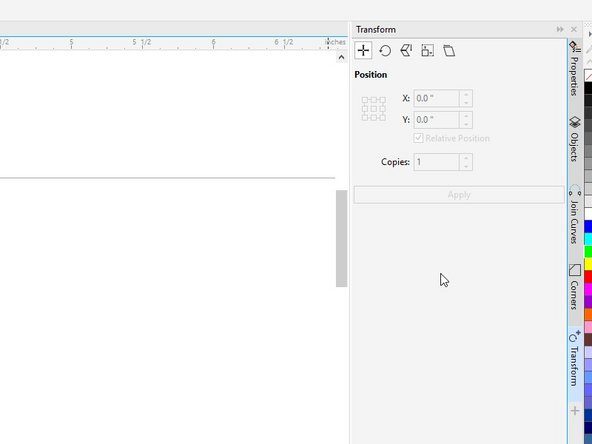
The Objects Docker can be used to select items, as well as see how the file is organized.
-
The Transform Docker can be used to move and rotate with precision. It is also where you can create patterns and mirroring.
-
The Corners Docker lets you create Chamfers and Fillets.
-
-
-
Congrats on finish Corel Draw intro!
-
Make sure to get one of the Kern trainers to sign off
-
Now that you know how to set up prints, the next step is the nonmetal cutting guide
-


You have created your training file in CorelDRAW! You should now have a basic understanding of the software and the tools it provides.
You have created your training file in CorelDRAW! You should now have a basic understanding of the software and the tools it provides.