
-
-
Create New Asset, following "Navigating Assets Step 5", with the following information
-
Select Terrapin Works as Company
-
Select Smart Extruder Plus as Model
-
Select Ready to Deploy as Status
-
Input the serial from the back of the extruder as Serial
-
In the Notes, write "New [Current Date]"
-
Save
-
Don't forget to create a label with the Asset Tag and put it on the extruder
-
-
-
Checkout Asset, by selecting the checkout button in the column view or the Actions button in the asset details page. Include the following details.
-
Checkout to Asset
-
You can search for the exact asset by typing out the Asset Name
-
Select the correct date as Checkout Date
-
Save
-
-
-
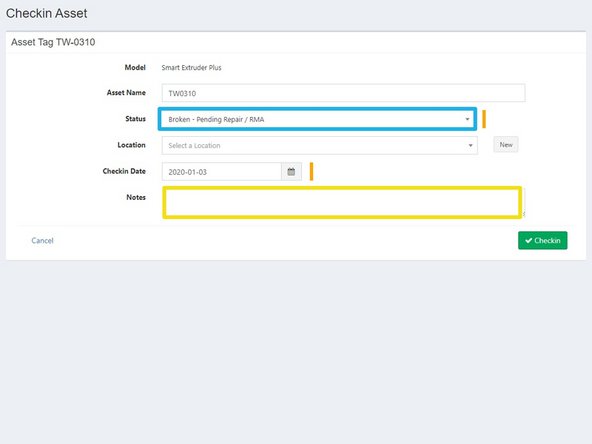
Checkin Asset, following "Navigating Assets Step 7", with the following information
-
Select Broken - Pending Repair / RMA as Status
-
Add note describing the issue with the extruder.
-
You can always come back and change the notes later by editing the asset. You can edit the asset by selecting the yellow pencil button from the column view, or the Actions button from the asset details page.
-
Save
-
Make sure to place extruders being checked in for repair into a labeled xs bag in the Needs Repair bin
-
-
-
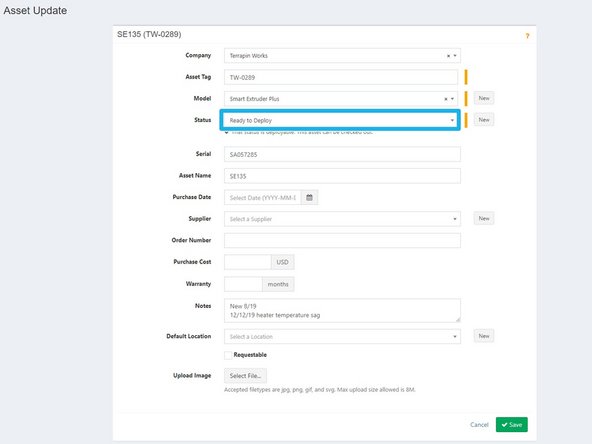
Edit the asset by selecting the yellow pencil button from the column view, or the Actions button from the asset details page. When an extruder is fixed change the following details.
-
Select Ready to Deploy as Status
-
Save
-
Proceed to Checkout Extruder if the extruder is going immediately back onto a printer
-
-
-
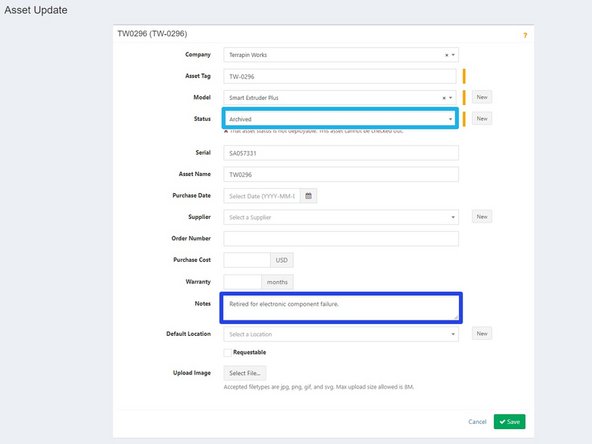
Update asset, by selecting the yellow pencil button from the column view, or the Actions button from the asset details page. When retiring, include the following details:
-
Select Archived as Status
-
Input the reason retired and the date in the Notes section
-
Save
-
Remember to checkin any extruders before retirement
-

Cancel: I did not complete this guide.
3 other people completed this guide.