Introduction
Welcome to the first guide to the Jira project management software. In this guide you’ll learn how to navigate to and around the website and understand the important pages used for special projects.
-
-
There are a few different ways to get to Jira but the easiest is through the portal.
-
Once you log into the portal navigate down to the ops tab under toolkits
-
Click the hyperlink to take you to the Jira sign in page
-
You can also just follow this link
-
-
-
Depending on if you've migrated your jitbit account or not, your Jira account may be associated with either your @eng.umd.edu account or your @umd.edu account
-
The best way to check is to just try signing in using both emails and if one doesn't work you'll know not to use it.
-
If you click on "[Campus] UMD CAS" you'll get redirected to the central authentication service where you can sign on with your standard credentials
-
If you click on "[Internal] ENG G suite" you'll get redirected to a google login page and you'll have to enter your @eng.umd.edu email and password
-
-
-
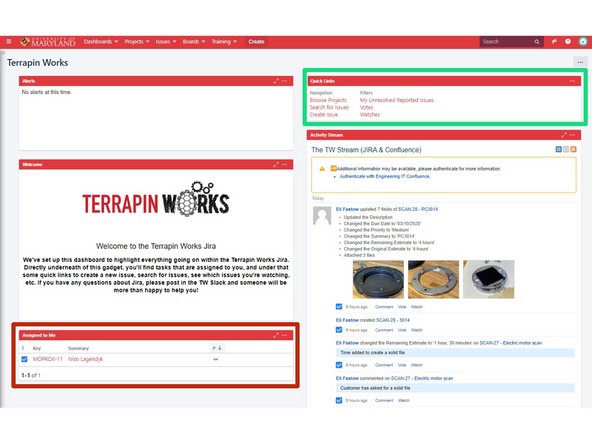
Once you log in, you'll probably begin your Jira journey on the Terrapin Works dashboard
-
Add this page to your bookmarks so you can get to it easily
-
You'll be able to see issues that have been assigned to you as well as their priority
-
There are quick links to places you might want to go up at the top of the page like creating an issue
-
-
-
One of the most useful visualization tools in Jira are the Project Boards which have been setup for every labspace
-
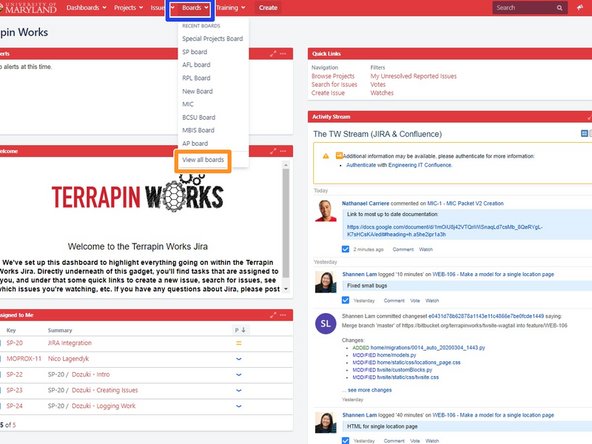
To get to your lab specific board you'll want to click on the "Boards" drop down in the top ribbon
-
Once you've opened the list click on view all boards to locate your labs board.
-
Once you've visited a board it'll show up in this column where you'll be able to get to it quickly
-
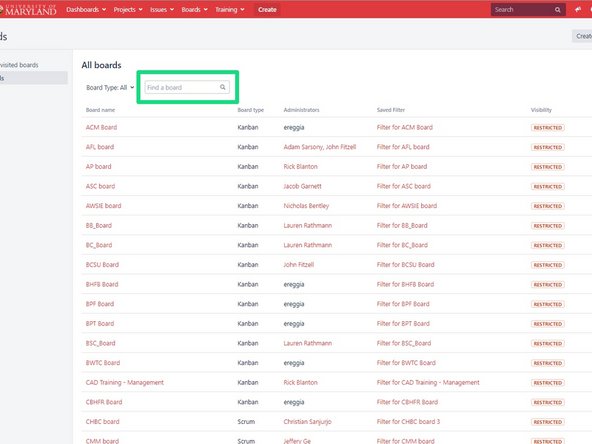
Click on the link you'll be presented with all the boards on Jira
-
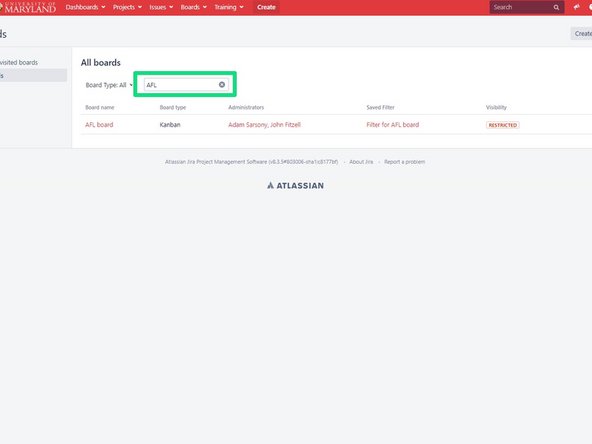
Don't get overwhelmed, you can simply type your lab's three letter initialism into the search tab to find it easily
-
-
-
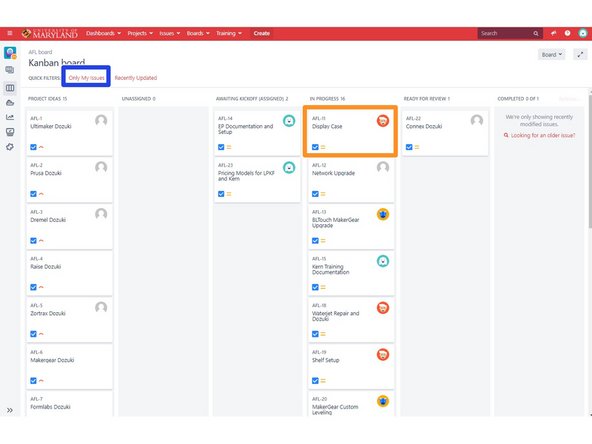
This is what a Kanban board for the AFL looks like, you're able to see the progression of projects across the screen from project ideas to completed
-
If the board feels a bit crowded for your liking, you can click on 'only my issues' to see just the issues you've been assigned
-
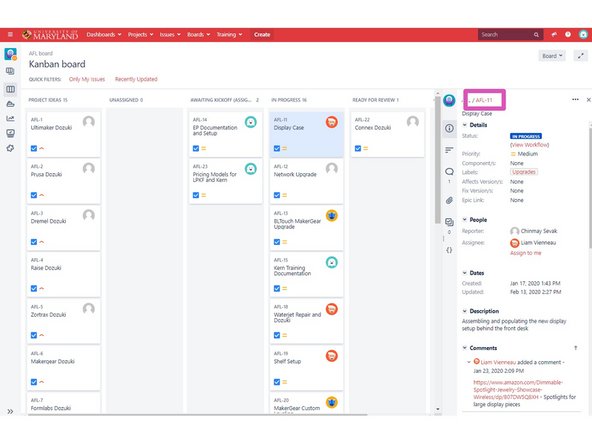
If you click on a project it will bring up an issue's detailed side ribbon
-
You'll be able to see the issue's details like it's assignee, reporter, when it was created, label(s), description and a stream of the comments made about the project
-
If you click the hyperlink at the top of the issue it will take you to the detailed view of an issue which will be discussed in the next step
-
Another way to navigate to this board is by going under projects and then clicking on "View All Projects" then under the categories on the left ribbon click on "[TW] Lab Projects" and you'll see all the relevant projects to the labs
-
-
-
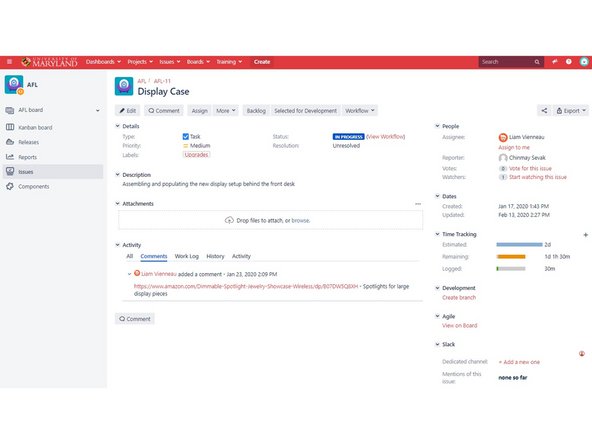
The issue is the main designation we use for projects and this is the detailed view of them.
-
There are a couple different ways of getting here whether its from the front dashboard, the navigation ribbon or from a board, they should all get you here.
-
You'll be able to track progress on your issue as well as edit it and log hours but that will be explained in later dozukis
-
-
-
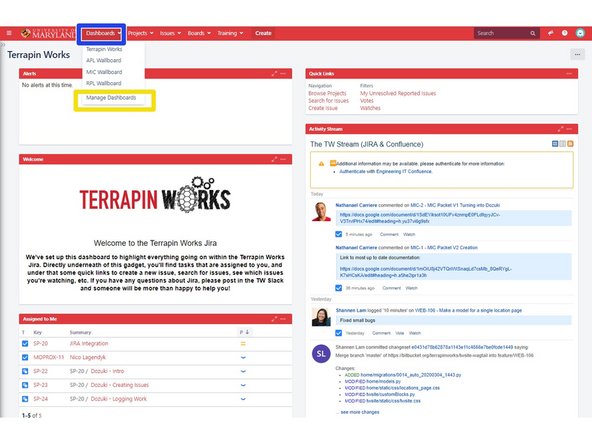
The last helpful page are the dashboards which is what you'll see on the display screens at each lab.
-
To get to the dashboard for you lab click on the dashboards drop down on the navigation ribbon
-
Then click on the manage dashboards link
-
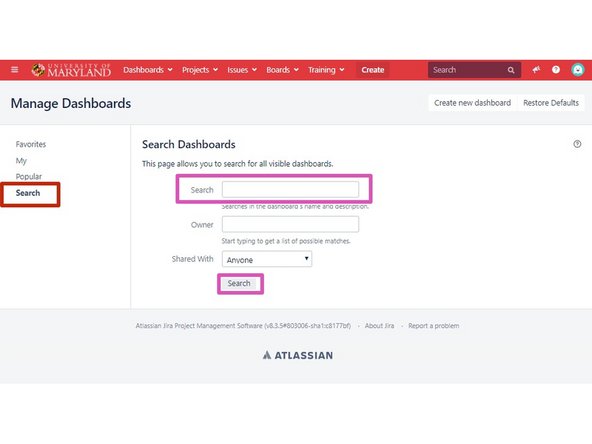
Once in the dashboard manager click on the search tab
-
Then you can either type your labspace into the search bar or just click the search button
-
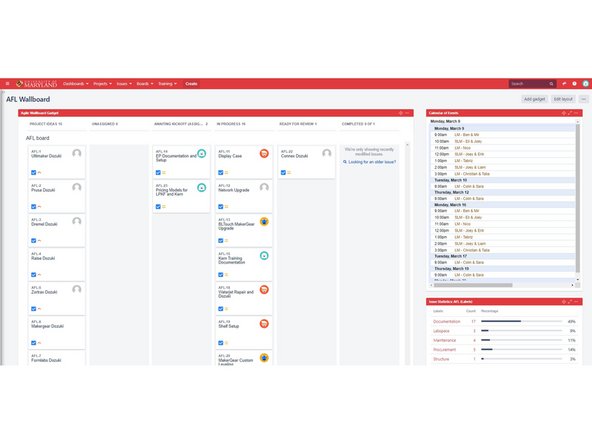
Once if your lab specific dash board you'll be able to see the kanban board for the lab, as well as a calendar which will have the shifts for all the LM and SLM's in the lab.
-
If you scroll down a bit further, you can see issue statistics for the projects based on their label and assignee.
-
Congratulations! You’ve made it to the end. Continue on to the “Creating Issues” guide to broaden your knowledge.
Congratulations! You’ve made it to the end. Continue on to the “Creating Issues” guide to broaden your knowledge.


![If you click on "[Campus] UMD CAS" you'll get redirected to the central authentication service where you can sign on with your standard credentials](https://d3t0tbmlie281e.cloudfront.net/igi/umd/UEk32A2iWfQ1TgNQ.medium)
