Tools
Parts
No parts specified.
-
-
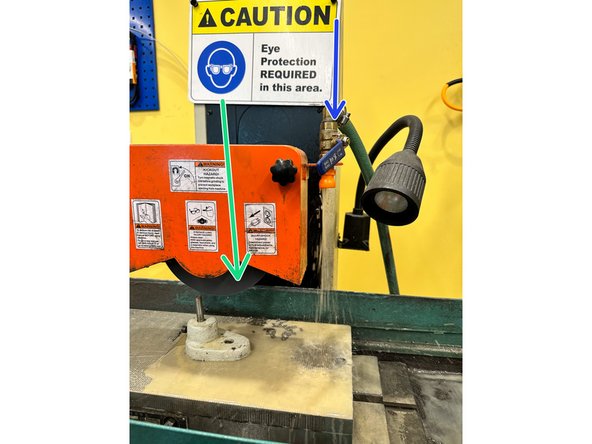
There must be at least one other person in the IFL with you when use the surface grinder.
-
Be sure to get protective eyewear when you walk in the door.
-
Alert the staff you're going to use the surface grinder for the ProX plate.
-
-
-
Here is the the magnetic carriage that will hold the plate while we resurface it. The carriage has a 2 axis movement system controlling forward and backward, as well as, left and right.
-
The left wheel controls the side to side movement of the carriage, while the center wheel controls the back and forth movement of the carriage.
-
The right wheel controls the height of the grinder wheel.
-
The front panel controls the power to the coolant flow, as well as the grinder wheel. The E-stop must be off for the machine to run. You'll want to turn on the coolant and then the grinder.
-
Make sure to push the electrical panel in and twist the knob clockwise.
-
On/off buttons for the Grinder Wheel
-
E Stop
-
On/Off Switch for the coolant
-
-
-
This Is the Grinder Wheel
-
Be careful with appendages/ fingers while the wheel is moving. It moves very fast and your hands generally don't like that.
-
This is the coolant flow valve
-
Proper coolant flow will ensure that the plate is not warped unnecessarily while post processing.
-
-
-
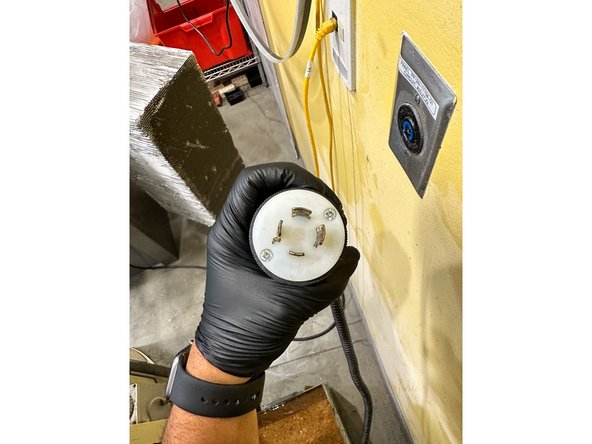
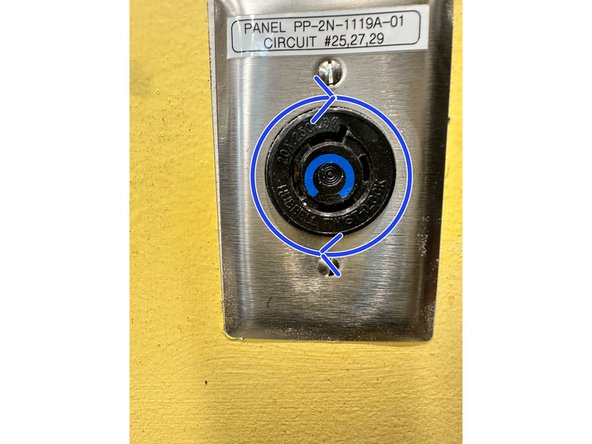
The plug has an odd shape so you'll need to make sure its aligned properly to the plug, with the bent prong going up and to the right. Turn the plug CW to lock it in place once it has been inserted into the outlet.
-
Once the machine is plugged in, you may power the grinder on by flipping the switch and pushing inward on the electrical panel.
-
-
-
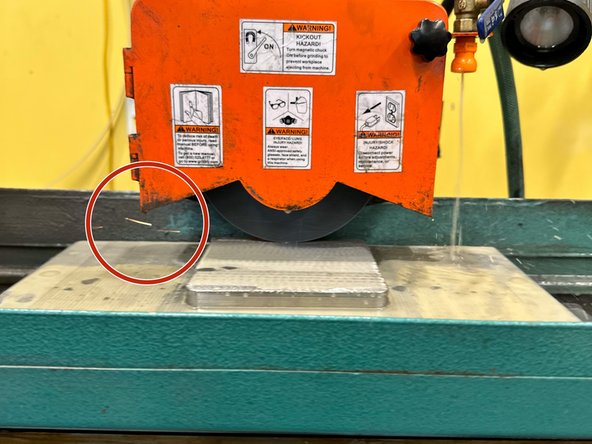
You'll need to dress the wheel using the diamond tipped dressing rod.
-
Make sure just the tip of the rod is touching the wheel. You should be able to move the wheel back and forth over the tip of the rod and it ideally will only catch for a brief moment upon the apex of the wheel crossing the tip of the rod.
-
Affix the rod by flipping the lever attached to the magnetic clamp.
-
Using the center wheel move the dressing tip from the front to the back of the wheel shaving off a thin layer of material.
-
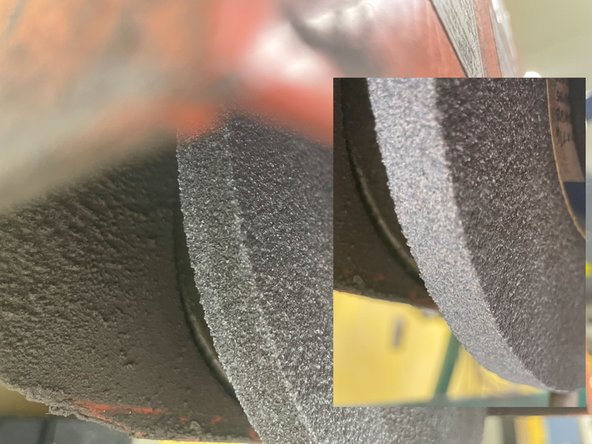
The second picture is a before and after using the dressing rod on the wheel. A whiteish/grey coat indicates a properly dressed wheel.
-
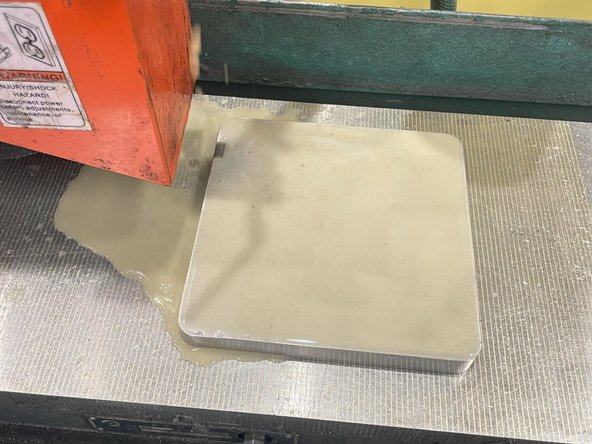
The third picture is what proper coolant coverage of a plate looks like.
-
In the next step we will go over removing the excess support as well as resurfacing the wheel.
-
-
-
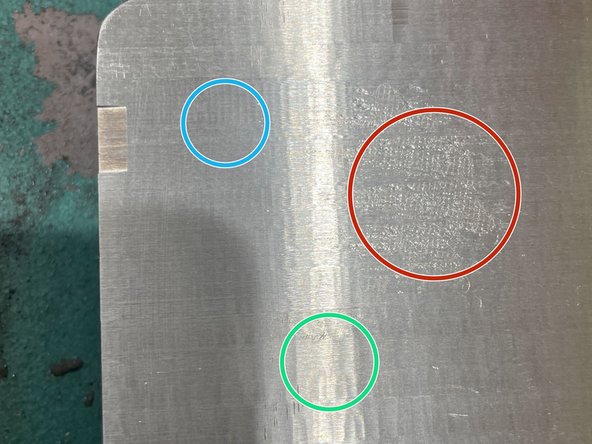
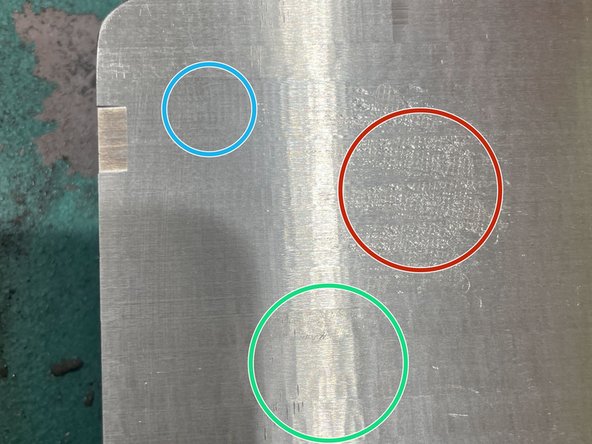
This circle shows what leftover support material looks like. This will be taken off in the first set of passes.
-
This circle shows acceptable surface quality for support removal. This semi choppy exterior is the result of the shorter 1-2 second passes.
-
This circle shows the spacing for the 3-5 second final polish. Notice how there is minimal surface disruptions and the area appears flat.
-
-
-
On average you can take 1/100th of an inch off the top without the wheel stalling so try not to push this limit.
-
When resurfacing plates it is important to note a few things:
-
This process is iterative so multiple passes may be needed to get a level plate.
-
Listen for the wheel physically contact the plate and watch the sparks to know if you've finished with that row.
-
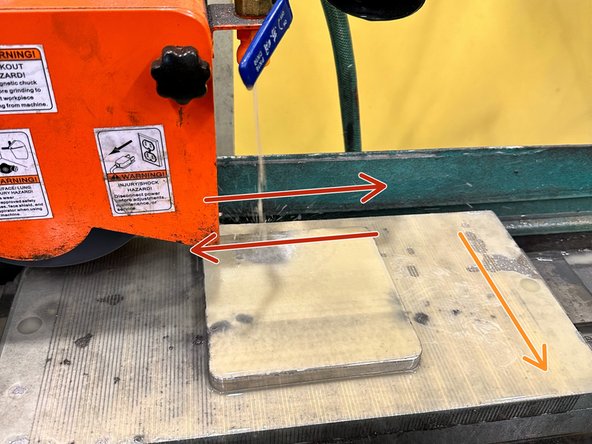
Start by orienting the plate so that the edge is parallel with the edge of the mount
-
This will remove any left over support material. This will ensure a smooth surface for the fine resurfacing step.
-
By using the left wheel, begin making 1-2 second passes over the length of the plate.
-
Constant coolant flow is needed and should fully coat the plate.
-
-
-
Overall surface quality is important to be mindful of when resurfacing a plate. Knowing how much material to take off will save you lots of time and effort when resurfacing tasks.
-
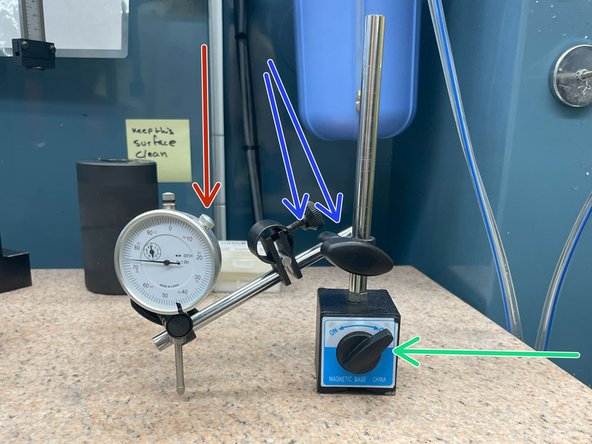
This knob controls the electromagnet in the base of the device.
-
These knobs on the armature control the axial movements of the arm and where you point the probe end of the surface measuring tool.
-
These knobs help adjust the zero of the measuring probe to hep you accurately assess changes in the surface height.
-
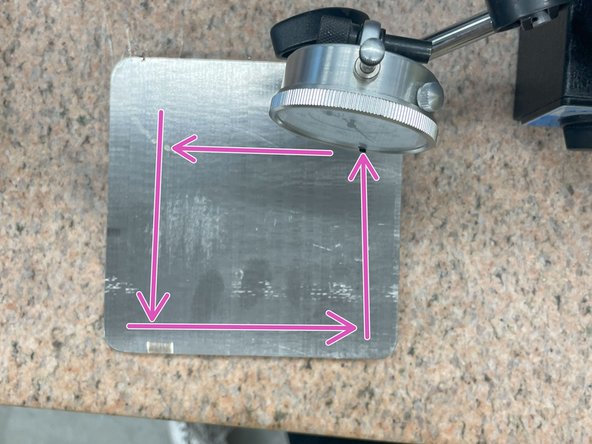
When measuring the surface quality you'll want to check all 4 corners of the plate for the lowest point and use that as a base line.
-
You will check the surface quality in-between each resurfacing cycle. (Every time you go from the back of the plate to the front)
-
The lever has no actual 0 since we're taking measurements relative to one corner.
-
After zeroing the leveler on the plate, move the plate so the probe can accurately measure all 4 corners. This determines how warped the surface of the plate is compared to the original corner.
-
-
-
Now we will begin The fine resurfacing process. Start by clamping the plate down using the magnetic clamp on the carriage.
-
Fine resurfacing aids the printer by providing the smoothest/ most level surface to print on.
-
Line up the grinder with one edge of the plate. With the wheel spinning and coolant flowing make a pass to the other side of the plate, this should take 3-5 seconds to achieve an ideal surface quality.
-
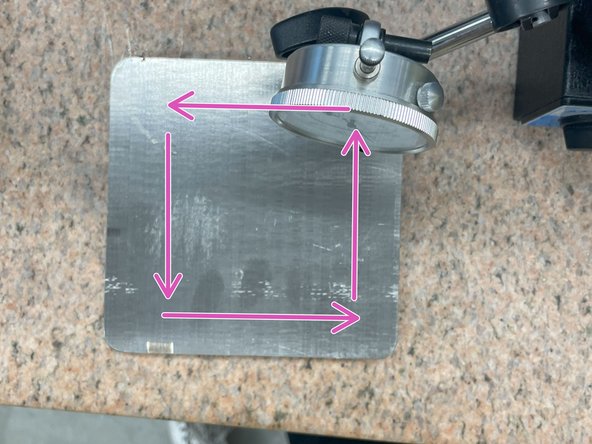
Move from edge to edge until the finish matches the green circle in the middle picture.
-
Just as with support removal listen for a grinding noise and watch for sparks to know if the plate is resurfaced properly.
-
By the end of resurfacing the plate should have negligible to nonexistent texture.
-
Following the arrows you should be able to move corner to corner on the plate without deviating from zero more than 2/1000th of an inch.
-