
-
-
This is our TIG welder in the IFL. It is a Miller Dynasty 210 with a cooling system and has the capability to weld in AC and DC polarity, and SMAW(Stick).
-
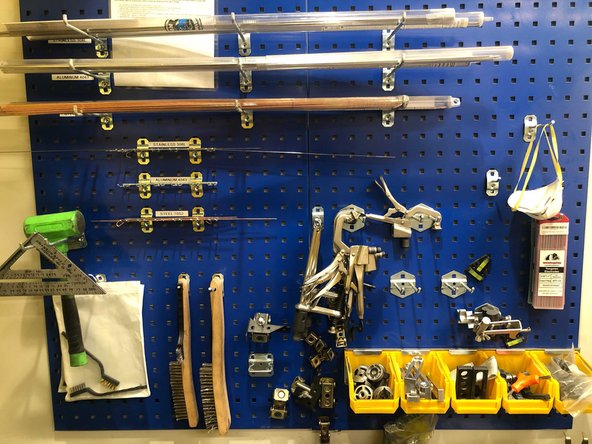
This is an image of our welding corner. All clamps and filler material are kept on the back wall. Any tools you may need are found under the table. Our safety equipment is found on side wall.
-
Quick reference guides are hung under the table.
-
-
-
Below are some safety guidelines to follow when using the welder. The process of arc welding require completing an electrical circuit and using the arc that is created to join metal.
-
Wear closed toed shoes, preferably without mesh, and long pants, preferably cotton.
-
MAKE SURE THAT YOU ARE COMFORTABLE
-
The fire extinguisher is located inside the main entrance to the lab
-
Wear a welding jacket and gloves that fit (welder takes priority)
-
Wear face shield(adjust sensitivity, delay, and size to comfort)
-
The image shows our welding jackets, gloves, and face shields. We will be using the white/tan gloves for TIG. On the inside of your face shield, there is a chart with recommended shade settings based on welding process and amperage. Be sure yours is set properly!
-
-
-
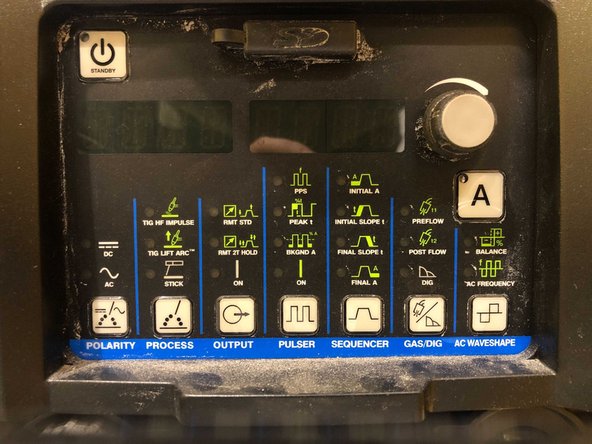
In the top left corner of the control panel is the standby power button. In order to turn the machine on, the main breaker(located on the back right corner of the machine)must be switched on. Pressing this button will not turn the machine on and off unless the breaker is on.
-
The polarity button toggles between AC and DC. Use DC for steel and AC for aluminum.
-
The "Process" button toggles between "High Frequency(HF) Impulse" and "Lift Arc". These are two methods used for "striking the arc when welding. For now, use "HF Impulse". Toggle to "Stick" to use the stick feature (outlined in a separate training).
-
Output selects the type of remote being used to allow electricity to pass through the electrode. We will be using a Standard Remote option since we will be using a foot pedal as our remote.
-
The "Pulser" button turns the pulser on and off. This can be used for training purposes to better regulate speed or for thin metals requiring long welds.
-
The sequencer is used to program the welder for specific amperages and times if welding processes will be repetitive. We will not be using this function.
-
The "AC Waveshape" setting allows the the Balance and Frequency to be adjusted for welding in AC. Like the Sequencer, use the dial to adjust the settings,. The AC Waveshape also has a Pro-Set.
-
To adjust the Amperage, select the "A" button and use the dial.
-
-
-
Before you start welding:
-
Ensure that all leads and cables are connected properly and are not frayed(power, ground, torch lead, foot pedal)
-
Ensure that the coolant level is full
-
Check the regulator on the Argon cylinder and be sure that there is Argon in the cylinder
-
Remove any flammable materials from the area(i.e. acetone, paper towels, etc.)
-
Ensure that all safety equipment is in good condition and has no tears or holes
-
The nearest fire extinguisher is located by the main entrance to the lab
-
-
-
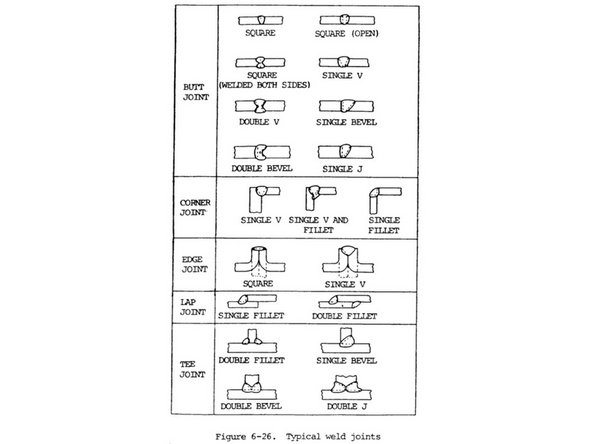
When welding a piece or pieces of metal, make sure that you know the type of metal you are welding and the type of weld that you are trying to accomplish.
-
A general rule of thumb to use is that you will need 1 amp for every thousandth of material thickness.
-
Your filler rod size will also correspond to the thickness of yuor material. You willl be able to weld materials thicker than your filler rod with thinner filler rod(i.e. 1/8 inch material with 3/32 filler rod), but will find it difficult to weld thinner metal with thicker filler rod(i.e. 1/16 inch material with 3/32 filler rod).
-
Be sure to clean the oxidation off of your material. you can use the angle grinder, acetone, the grinder/sander, or wire brushes. The wire brushes are marked for each material. if you use the wire brushes, DO NOT cross contaminate the brushes with different oxidizers.
-
Clamp your material firmly to the table to ensure a good ground. You can also directly clamp the ground to your material if you have a larger piece you are working with.
-
You can use magnets to position material to complete a weld, but only use the magnets to tack your material together. Heat will make magnets loose their polarity.
-
Refer to the slide rule on the welding bench or the Miller Weld Settings App for more specific application and machine settings before starting your weld.
-
-
-
Turn the main power on located on the back of the machine.
-
Select the proper polarity(DC for steel and AC for aluminum).
-
Adjust the settings on the control pad as necessary to accomplish your weld.
-
We will go more into detail on machine setup in the guides on AC and DC welding for each application.
-
Refer to the manual for more detail on the controls and welding process.
-
-
-
Be sure that you have the proper size cup, gas lens, and collet in the torch.
-
Your electrode diameter can follow the same rule as filler rod, outline in the "Material Outline" step of this guide.
-
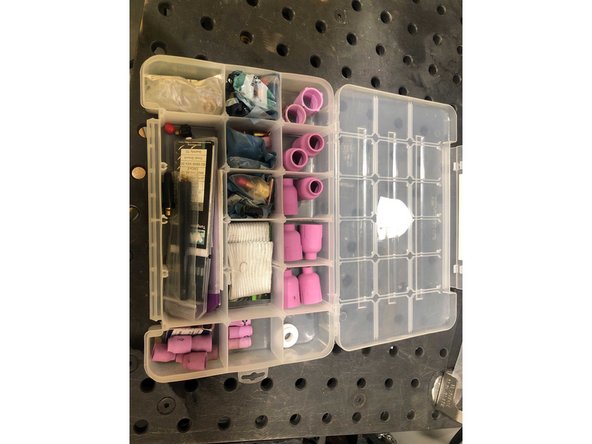
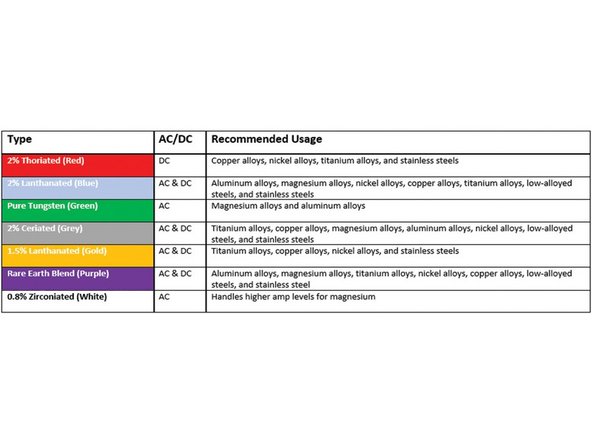
We have three colors of electrodes in the IFL: green, red, and grey. The color of the electrode is designated by the band at the top. Use red for steel and green for aluminum. Grey can be used for either, but is more appropriate for steel.
-
Electrode setup is important for electron flow. Setup for each polarity will be touched on in the respective guides to follow.
-
As a general rule, your electrode should protrude about 1 about one electrode diameter from the edge of the cup.
-
-
-
When you have the machine and the material all setup, you can adjust your argon flow.
-
Argon is used as a shielding gas to shield the metal from oxygen, which is an oxidizer. This ensure that your welds are pure. Argon flow is read on the regular by the number at the bottom of the ball. Be sure you are reading the correct scale!
-
Argon flow will be determ,ned by yor material, material thickness, and weld type. Refer to the slide rule or the app for specifc numbers.
-
In cases where a weld joint is tight, you can extend your electrode up to the inside diameter of the cup, but you must increase your flow rate slightly.
-
Remember, too much argon is just as bad as too little argon!
-
-
-
When you are all set up, you should now try to p[position yourself and your material in the most comfortable position as possible.
-
Keep your shoulders down and your arms tucked to your side.
-
Make sure that you have room and filler material to complete your weld.
-
TIG requires you to have a steady hand in order to "dip" the filler rod into the arc and move the torch and filler rod in a straight line.
-
The key to understanding welding is to PRACTICE!
-
-
-
You can refer to the following for references and any general questions:
-
The Procedure Handbook for Arc Welding(book shelf)
-
Metals and How to Weld Them(book shelf)
-
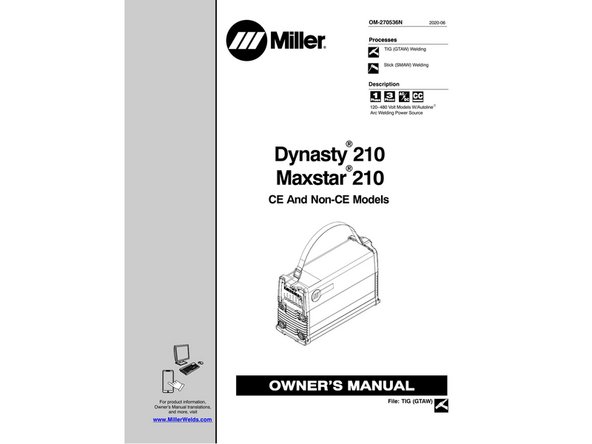
Miller Dynasty 210 Manual
-
Miller/Lincoln Apps
-
Any forums or videos that you find useful
-
Do not hesitate to reach out to any welding trainer for tips or to answer your questions!
-


Cancel: I did not complete this guide.
3 other people completed this guide.