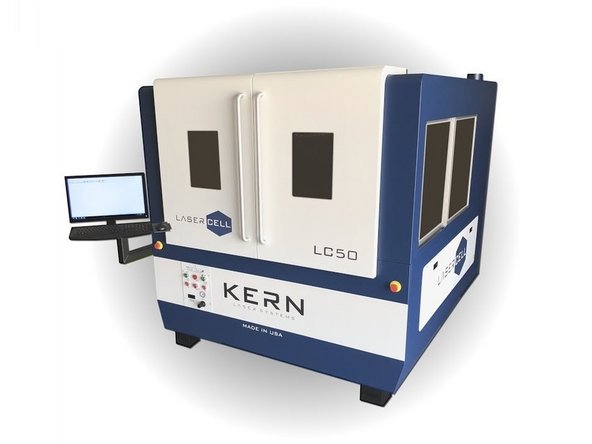
Introduction
This guide shows some of the advanced features of Kcam. There are a lot of things Kcam can do such as setting up arrays and some advanced settings that can be controlled on the Kern. This helps show some of those settings for people who want to do stuff beyond normal operation or experiment with settings/materials.
Tools
Parts
No parts specified.
-
-
Previously, the only steps taught in KCam were the steps used to set up a basic print
-
This guide will cover more indepth settings changes, and other things that KCam can do such as arrays that can make setting up parts easier
-
-
-
The settings tab will bring you to import or create cutting settings
-
Info will tell you how long a job will take
-
This is dependent on the settings you have imported
-
Cut will bring you to the cut/engrave dialog
-
Test will bring you to the test dialog
-
Many of these are in the others' menus as well. You can get to the settings or test from the cut menu, and vice versa
-
-
-
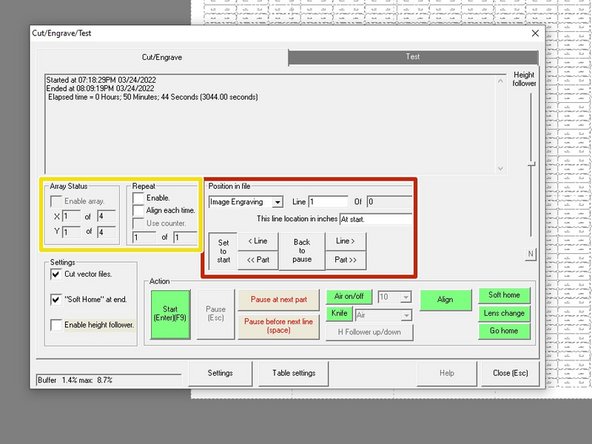
This is where jobs are started and stopped
-
You can see the order the lines will be cut and start on a specific line using the position in file area
-
You can also pause the laser, skip certain lines, and continue if needed
-
This area allows you to set up an array of objects or repeat cuts over and over (explained later)
-
-
-
Set the correct gas to match your recipe here
-
Change the user offset position to what suites the cut best
-
Go to a specific position on the bed (relative to 0,0)
-
Change the speed the gantry moves when using the arrow keys
-
Perform manual cuts using this section (normally only used when refocusing the height of the lens in the assembly and explained in the online guide)
-
-
-
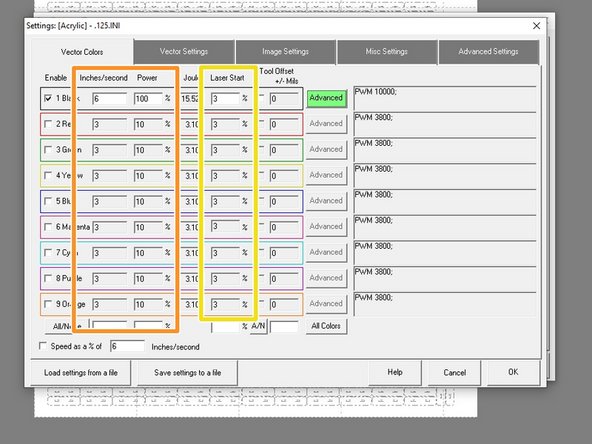
This is the main vector settings page where each of the vector settings can be changed
-
The first two are speed measured in inches/second and power measured as a percentage
-
Speed and power have the greatest effect on cutting so try increasing power or decreasing speed if a material isn't being cut all the way through
-
The start percentage adjusts the laser power as it ramps through corners and arcs
-
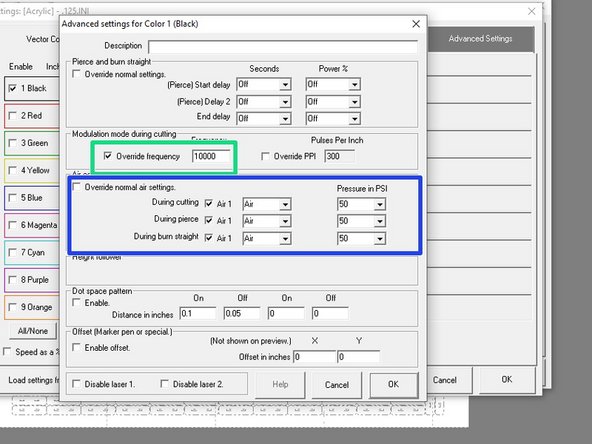
In the Advanced menu: frequency adjusts the laser modulation from 50Hz to 10000 Hz
-
Overriding air settings will use a different air when cutting lines of that color
-
Color mapping can be used to adjust each of these settings for each of the colors listed
-
You must enable the color in this menu in order to see the cut lines of the same color on the preview
-
-
-
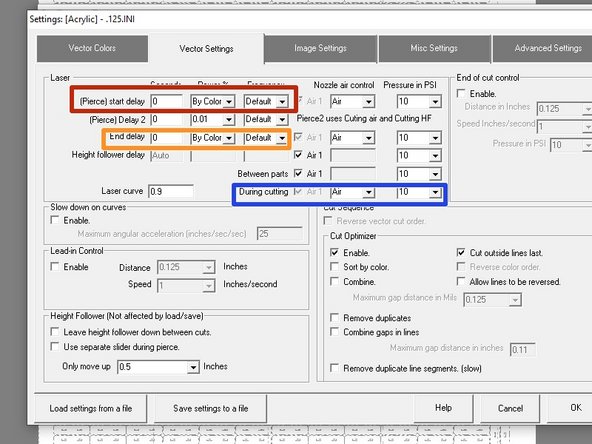
Laser setting will let you select assist gas and pressures for different parts of cutting
-
Pierce delay will pause the laser after starting the first pierce on a line
-
End delay is an extra amount of time in the end and will only run if selected
-
Between parts selects pressure to be used as the laser is moving between parts and can be much lower than pressures used in other steps
-
During cutting is the pressure and gas used while cutting
-
-
-
The cut optimizer tries to optimize the way parts are cut
-
The other box to check is Cut outside lines last which will optimize cutting by trying to cut inner objects before cutting the outside part
-
For example if cutting a mounting bracket that has bolt holes, the cut optimizer will cut out the bolt holes then the bracket
-
Sometimes this doesn't work, so it's worth checking the cut order, especially on metal parts, in the cut/engrave menu
-
When disabled, kcam will cut in the order of the layers from corel, bottom to top
-
Sorting by color and reversing order can be used to go in the order of colors in the front settings page. This is useful for some parts where the cut optimizer isn't working well
-
-
-
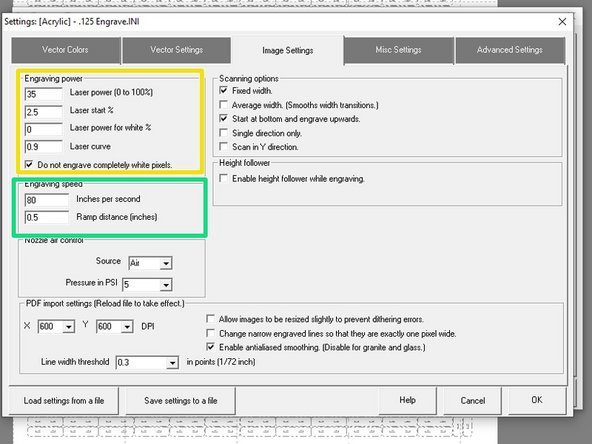
These settings adjust the engraving settings
-
Power adjust the power for engraving and can be adjusted for both black and white pixels
-
Setting power to the white pixels and no power to the black pixels is the equivalent of inverting the colors
-
The engraving speed adjust how fast the head will move
-
Ramp distance adjusts how far beyond the engraving the head will move
-
the default is .5", so the laser will move .5" to the left and right of the image engraved as it is moving
-
The head of the kern weighs about 15 pounds, so the engraving speed is limited to 130 inches/sec and may be lowered further if the engraving is small. Increasing the ramp can increase the engraving speed because it allows more time for the head the accelerate and deccelerate
-
-
-
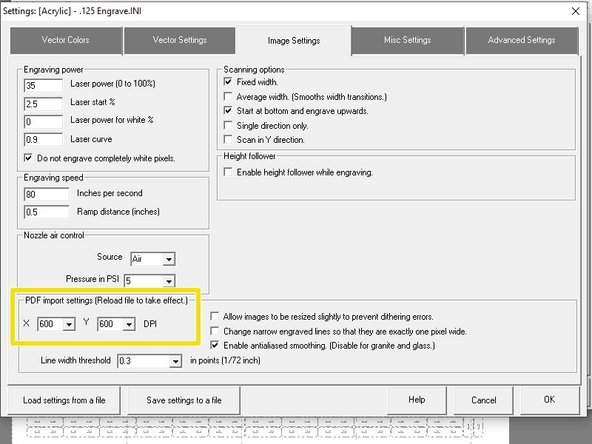
These settings change the file import settings
-
DPI is the biggest one to change and can range from 150 upto 1200
-
DPI affects the resolution of the image where a lower dpi will be a lower resolution but faster engraving time than a higher DPI
-
-
-
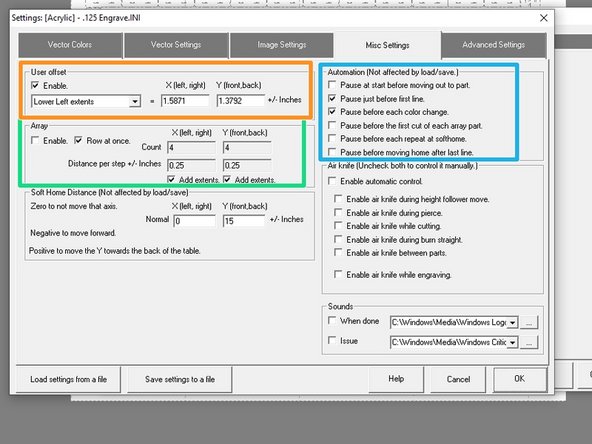
This page contains all the misc settings that can be adjusted
-
The array settings are useful for setting up an array of parts
-
For example if you have 1 circle, but want to cut 4 circles, you can check array and select if you want a box of 4 or a line of 4 by adusting how many you want in the x direction and the y direction
-
The automation selects when cutting will pause and can be useful for automatically pausing mid-job to see how parts are coming out
-
Leave pause just before first line checked especially during metal cutting to prevent the head from crashing
-
-
-
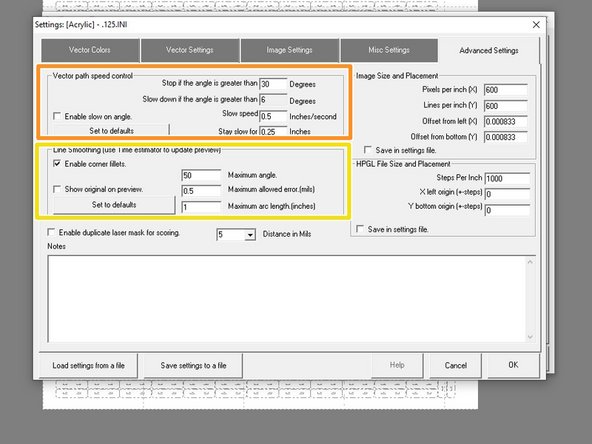
The advanced settings tab contains settings that will affect cutting regardless of color (no color mapping)
-
The vector path speed control has settings to adjust speed when coming to point and corners to slow the head down the improve cutting performance in some situations
-
Line smoothing will produce corners with fillets to make them smoother
-
-
-
All these tips and many more are documented in the manual (it even has a whole section to itself) if you want to learn more!
-
Congrats!! You are now finished with all the Kern Dozuki Guides
-
Post any questions in #equip-kern slack channel and happy kerning!
-