Introduction
This guide will show the process of switching from non-metal to metal cutting. There are a few things that are different about metal cutting, and this guide shows what those are and what to look out for.
-
-
Click the LENS CHANGE button to align the head above the lens change hole in the back-left corner
-
Turn the knob until the head is at its highest location
-
Remove the airline from the head by pushing all the way in and then pulling out
-
Unscrew the head and remove by lowering the head into the hole at an angle
-
DO NOT DROP THE HEAD DOWN THE HOLE
-
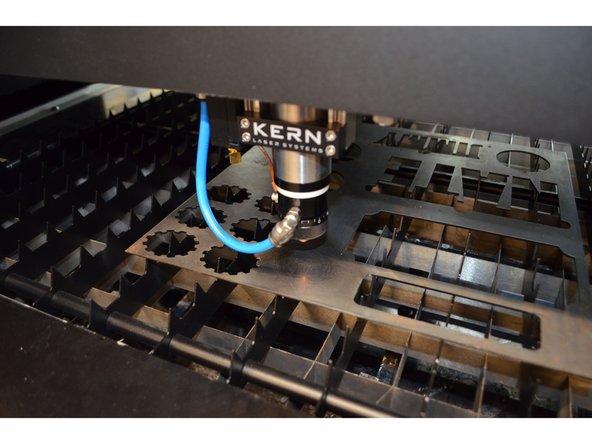
Fully screw the metal head into the empty socket
-
Attach the airline to the metal head
-
Fully screw the capacitive sensor wire into its empty socket
-
-
-
Cut the tape holding the paper down
-
Roll the paper back behind the laser
-
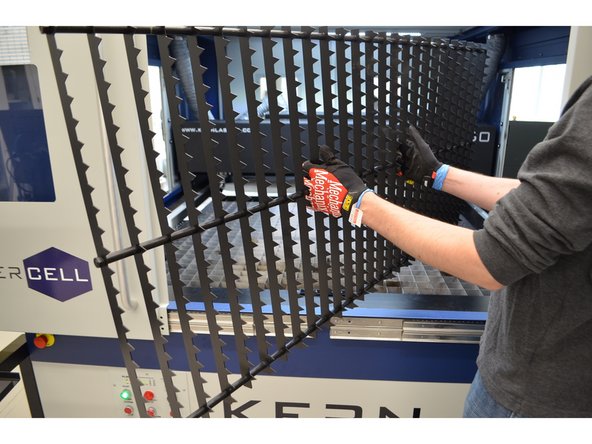
While wearing gloves, remove the honeycomb and store under the Kern
-
This is easiest with 3 people
-
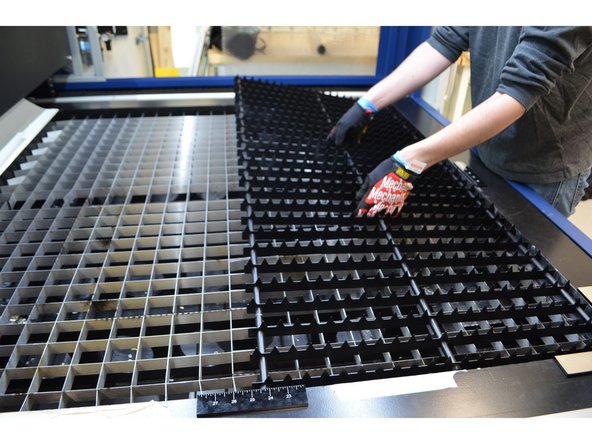
Vacuum the debris from underneath the grid
-
-
-
Add the metal grate. You may need both grates for a large job
-
-
-
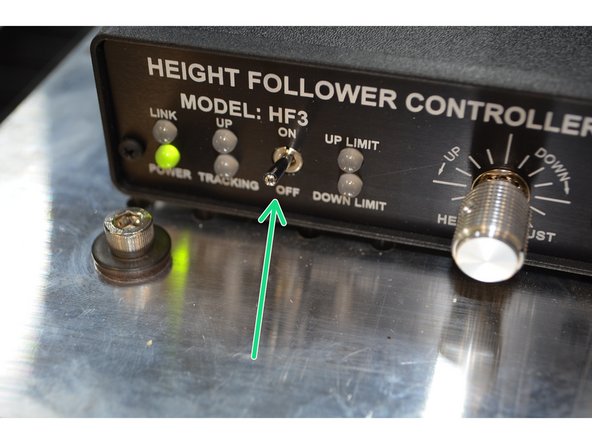
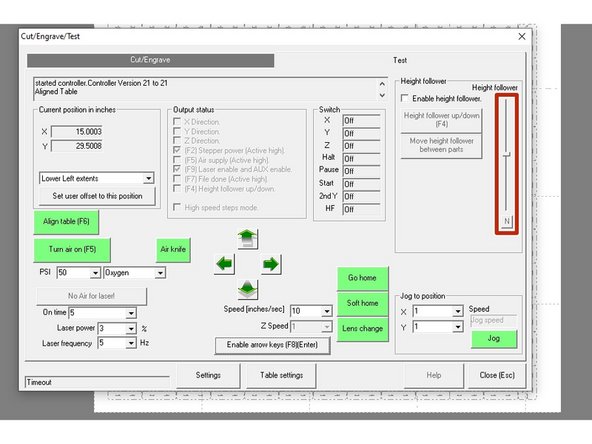
Move the gantry about halfway back from the front of the machine to access the height follower switch
-
Turn on the height follower switch
-
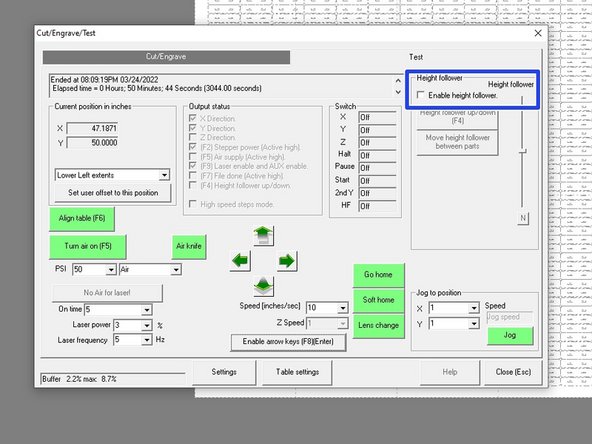
Click ENABLE HEIGHT FOLLOWER in the test dialog menu
-
-
-
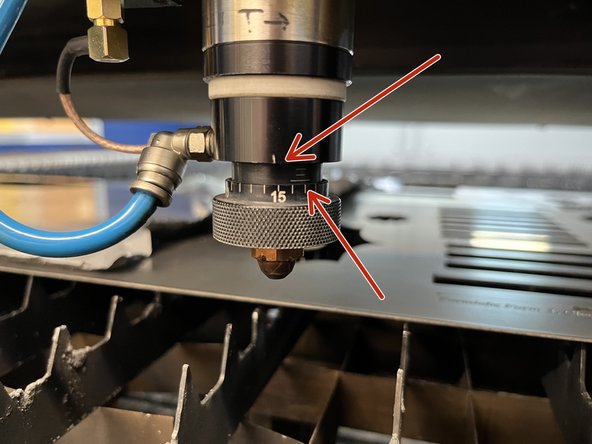
Turn the dial on the lens assembly until you see 4 small white lines, then turn the dial back to only show 3 lines so the 15 is in line with the white tick and there is a little bit of blank space after the 3rd white line. Otherwise, if you are cutting with oxygen, you're done.
-
If you're cutting with nitrogen, screw the focus back up based on the thickness of the stock, plus a 5 thou offset
-
Example: If my stainless stock is .06", I would turn it counter-clockwise two full turns (each turn is .025") plus 10 thou, and an additional 5 thou for the offset, so it should end at the 0 mark
-
-
-
The following steps are specific to oxygen. The same procedure is followed if using nitrogen instead
-
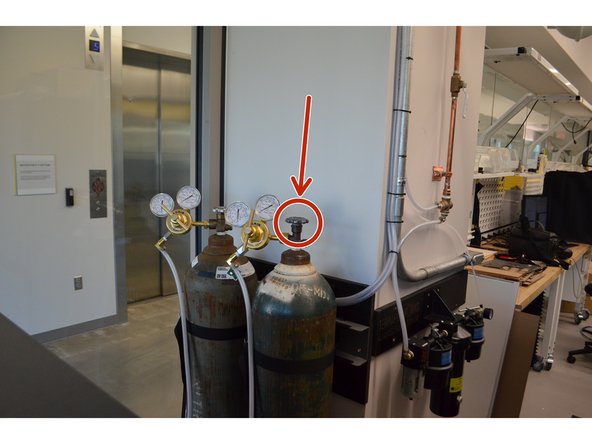
Open the oxygen bottle
-
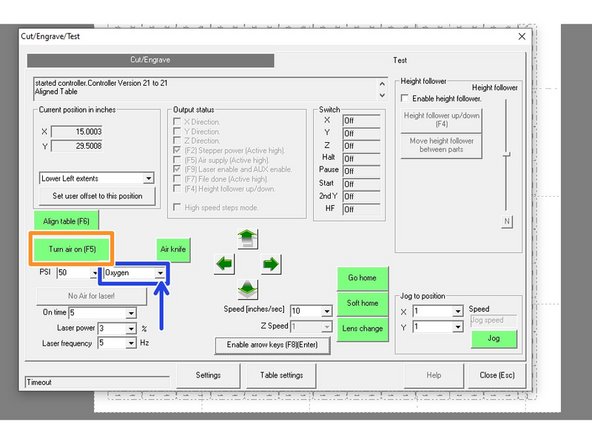
Turn the oxygen on in the test dialog by selecting OXYGEN in the drop down menu
-
Purge out the shop air and fill the lines with oxygen by clicking TURN AIR ON and let it run for ~3 seconds
-
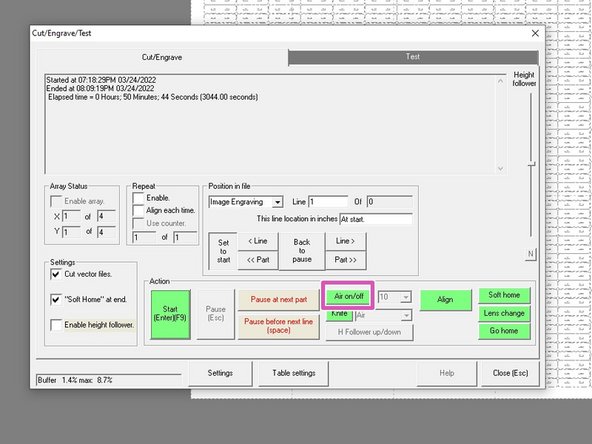
This can also be done from the cut dialog
-
-
-
Drive the head over the work piece
-
Click the height follower adjustment button N to lower the head to the work piece and then set the user offset
-
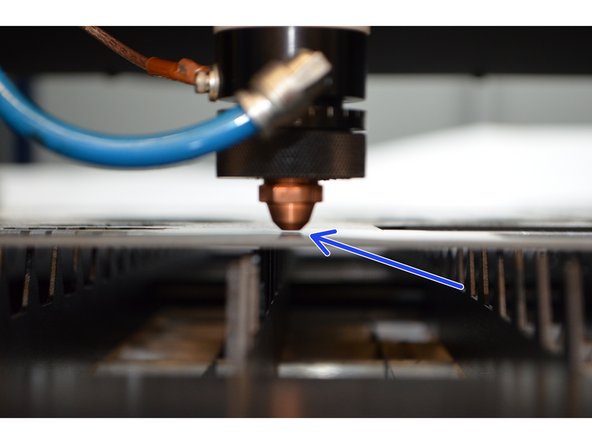
Ensure that there is a slight gap between the head and the work piece (about 20 thou)
-
Adjust the slider to raise or lower the head if needed to create the gap
-
Raise the head back up by pressing the height follower adjustment button N again
-
Set the user offset like normal (might be easier to do with the height follower down) and proceed with the cut
-
-
-
Congrats you can now cut all materials
-
As always post in #equip-kern if you have any questions
-
The next step is the advanced Kcam that shows how to change settings and do some advanced stuff
-