Introduction
This guide teaches how to perform measurements of different waveform properties.
Tools
Parts
No parts specified.
-
-
Measurements appear constantly on screen in the lower right corner, and update in real time.
-
-
-
To measure different properties of your displayed signals, you can press the “Meas” button in the Measure section of buttons. This will display a set of options for adding measurements on-screen.
-
-
-
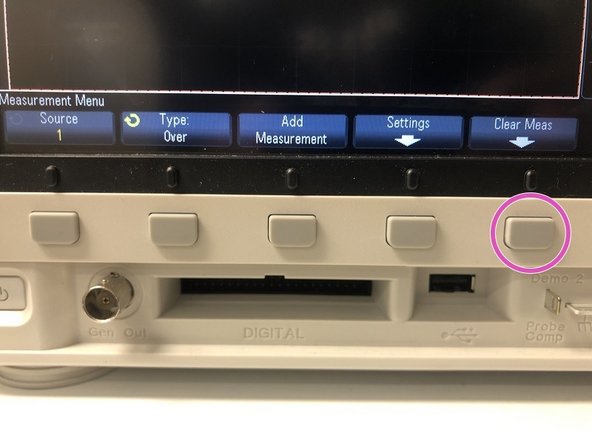
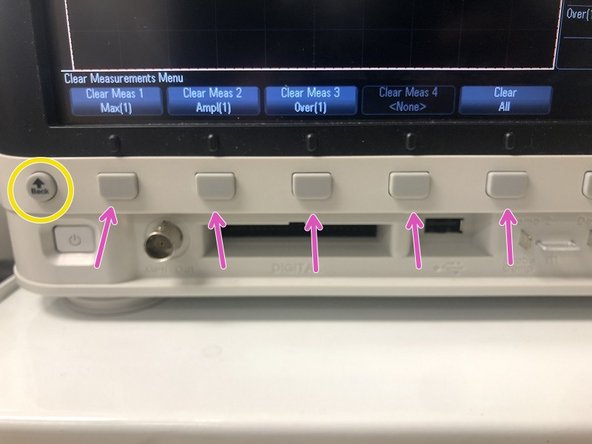
The oscilloscope can only display 4 measurements at one time. If there are unwanted measurements currently on screen, you can press the softkey for Clear Meas, and then press the softkey(s) for whichever measurements you no longer want to have displayed on screen or alternatively, Clear All.
-
To exit out of this sub-menu, you can click the Back softkey located to the left of the other softkeys.
-
-
-
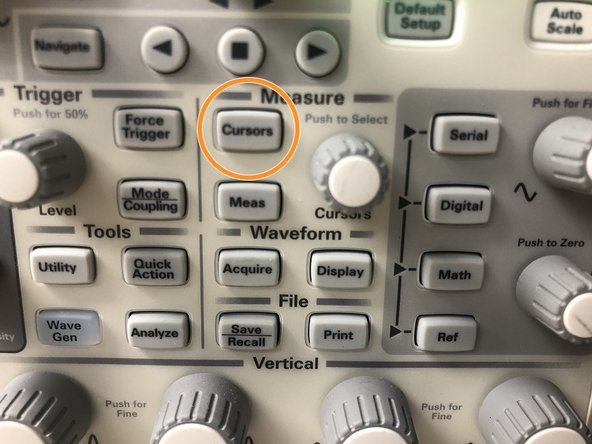
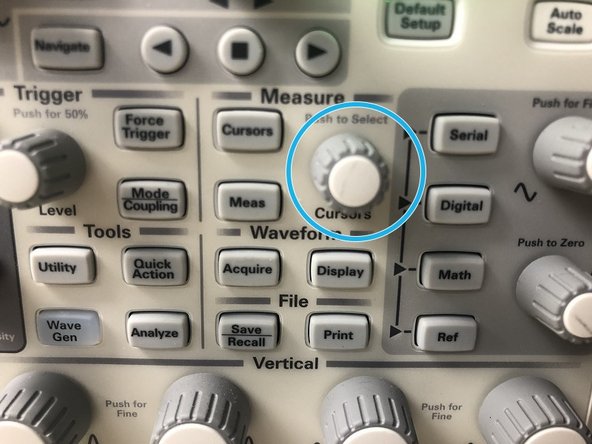
The "Cursors" button in the Measure menu will make the cursors either hide or disappear. X1, X2, Y1, and Y2 should be available for use.
-
-
-
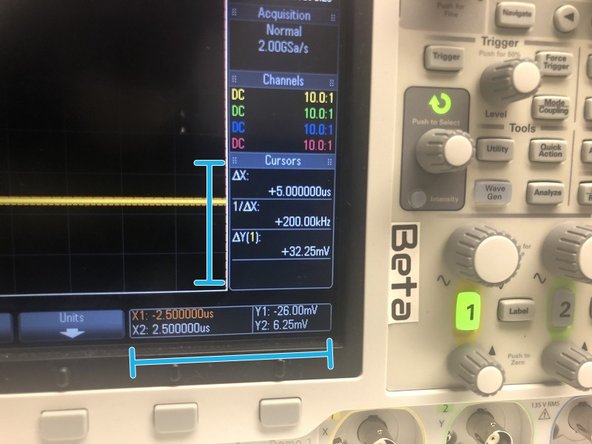
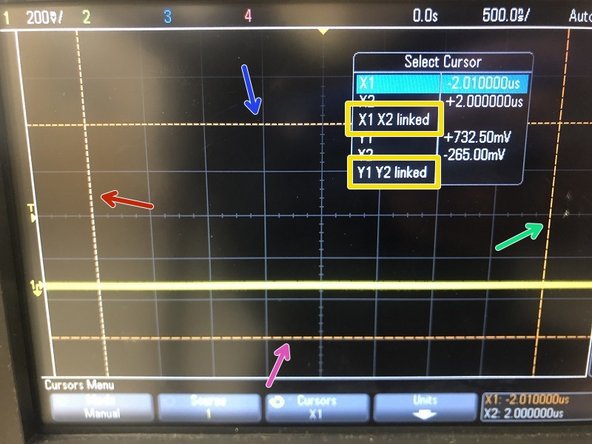
This is where you can see all the relevant information of the cursors, such as position, time, and voltage.
-
-
-
The Measure knob (next to the Cursors button) will move the cursor currently selected (left/right if it's an X axis cursor, up/down if it's in the Y axis).
-
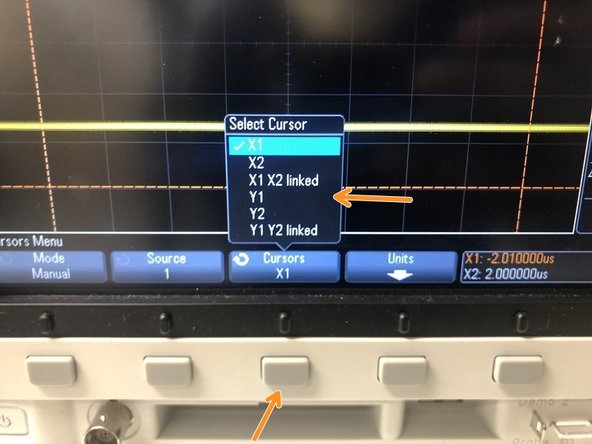
To select a different cursor, press in on the Measure knob and scroll and press again to select the desired cursor.
-
X1
-
X2
-
Y1
-
Y2
-
X1 X2 linked causes both X1 and X2 to move at the same time, same for Y1 Y2 linked
-
You can also press the third softbutton from the left, and keep pressing the button to iterate through the cursors.
-