
-
-
After successfully walking through the Setup Wizard, you will now make changes in the Configuration Wizard
-
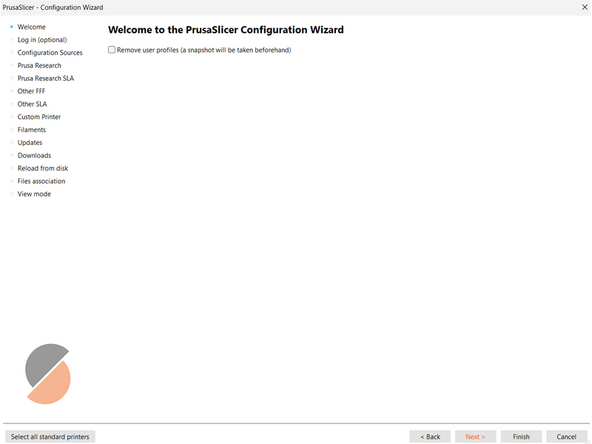
After launching PrusaSlicer for the first time, you'll be greeted with the Configuration Wizard window
-
If you do not immediately see this window, it can be launched from the top menu by selecting "Configuration" -> "Configuration Wizard"
-
-
-
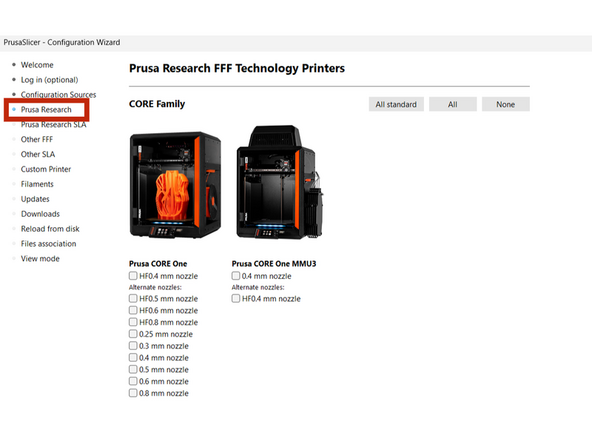
Skip to the Prusa Research tab and check the boxes next to the following printers...
-
CORE Family: Select 0.4mm nozzle under Prusa CORE One
-
MK4 Family: Select 0.4mm nozzle under Original Prusa MK4S
-
MK3 Family: Select 0.25 mm nozzle and 0.4mm nozzle under Original Prusa i3 MK3S & MMK3s+
-
Legacy Profiles Family: Select 0.6mm nozzle under Original Prusa XL
-
These are the printer types and nozzle diameters of the various Prusas used in the AFL
-
-
-
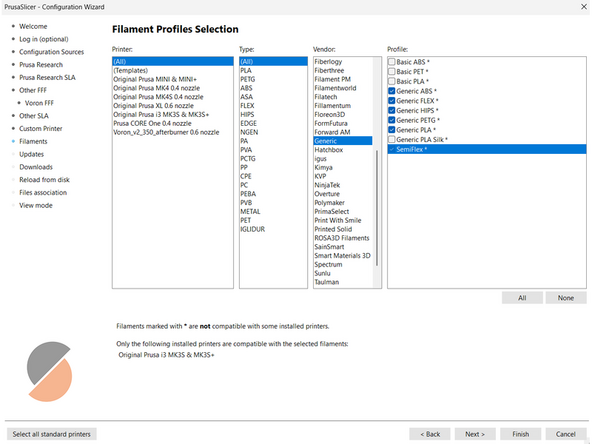
You will now select all relevant materials that the AFL uses for printing
-
Under "Vendor" scroll down to select Generic
-
Select the following generic filaments: ABS, FLEX, HIPS, PETG, PLA, and SemiFlex
-
-
-
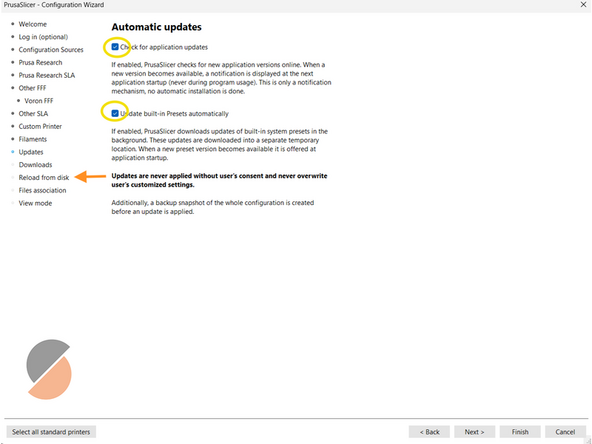
Assure that both boxes are checked under the updates tab
-
Leave the box unchecked under Reload from Disk
-
-
-
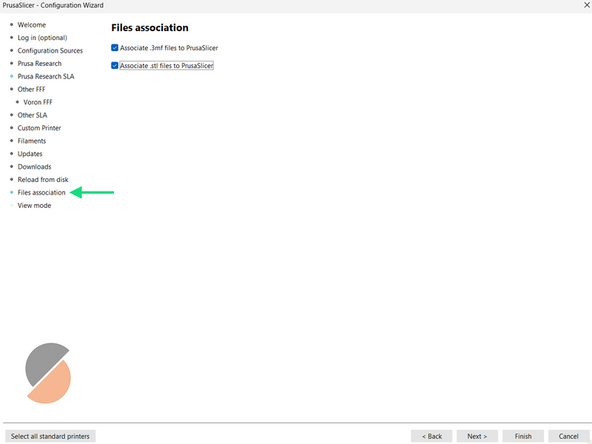
Under File Association, select both boxes
-
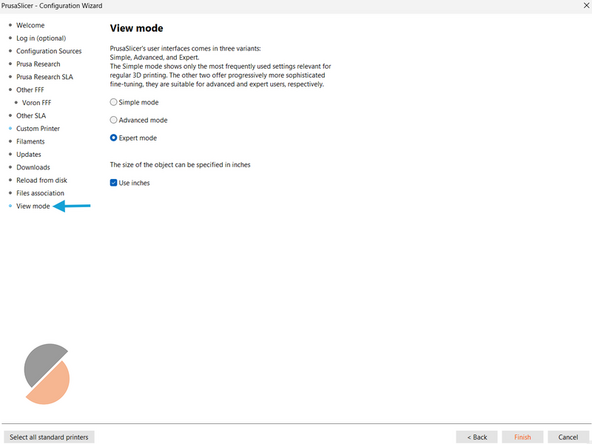
Under View Mode, select Expert Mode
-
Also check the "Use Inches" box
-
-
-
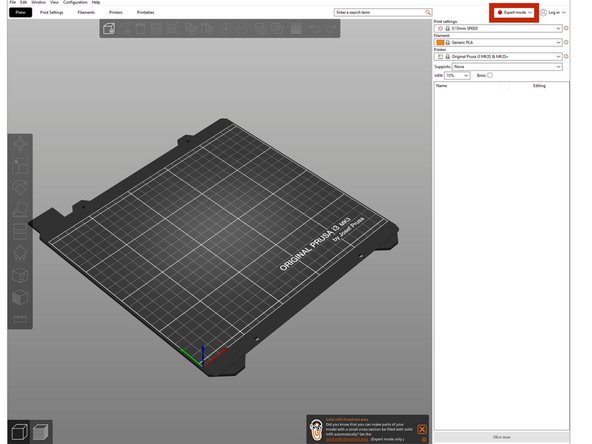
Switch the mode to "Expert" once set up
-
Once you have everything successfully setup in the Configuration Wizard, let a TS know so they can check you off. If you have any questions about any configuration settings, please feel free to ask any staffer.
Once you have everything successfully setup in the Configuration Wizard, let a TS know so they can check you off. If you have any questions about any configuration settings, please feel free to ask any staffer.
Cancel: I did not complete this guide.
2 other people completed this guide.
