Introduction
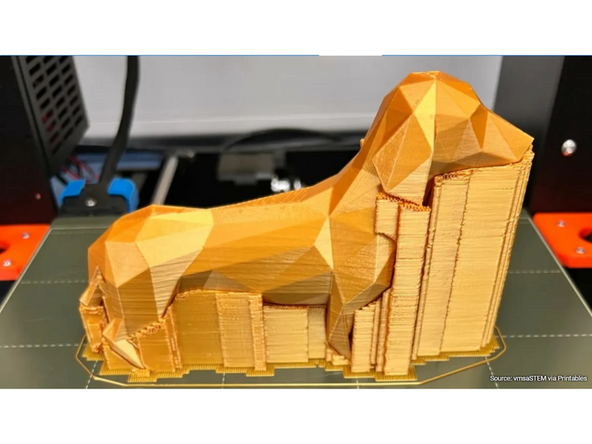
Extruded plastic is pliable while hot. Gravity can have a negative effect while printing, causing extrusions that print “in the air” or without sufficient foundation to sag before they solidify. We can counteract gravity by adding “support” to 3D prints. This is sacrificial material that the model can rest on when 3D printing.
-
-
3D printers work by laying layer over layer of plastic to create a 3D object. Each new layer must be supported by the one beneath it.
-
If part of your model starts in mid-air and is not supported by anything below, you need to add an additional support structure to ensure a successful print.
-
This guide goes through different support generation and how to use it in PrusaSlicer.
-
-
-
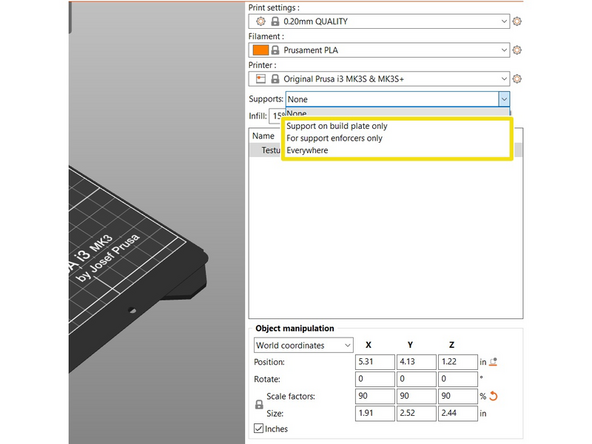
PrusaSlicer can both detect areas that need supports and generate them in these places automatically.
-
The quick setting area provides three different methods for autogenerating supports. Supports on build plate only, For support enforcers only, and Everywhere.
-
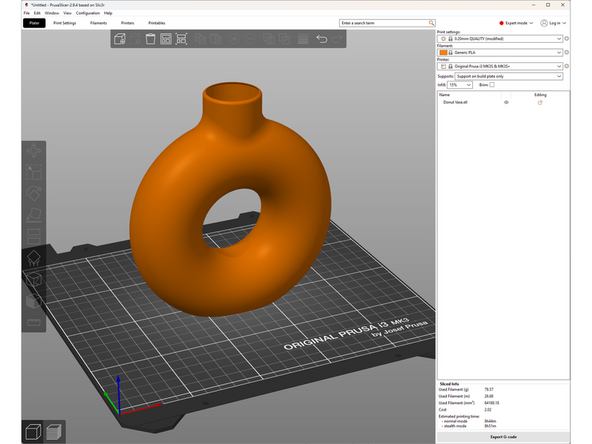
To demonstrate how each works we will be suing this wormhole vase model from Printables, made by Shepp 3D.
-
-
-
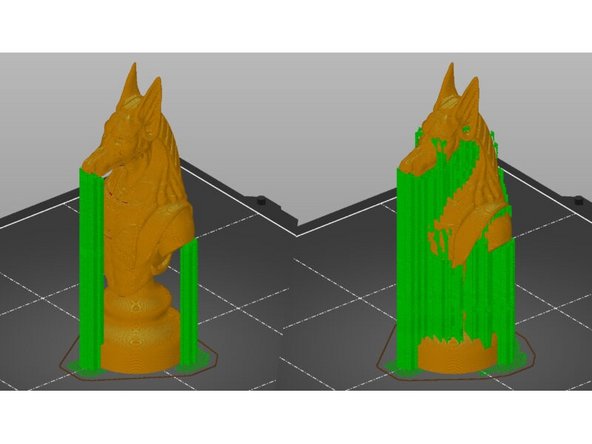
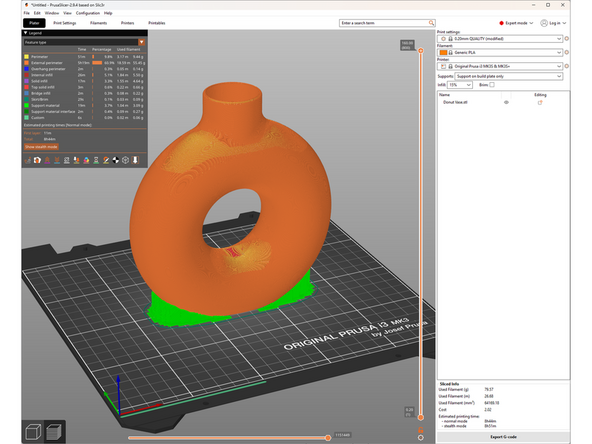
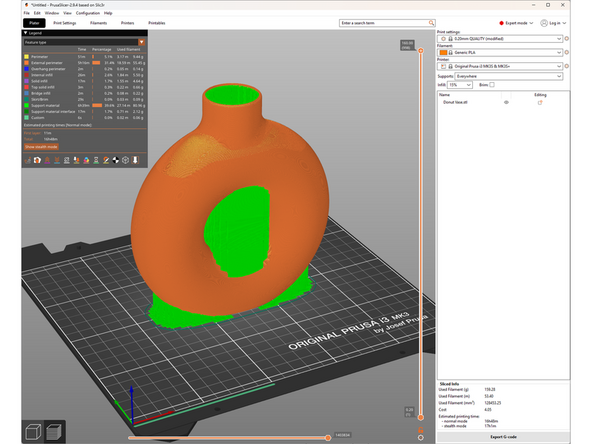
This setting will only create supports starting at the build plate. It will not create supports starting on top of the model.
-
In our donut example we see that support has been generated at the bottom, but not within the hole.
-
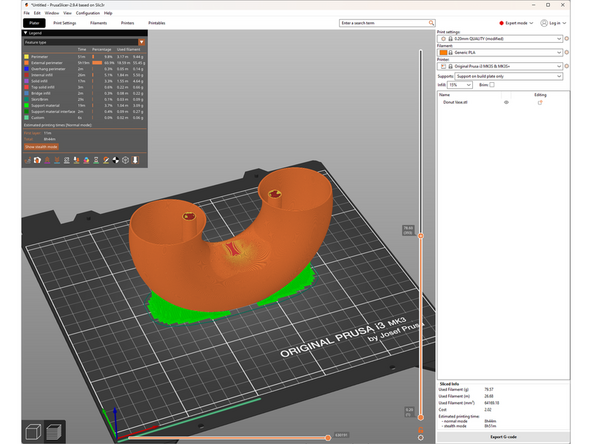
If we use the layer view to look inside of the vase we can also see that no support has been generated internally.
-
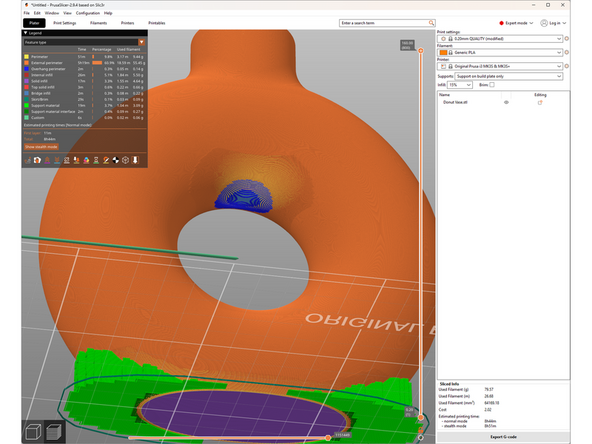
If we look at the top surface of the hole, we will see it is color coded blue. The feature key at the top left informs us that blue indicates and overhang perimeter. This part will likely sag if we do not print with support.
-
-
-
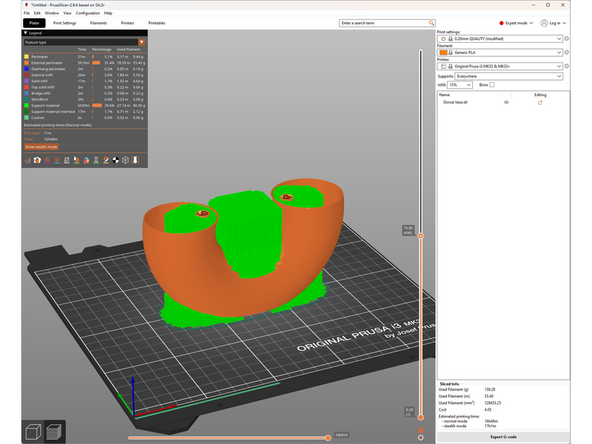
Supports everywhere can grow from both the print bed and any model surface when necessary. This ensures that every overhang and part starting mid-air will get supported.
-
Small imperfections may appear on the surface where supports start, or it may be impossible to remove the support depending on the geometry.
-
In our donut example we see that support has been generated in the hole and inside of the vase. The internal support will be impossible to remove.
-
-
-
Support enforcers only generates support only where you specify. It is useful when neither everywhere or build plate only generate acceptable support structures.
-
There are two ways to add support enforcers.
-
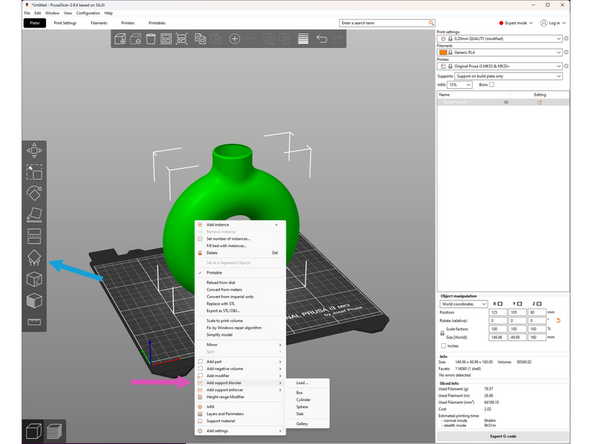
You can add a support enforcer shape by right clicking on the model and selecting Add Support Enforcer. This will add a simple object (box, cube, cylinder, etc.) to the virtual build plate in which support will be generated.
-
You can similarly add support blocker shapes.
-
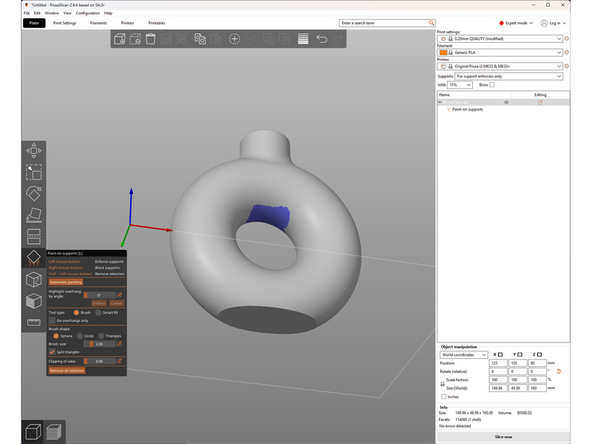
You can use the Paint On Support tool in the left toolbar. This will allow you to select surfaces you wish to support.
-
Support enforcers and blockers can also be used in the other generation modes to generate supplemental support, or remove unwanted support.
-
-
-
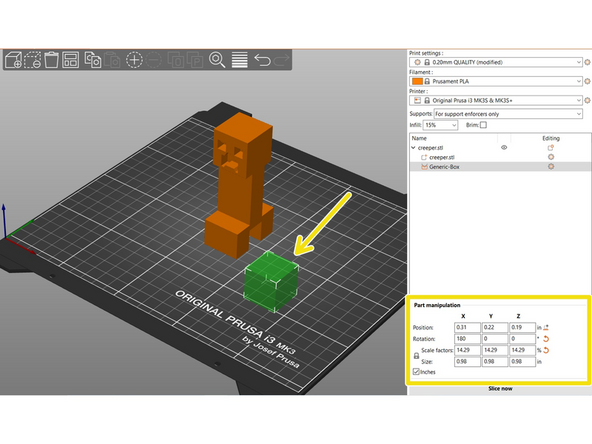
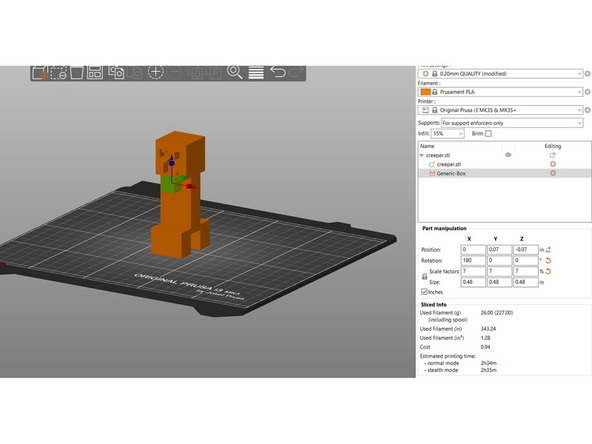
After adding a support enforcer shape, notice the highlighted window now says Part Manipulation. When the support enforcer is selected, you can modify it's size and position to fit the model.
-
You can also utilize the sizing and moving tools in the left hand toolbar
-
Once the support enforcer is in proper position, select For Support Enforcers Only in the dropdown menu. Then select Slice now
-
The supports will not be generated unless the support enforcer is in contact with a detected overhang
-
-
-
The Paint-On Support tool lets you "paint" the surfaces you want to enforce or block supports on.
-
Left clicking on a surface will enforce supports on that surface and turn it blue.
-
Right clicking on a surface will block supports on that surface and turn it red.
-
Left clicking while holding the shift button will erase both enforcers and blockers.
-
Returning to our donut example, we can add supports only in the center hole using the paint on supports tool.
-
There are variety of ways to modify this tool, from brush size, to smart fill and more. Feel free to play around with it!
-
-
-
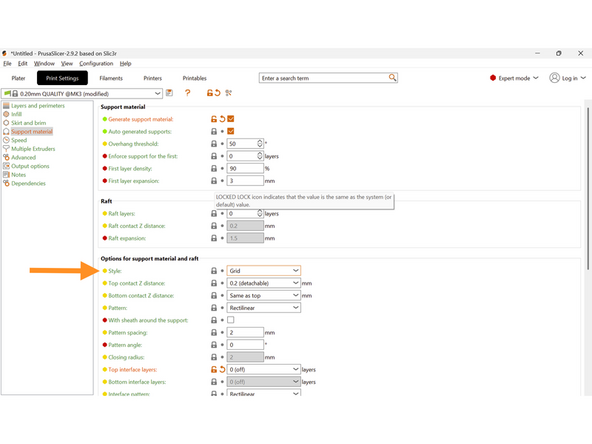
By default, your slicer will generate grid supports. These are tower like structures that excel at supporting wide flat surfaces.
-
For certain geometry, it may be appropriate to switch to organic supports. These are tree like structures that excel at supporting curves and organic geometries.
-
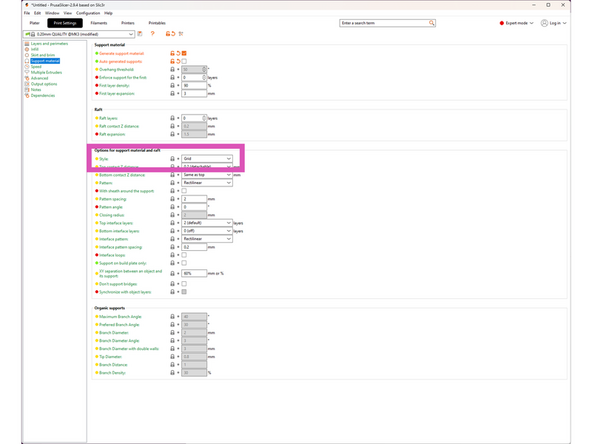
To switch, open the Print Settings tab, Support Material, and change the style from Grid to Organic.
-
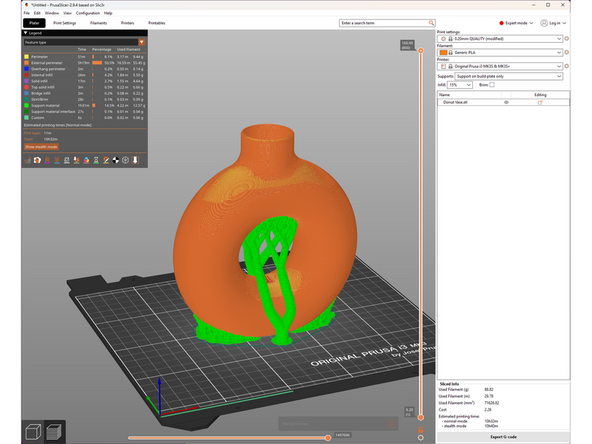
Returning to the donut vase, set to organic supports and support on build plate only, we see we are now able to support the internal hole.
-
-
-
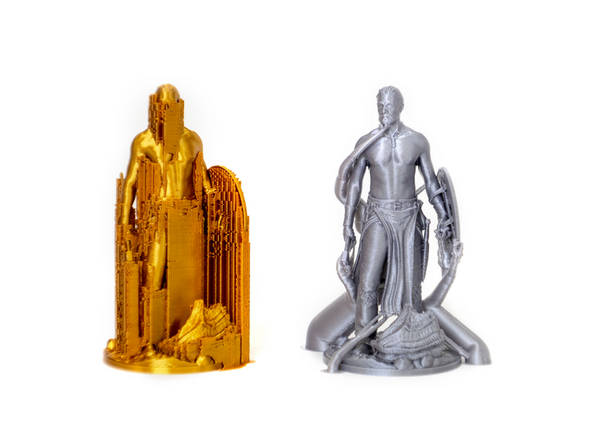
Supports add post processing time, and can mar the surface of the printed part. Certain geometries also make it impossible to remove. It is often required, but the goal is always to minimize its use while maintaining final part quality.
-
There are lots of methods to approach support generation for each model, and there isn't necessarily a single correct answer. Play around with supports and think about what surfaces really need support and how difficult each support will be to remove.
-

In conclusion, this guide went over three ways to generate supports in PrusaSlicer. When completed, notify a TS and they will check you off. The next guide will explain how to identify whether a model needs supports or not.
In conclusion, this guide went over three ways to generate supports in PrusaSlicer. When completed, notify a TS and they will check you off. The next guide will explain how to identify whether a model needs supports or not.
Cancel: I did not complete this guide.
5 other people completed this guide.
