-
-
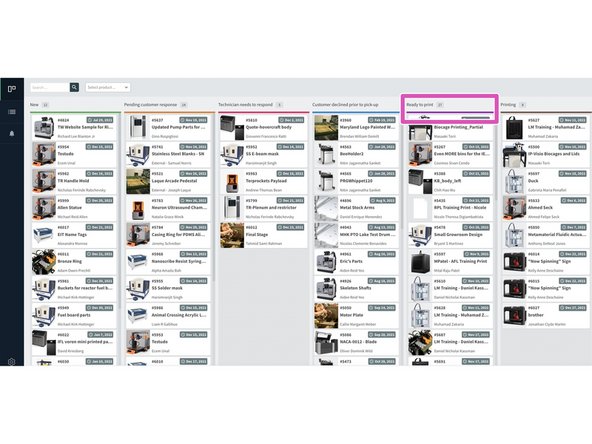
Welcome to PaperCut. This is what the page will look like when you first click into operator view.
-
This menu should be used to narrow down the list of printers that are seen on the dashboard.
-
We use the printer " [Powder Bed] - Formlabs Fuse 1/ HP JF580 " click to select this filter
-
The dashboard will now look something like this. (Iss nice, no?)
-
-
-
Look to see if there any parts in the new column.
-
If there aren't any new parts, look in the other columns to check to see if everything has been updated properly. (using the rest of the steps in this guide)
-
1. This is one way a customer would report that they want the part in a particular color using these fields, but it is NOT the only way they may do so
-
2. Customers may also use this field to indicate color, again it is NOT be the only way they may do so
-
3. Customers may also put other requests in these fields so it's good to include in your first look at the PaperCut Order
-
If the customer has put something in these fields, then you should always follow up in a message asking if they would like the part to be printed for the fuse or HP
-
The Fuse only prints in the grey color powder provided. The HP is the only powder printer that prints in color
-
-
-
Once you have figured out that the parts are for the Fuse, it's time to slice.
-
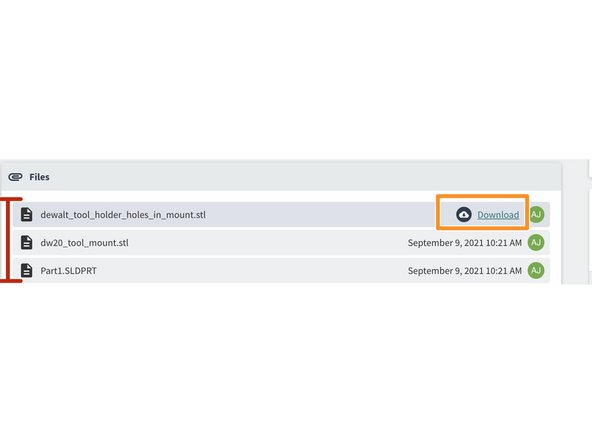
Once you click the part on the initial dashboard, a new page is generated and at the top of the screen you will see each part uploaded by the customer
-
.stl files are fused for the Fuse, but other files that show up could be .obj, or .3mf (usually these are for the HP, but can be sliced in Preform)
-
Download each part
-
Open Preform, the slicing software for the Fuse
-
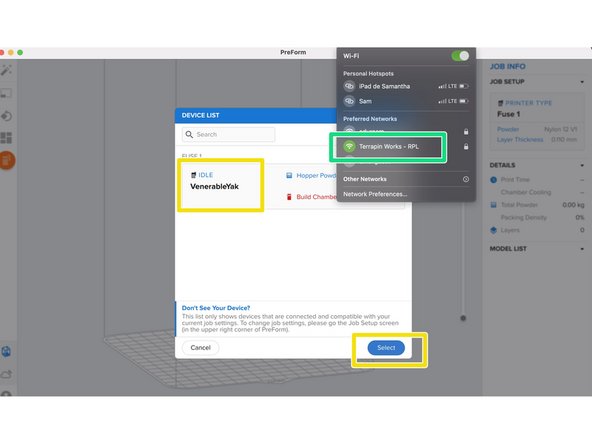
In order to select the correct the correct printer, you must be on TW Wifi-RPL- (ask someone in the lab for access to LastPass or ask for the password)
-
Once on the correct Wifi, select the printer VenerableYak
-
Add parts to build box by either clicking and dragging the downloaded file into the box, or opening the files through PreForm
-
-
-
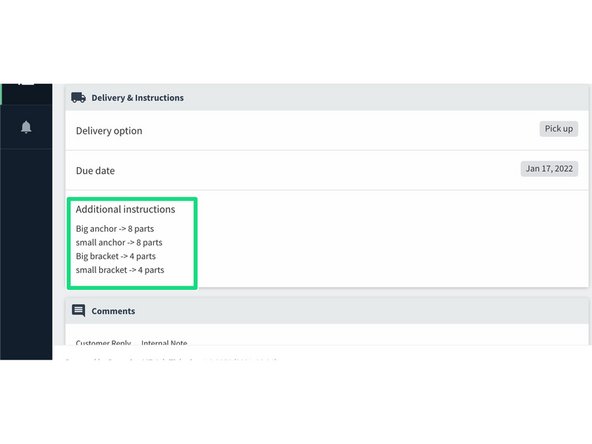
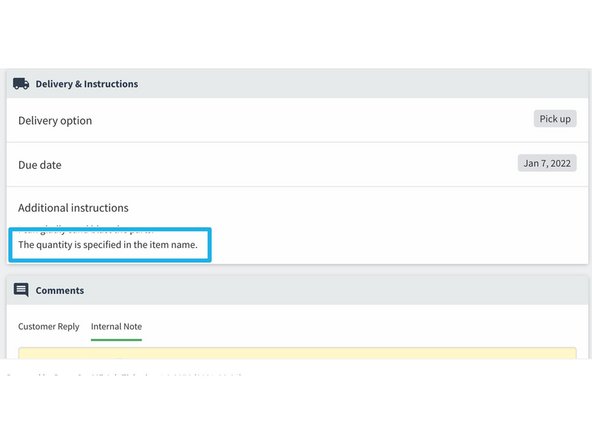
Again, customers may specify part amounts in different places like the "Additional Instructions" section of PaperCut
-
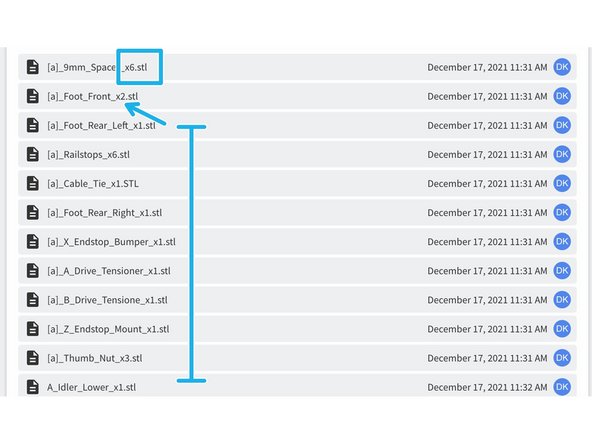
OR the customer may specify in the instructions that the amount they need is in the part name
-
Regardless the location, it's always good practice to look in all of the mentioned areas for part amounts before printing
-
-
-
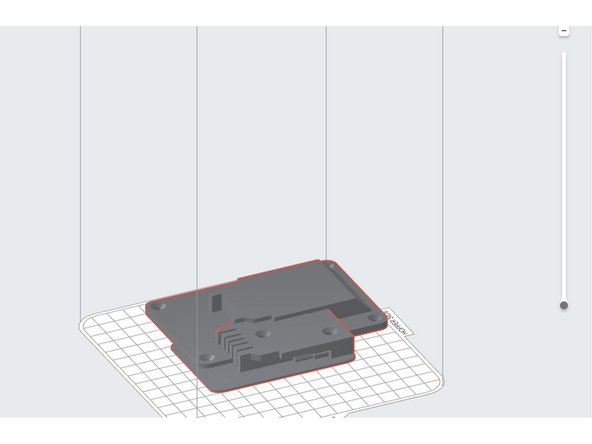
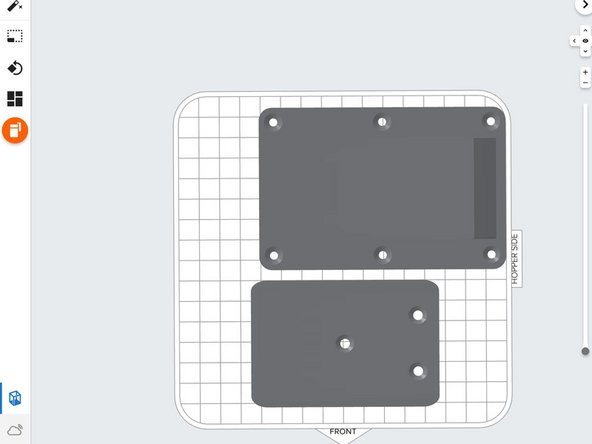
Arrange the parts so that they are a short distance apart and flat on the build plate
-
Parts will vary with how they will be oriented in the build chamber. Not all will be flat, some will need to be rotated etc.
-
See Fuse slicing best practices for how/when to rotate a part HERE
-
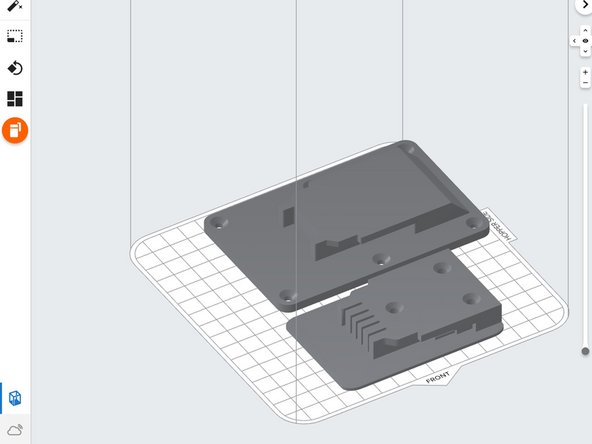
The orange highlight around the parts indicates that they are overlapping, and it will not print properly
-
-
-
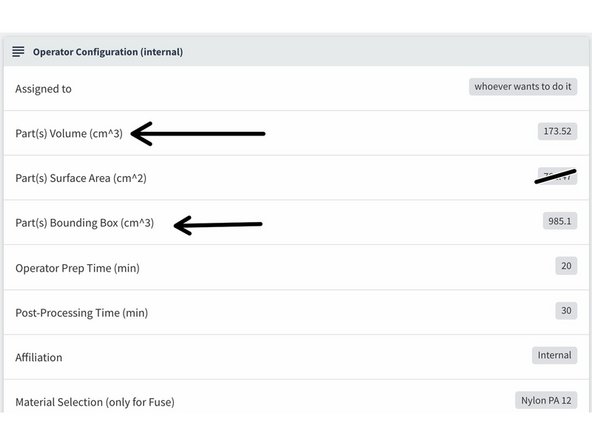
All parts need to be quoted from PreForm for two fields: 1. Bounding Box and 2. Volume
-
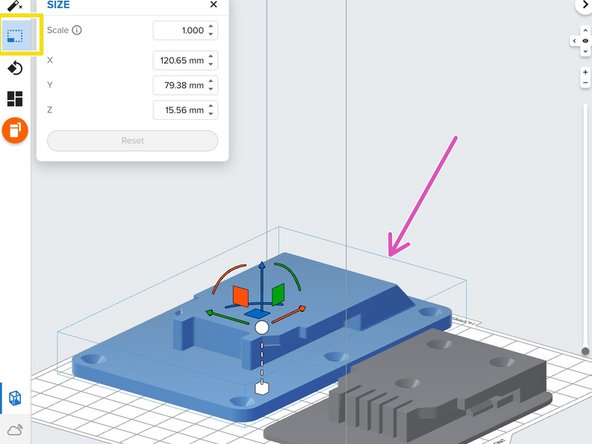
The Bounding Box is the blue box surrounding a part when you click on it in PreForm
-
The Bounding Box Volume is calculated using the values displayed in the Size menu for x, y, and z
-
Volume and Bounding Box Volume are two different values
-
Volume is calculated using the Model Powder
-
-
-
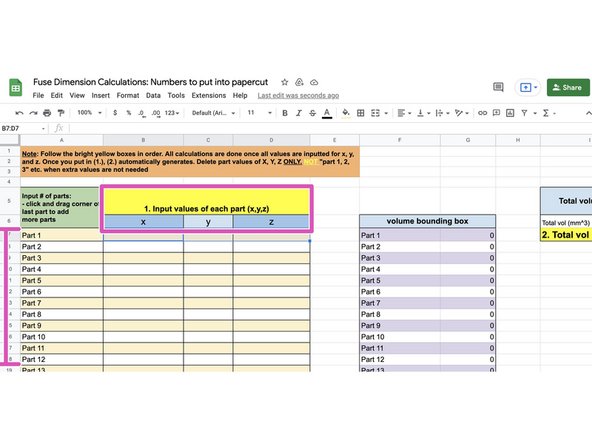
Luckily, there's a handy Excel sheet that can be used to calculate and convert bounding box values for you found HERE
-
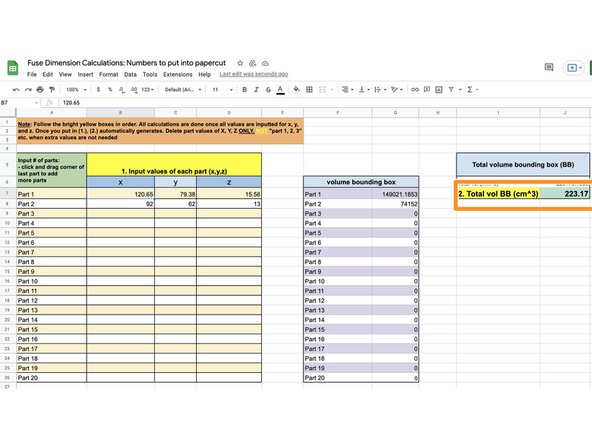
Input the values found in PreForm for x, y, and z for each part
-
There is a new row for each part, and new values are generated for each part for the Bounding Box in PreForm when you click on them
-
The value needed to input into PaperCut for the Bounding Box Volume is populated here
-
Bounding box dimensions in PreForm change depending on orientation of each part
-
-
-
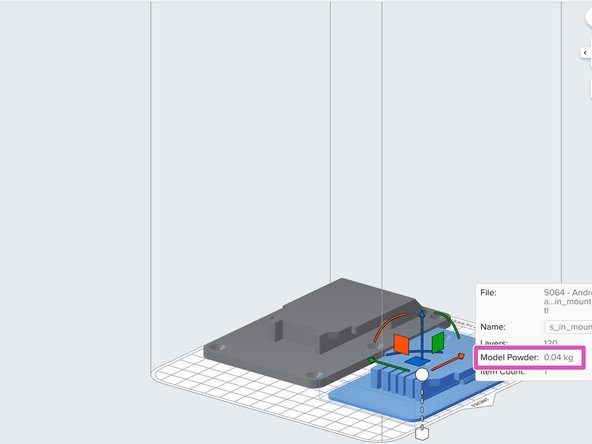
Volume in Preform = Model Powder. We use these values for each part to calculate total powder use for each part for this particular job
-
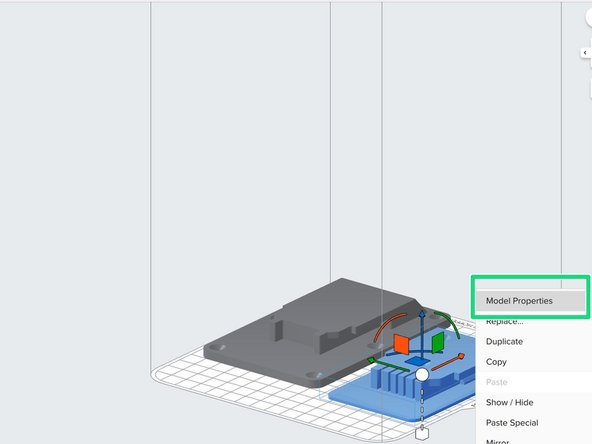
Right click on a part and click "Model Properties"
-
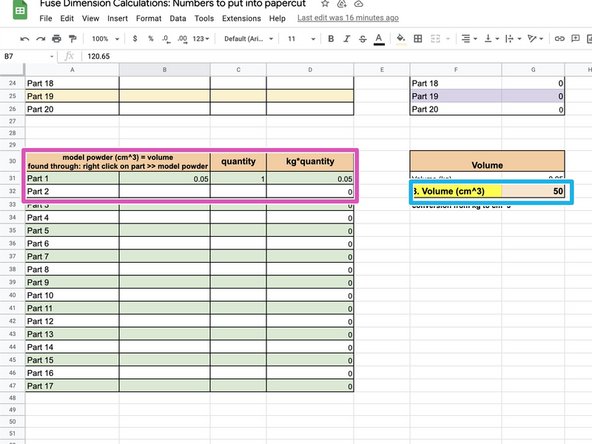
Input the Model Powder value into the Excel sheet for each part (have to follow above step for each part)
-
If you have the same part duplicated many times, you can just add the Model Powder in the field once, then include the quantity of the part
-
Orientation does NOT affect part volume, only the bounding box
-
This value is what is put into PaperCut for the Part(s) Volume field
-
-
-
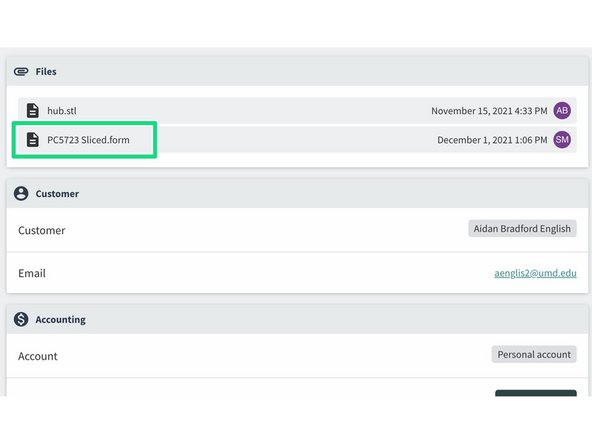
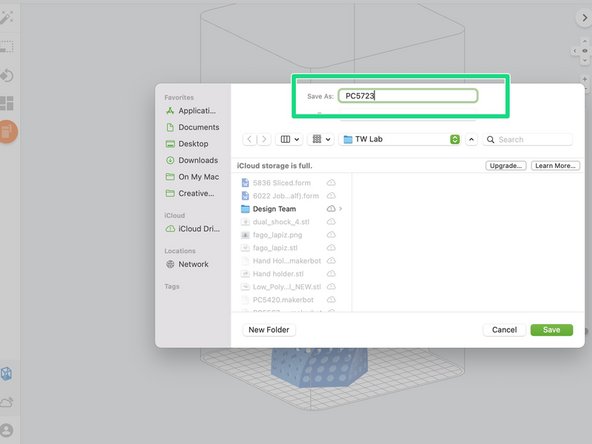
Save part as PC(part number) and upload it to PaperCut
-
Uploading the part to PaperCut after slicing is important so that those that come after can check quoting, or can redownload/upload the part if something goes wrong
-
-
-
Once everything is sliced, check to see if there are any other prints that have already been sliced, or that are new for the Fuse
-
These prints can be run together in one job (AFTER they have been sliced individually for quoting)
-
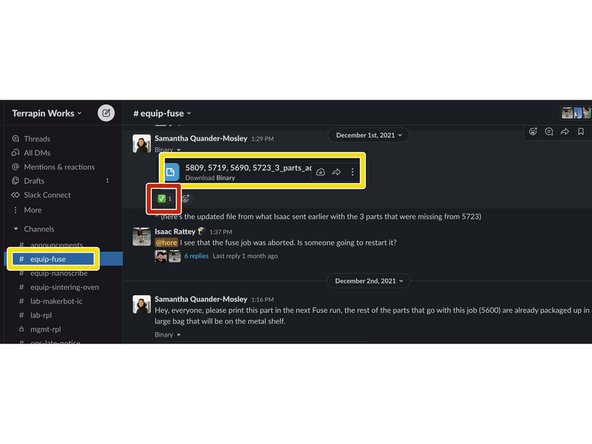
The equip-fuse channel should be checked too to make sure that all prints that can fit in one job are included in the next print
-
If you finished slicing a job but cannot run it on your shift, put the PaperCut order number in the equip-fuse channel so that someone can look at it later
-
Once a job has been uploaded and is printing, add a green check mark to the existing job in the equip-fuse slack channel
-
This is a job with multiple PaperCut orders sent in slack to be printed later
-
-
-
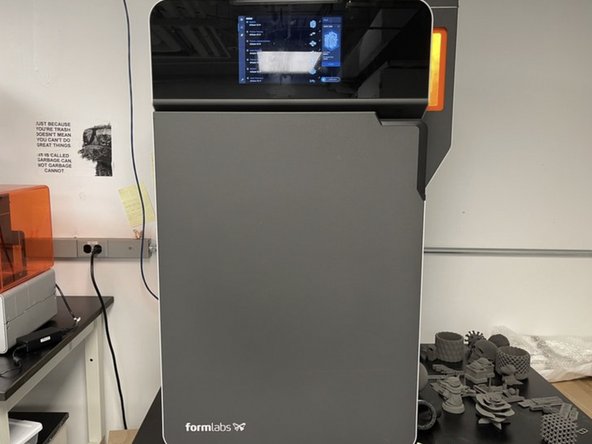
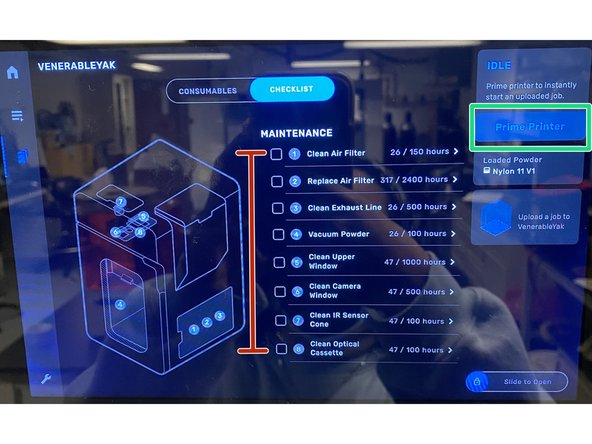
Time to begin Fuse prep!
-
These are general Fuse maintenance items that only need to be taken care of when they are almost full
-
When prints have warped or something has gone wrong, completing a few of these tasks may help to fix the problem
-
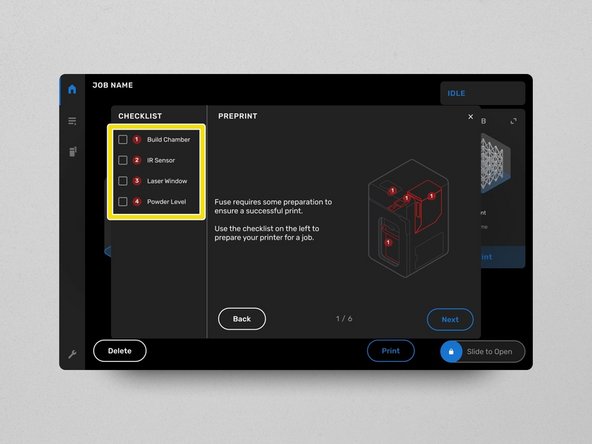
To begin priming the printer, click prime printer
-
Clicking Prime Printer will lead you to a list of tasks that need to be done each time before a new print is done
-
-
-
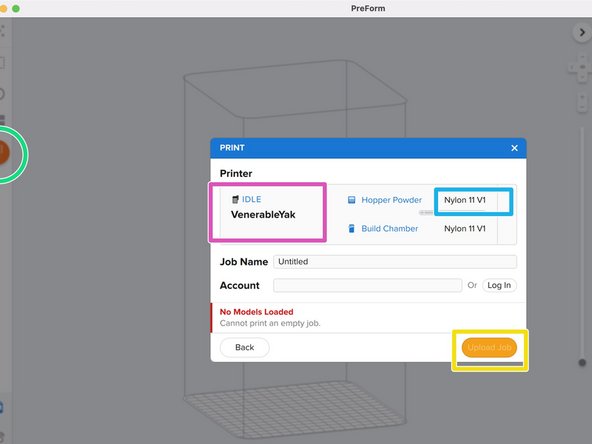
Once you have gone through the Fuse checklist, click the print button in PreForm
-
Ensure that you are printing on VenerableYak as that is the name of the Fuse in the RPL
-
Change Nylon to the correct Nylon type. (We should be using Nylon 11, but check with LC as this is subject to change)
-
Once everything is all set, click Upload Job
-
The printer will start automatically (once the upload is finished) since it has already been primed
-
-
-
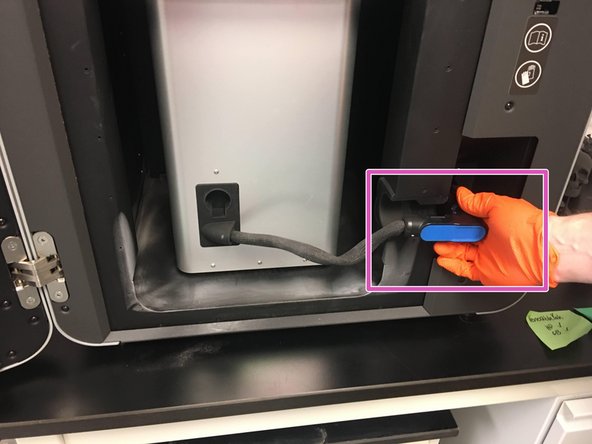
Whenever handling anything within the Fuse or Sift, gloves MUST be worn in addition to a mask
-
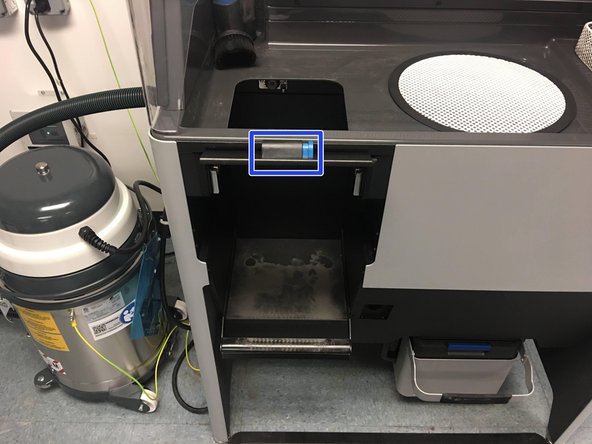
Open the latch with the blue button on the Sift to Prep for transferring the build chamber from the Fuse to the Sift
-
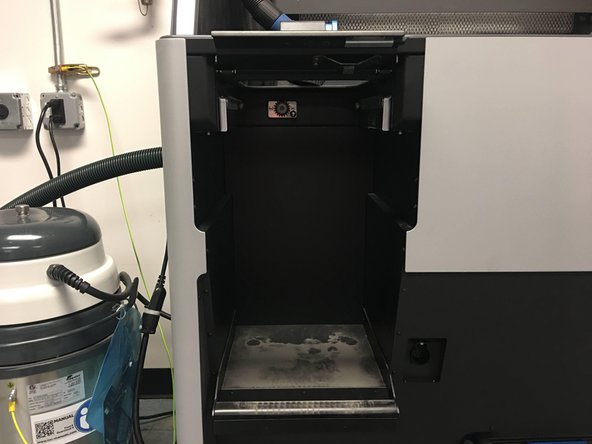
Make sure the build chamber area on the Sift is empty and ready to accept the build chamber
-
Make sure the vacuum hose is not hanging down into the build chamber area
-
-
-
Once the print is done, the Fuse will look like this with the name of each part on top of the print bed
-
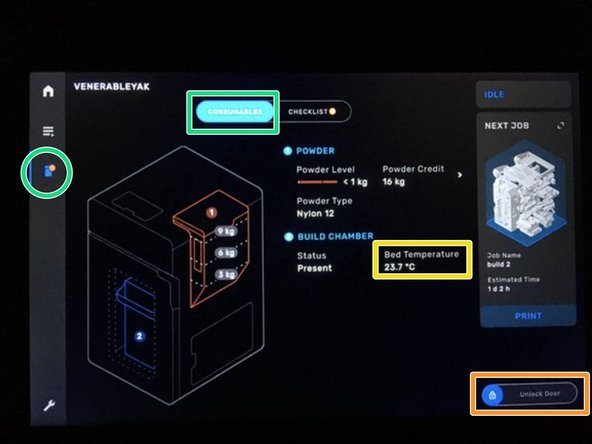
Before removing the Build chamber click on the printer icon and consumables toggle to get to this screen
-
Ensure that thee build chamber is BELOW 45ºC before removing it
-
Open the Fuse door by sliding over the "Unlock Door" on the Fuse touchpad
-
Use oven mitts to remove chamber if necessary to do so before it fully cools
-
Mitts can be found to the right of the Fuse
-
-
-
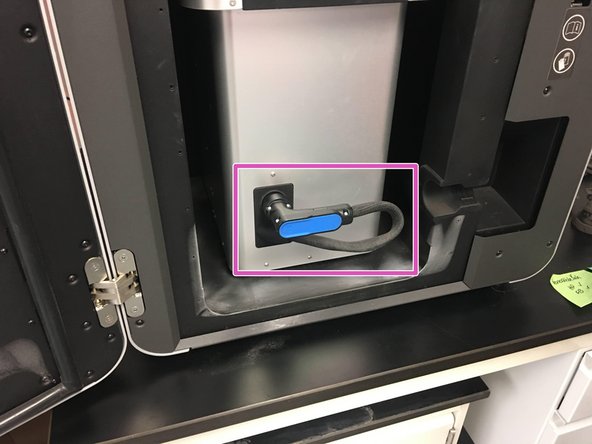
Again, ensure that the build chamber is below 45°C. Otherwise, you must use oven mitts for handling the build chamber
-
Disconnect and stow the build chamber data cable in the rubber slot on the build chamber
-
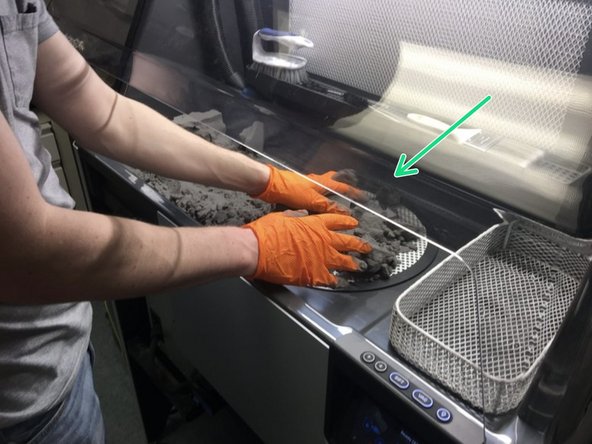
Now you are ready to sift and clean the parts. See the Fuse Sift Operation Dozuki for more details
-
-
-
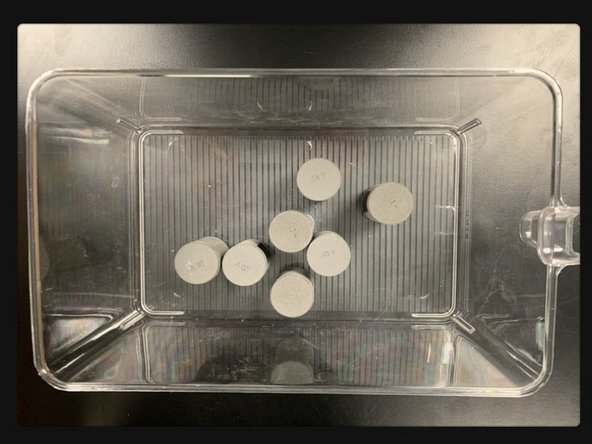
Once you are done cleaning the parts in thee sifting hood, the parts must be bead blasted to reduce/eliminate any stray powder from sifting and cleaning the parts
-
See Bead Blaster Usage for more details
-
Be sure not to over bead blast or clean the parts, as that can ruin part integrity.
-
-
-
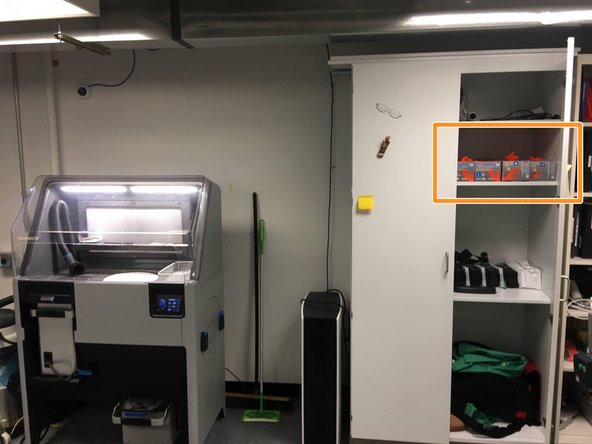
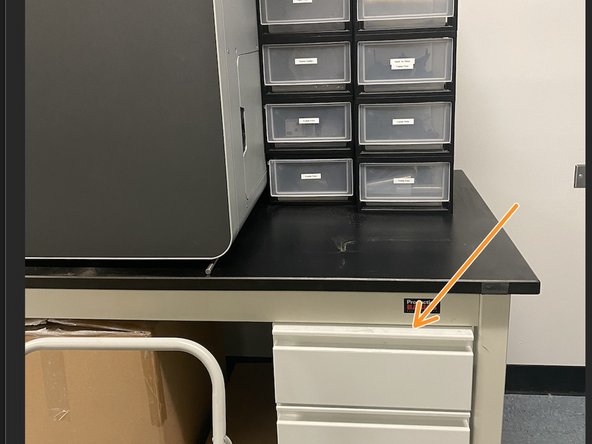
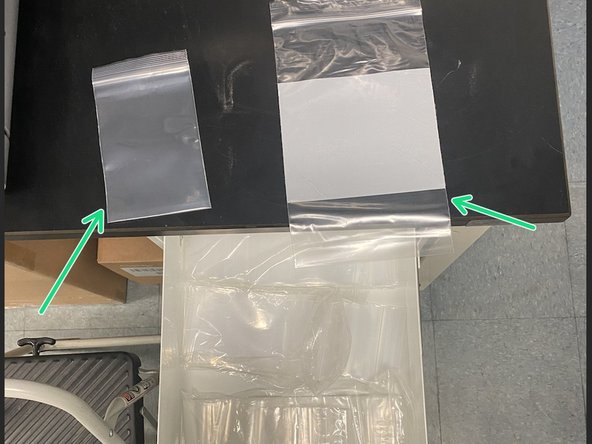
Once you're done bead blasting, the parts need to be bagged up and taken to the AFL for pickup -- The bags are stored in the 1st drawer next to the Fuse
-
There are two bag sizes, small and medium. Larger bags are available in AFL
-
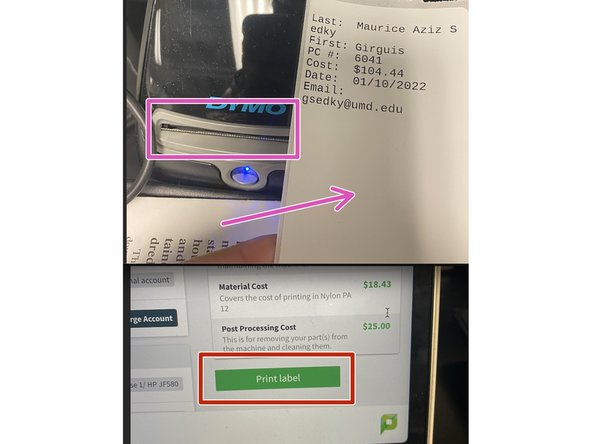
Once you have placed the parts in the bag, find the order on papercut and click "Print Label"
-
You should be connected to TW Wifi in order to print the label
-
A label will print out with the name and pricing information. Place the label onto the bag containing the parts
-
If the label maker is not working write on the bag in sharpie instead, including: Name, Price of the print, and Papercut part number
-
Transport to AFL and place it in the correct bin according to last name and part fragility!
-
Be sure to change the status to "Ready for Pickup" in Papercut once dropped off to AFL
-

![We use the printer " [Powder Bed] - Formlabs Fuse 1/ HP JF580 " click to select this filter](https://d3t0tbmlie281e.cloudfront.net/igi/umd/LvOWCjAexi44HICM.medium)