
Introduction
This guide explains how to operate Romer Absolute Arm Benchtop 3D scanner to capture scans of simple objects. Scanning most objects requires scans from multiple angles. Each scan captures an incomplete area of the object, so creating a complete mesh of an object requires further post processing. Refer to the Basic Post Processing in Geomagic Design X guide for an introduction to post processing in DesignX.
Images By: Martinus Arie
-
-
Geomagic Design X is used to operate the scanning arm
-
Before starting the scan, make sure that the control panel software is closed otherwise an error will occur
-
In the Livecapture tab, select Romer Absolute from the device drop down menu
-
After selecting the device, click Device Connect
-
In the home tab, click LiveCapture to connect Geomagic Design X to the arm
-
This opens the window that controls the scan
-
Select the “Laser Scanning” symbol to start the scan
-
-
-
Remove the cap of the scanner
-
Turn the lock down to the green unlock symbol to allow for full rotation of each joint in the arm
-
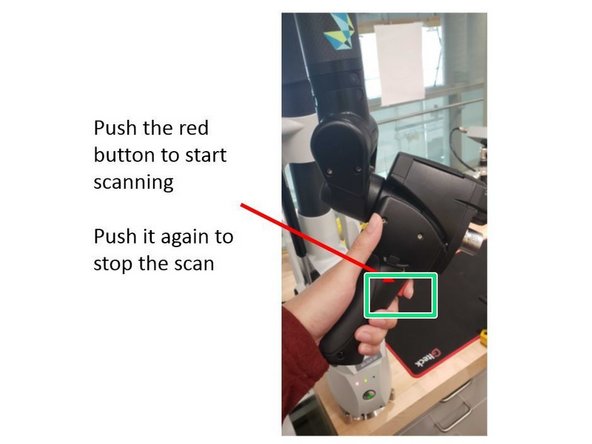
Push on the red button that looks like a trigger on the scanner handle to start scanning
-
Push it again to pause the scan
-
-
-
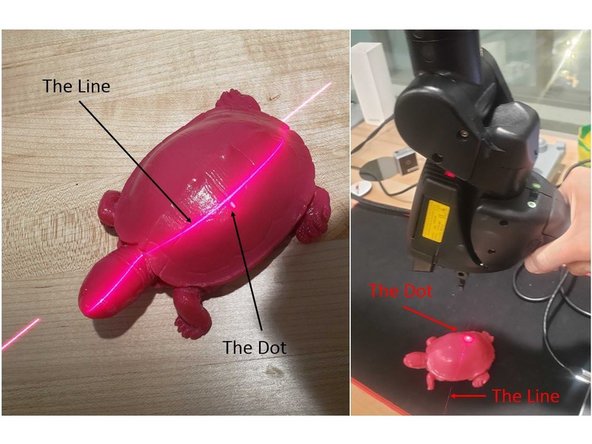
The red dot and line need to align during the scan
-
Misalignment means the scanner is either too close or too far from the object
-
There is some tolerance, but try to keep the dot and line as aligned as possible
-
Keep the scanner perpendicular to the target surface for optimal data collection
-
Do not move the object during the scan!
-
The Romer arm uses encoders in each joint to automatically align anything it scans to a global origin point in the base. As long as the object does not move, all scans automatically align
-
You don't need to finish scanning in one pass as the scanner will automatically remove some of the scan data that's not accurate or has too much noise
-
You will need to re-scan those regions in a subsequent scanning pass
-
-
-
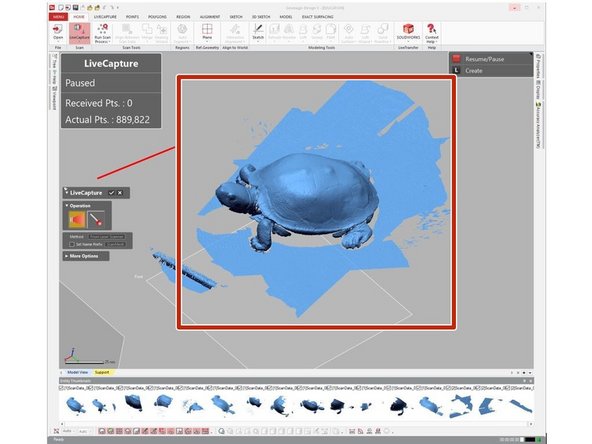
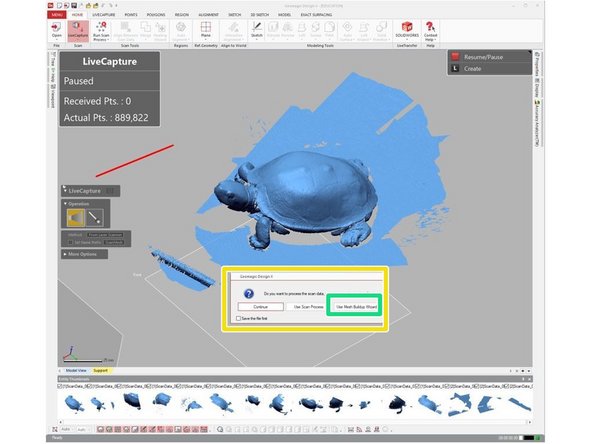
Scan data is shown on the screen
-
Any gaps in the captured point cloud data will need to be scanned again in a subsequent pass
-
Repeat scanning passes until all visible surfaces of the target object are captured from the current object orientation
-
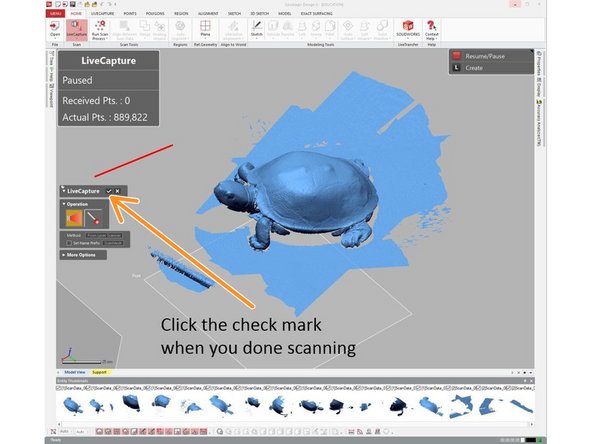
Click the check mark when you are done scanning the object in this orientation
-
A pop up window will appear:
-
In the pop up window select Use Mesh Building Wizard to merge current data together
-
-
-
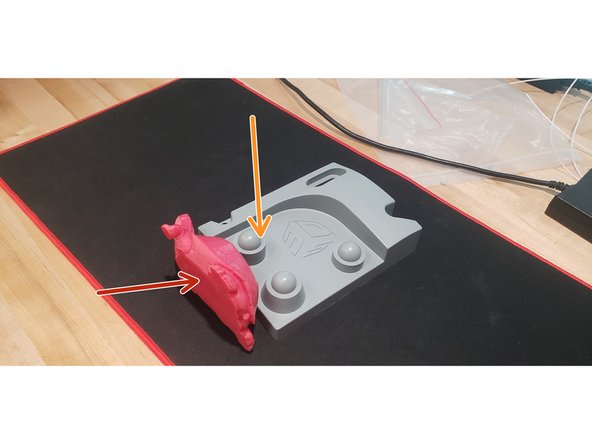
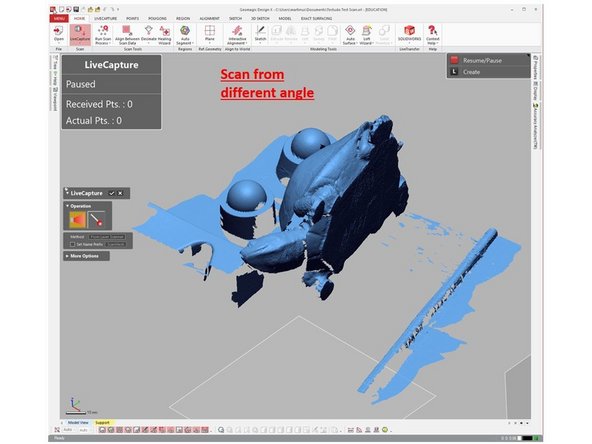
After completing post processing of the scans from one angle, scanning from a different angle captures the rest of the surfaces
-
On many objects, you need to scan the bottom surfaces that are not possible to scan in the first orientation
-
Be sure to support the object well since if it falls or shifts the scan data would have to be merged and another pass would be needed
-
Any misc. objects used to prop up the desired object can be removed in post-processing
-
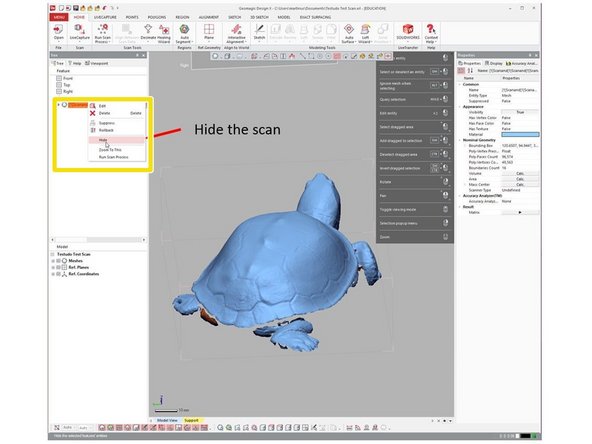
Before starting subsequent scanning passes, you can hide previous scan data by right clicking on them in the left panel
-
Save the file before EACH time a new scan pass is started to help mitigate lost work
-
For alignment with the first scan, it is required to have a common scan area between the current scanning pass and previous scan data
-
In most cases, this means that at least 3 passes are required to scan an object in full
-
-
-
These scanning passes require post processing to make a complete and manifold mesh
-
Refer to Basic Post Processing in Geomagic Design X guide for more info
-
The scanner is not needed to do post-processing once all scanning passes are complete, so it can be shut down:
-
Put the cap back to the scanner
-
Turn the lock to red to lock the arm
-
Turn off the scanner
-


Congratulation you have learn the basic skill needed to operate Romer Absolute Arms 3D Scanner
Congratulation you have learn the basic skill needed to operate Romer Absolute Arms 3D Scanner