Tools
Parts
No parts specified.
-
-
The type of prints that go in the sonicator include:
-
Small/Fragile prints
-
Prints made with heavy (hard) support material
-
All prints made primarily of Agilus
-
-
-
If possible, remove as much support material as you can
-
Don't risk damaging the print trying to remove support material if it's too brittle
-
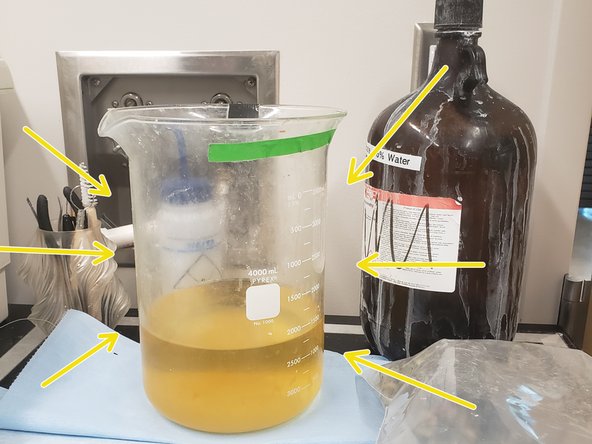
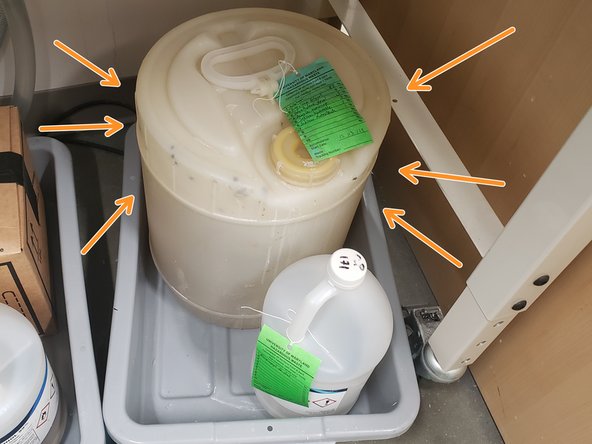
Get the sonicator solution and a beaker. It should be located in the yellow fire cabinet and is in a large brown jug
-
If the jug is empty, see the 'Sonicator Removal Solution' Dozuki guide to see how to make it
-
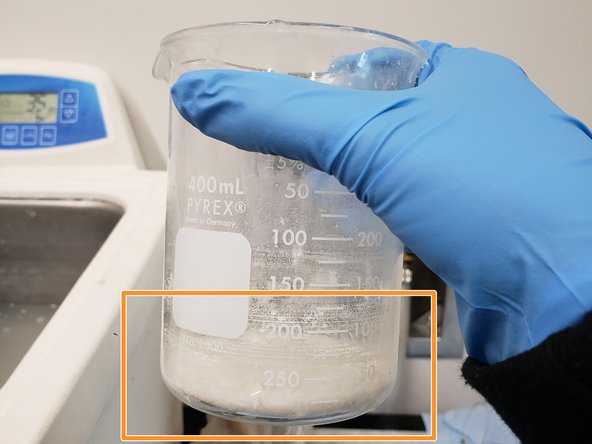
If you see a beaker with used sonicator solution on the work station, it can be reused so long as it's still watery and doesn't have any chunks in it.
-
-
-
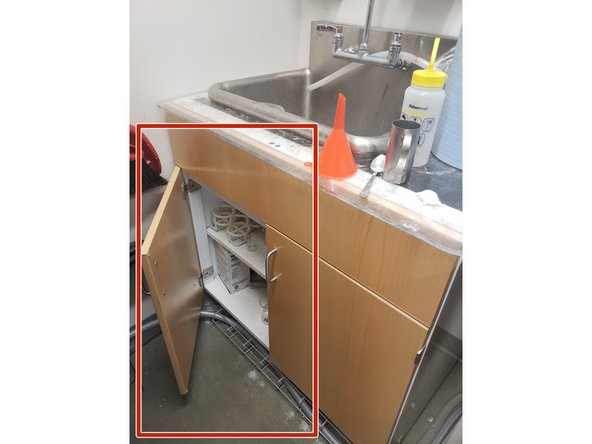
If there aren't any beakers out, they can be found in the cabinet under the sink
-
Put the print(s) in the beaker(s)
-
For multiple small prints, you can put several in one beaker.
-
DON'T try to stuff the beaker(s). Only put in as many that can fit in about half of the beaker.
-
Pour the sonicator solution into the beaker(s). Only pour as much as needed to submerge all of the print(s)
-
For especially large prints, use the 4000mL beaker.
-
-
-
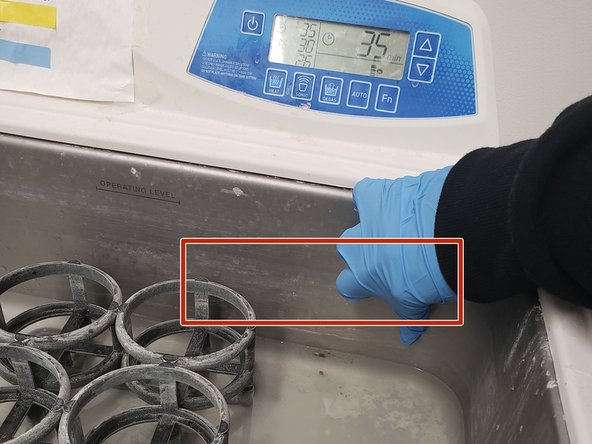
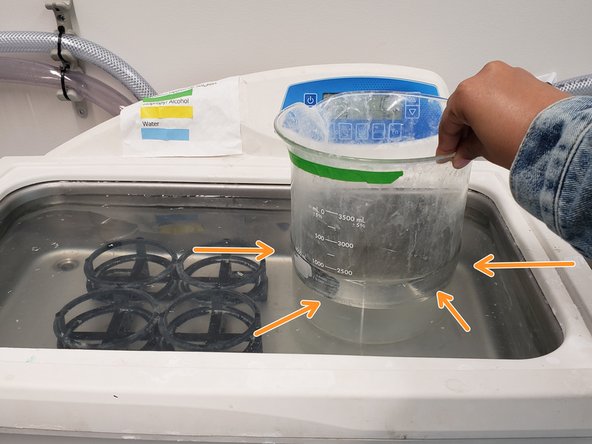
Place the beaker(s) in the holsters in the sonicator bath.
-
There should be water in the bath, but if it's empty, fill it up to the faded line (see pic) with water from the sink
-
If using the 4000mL beaker, just put it directly in the bath, as it won't fit in the beaker holsters anyway.
-
For large beakers, you can fill the Sonicator up to a point where the beaker is about 25% - 50% submerged
-
-
-
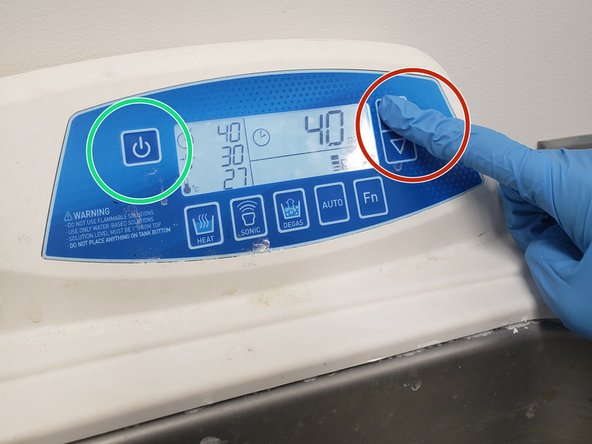
Turn on the sonicator if it isn't already
-
Use the arrow keys to adjust the time
-
The MAXIMUM amount of time ANY print can be in the sonicator is 60 minutes. Smaller prints and prints with less support material may need less time.
-
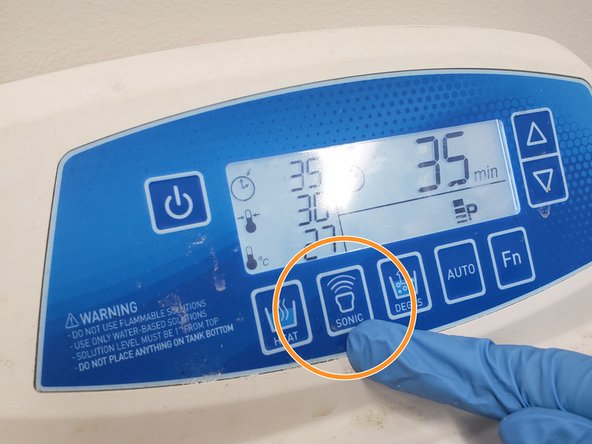
Hit the sonic button once time is set
-
If you have sonicated a print but won't be able to finish printing it, leave a note on harvesting station by the print noting how long it's been sonicated and the job number.
-
-
-
When the sonicator is done, remove the beakers.
-
Take out the parts and check to see whether the support material has softened enough to be removed manually.
-
You may see that the majority of support material has been removed. If that's the case, you can just clean off the part using water from the sink.
-
If the support material isn't soft enough for manual removal, put it back in the sonicator.
-
Make sure the total time in the sonicator isn't over 60 minutes.
-
-
-
For large prints that contain a lot a solid structure (i.e. Vero) in them, and/or channels where support material couldn't be sonicated out, you can use PowerBlast after sonication and your first cleaning
-
See 'Support Removal using the PowerBlast Cleaner (Vero & Agilus30 Prints)' for how to use the power cleaner and what prints can go on it.
-
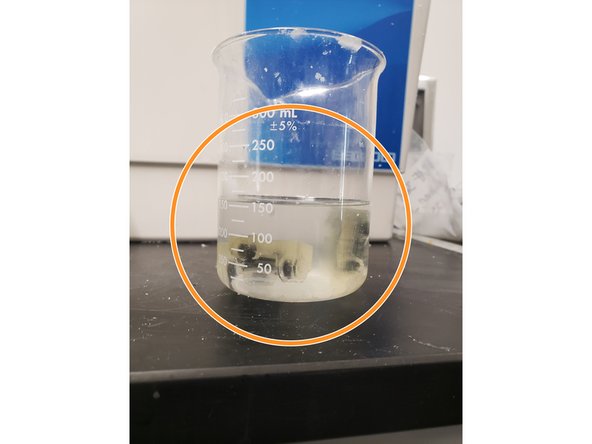
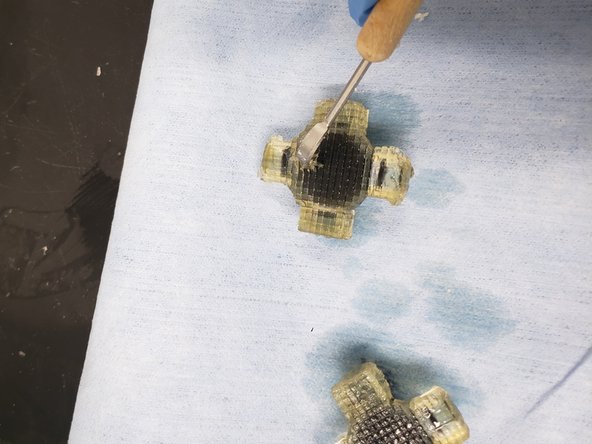
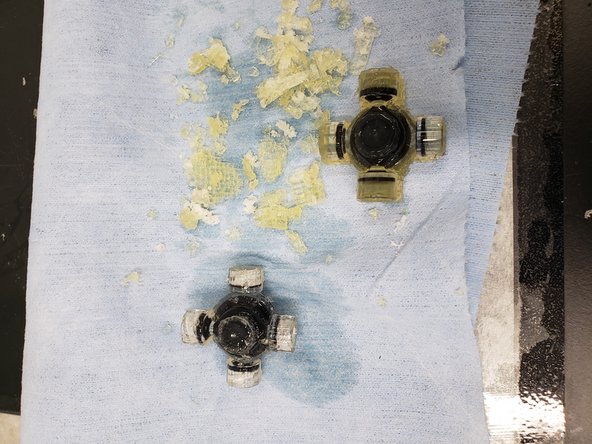
See the example pic. The parts of the print within the red circles are made of Agilus while the rest of the print is made of Vero. This print was sonicated first in the 4000mL beaker, then was cleaned using the PowerBlast. This method is only possible for prints like this, where you can avoid hitting the Agilus parts relatively easily.
-
-
-
Once done sonicating, take the beakers out and place them on the work station. Remove the print from the beaker and place it on a paper towel.
-
Remove any remaining support material with the necessary sculpting tools. You might also need to use the sink to rinse off the material.
-
BE GENTLE!!! Remember Agilus prints are still very delicate, especially after sonication.
-
Make sure to dry off the prints before bagging.
-
-
-
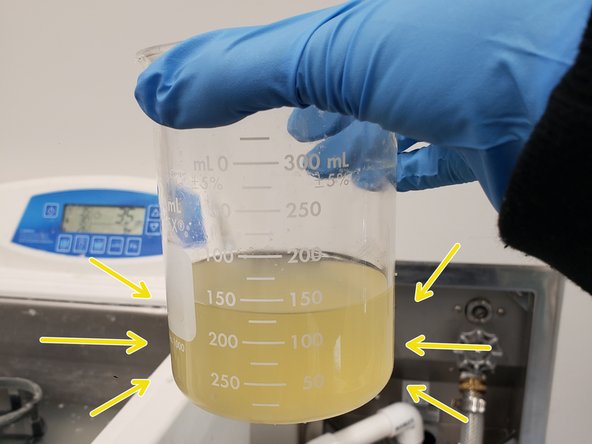
If the sonicator solution is still watery, it can be reused in later sonication so just leave it in the beaker on the work station.
-
If the solution has a lot of support residue in it and/or looks viscous and thick, dispose of it in the sonicator disposal container below the work station.
-