Introduction
This guide will explain the steps to properly harvest the Ultimaker 2+
Pictures by: Nico Lagendyk
Parts
No parts specified.
-
-
This step only applies for Ultimaker machines that have the original build plate setup, please see steps 3 and 4 for instructions using a Flexplate setup
-
Wait until the build plate has cooled
-
Pull the metal clips towards you, releasing the build plate
-
Slide the build plate forward slightly
-
Tilt the build plate and lift to remove it from the machine
-
-
-
Place the build platform on a flat surface or in a fixture
-
This can be useful to avoid the build plate sliding around while trying to remove a print
-
If a fixture is unavailable, try to utilize a flat lip or wall in your work area
-
Using a spatula work around the edges of the raft and slowly push further each time
-
If the part is particularly stuck, carefully use a razor to lift the edges enough to get the spatula underneath
-
Be patient with fragile parts as they could pop off or crack
-
Avoid scratching the build plate as much as possible- especially if kapton tape is installed
-
-
-
This step only applies for Ultimaker machines that have the Buildtak Flexplate setup, please see steps 1 and 2 for instructions using the original setup
-
The Flexplate is held on by magnets, simply lift the top portion of the plate (the spring steel sheet) upwards from the front
-
Be careful to not yank or force the z-axis to move while removing the spring steel sheet
-
-
-
Bend the flexible spring steel sheet, and the print should pop off
-
If the part is printed in ABS, it may be helpful to re-heat the build plate on the machine and pop off the print while it is still warm
-
If necessary, gently use a spatula to pop off any remnants or help print removal
-
-
-
Scrape off any excess filament that is still adhered to the build plate with a rounded-edge spatula
-
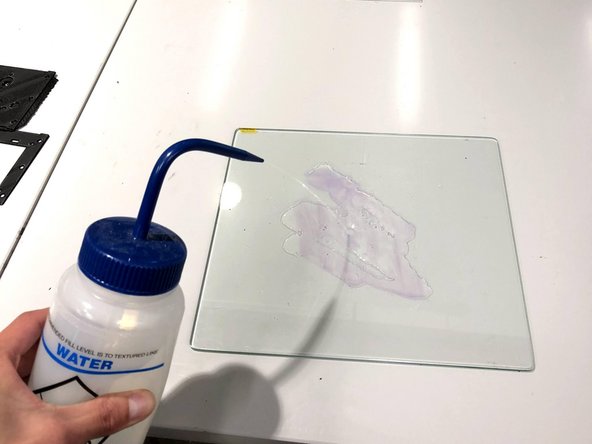
If Glue was used as build plate adhesion, use a water wash bottle to spray the build plate
-
Avoid getting water on the machines or other prints
-
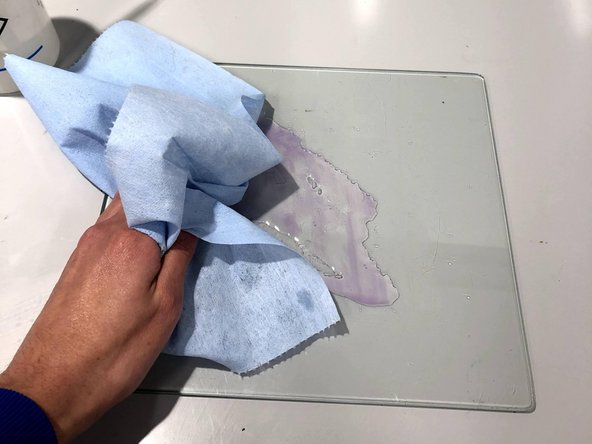
Wipe the build plate dry with a paper towel or cloth
-
If using a Buildtak or Kapton surface, use IPA and a towel to wash then dry the surface
-
Do not use IPA to wash off water-soluble glue
-
-
-
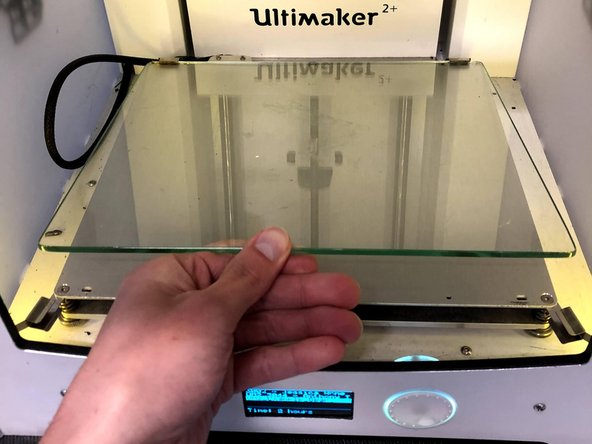
For the original build plate:
-
Slide the build plate back onto the printer
-
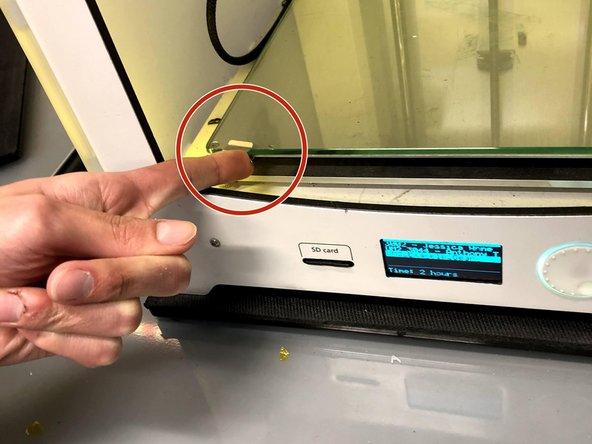
Close the metal clips onto the build plate securing it to the printer
-
For the BuildTak Flexplate:
-
Line up the back edge of the spring steel sheet with the back of the build platform while holding the sheet at an angle
-
Slowly lower the build sheet onto the platform, being careful not to pinch your fingers
-
-
-
For simple prints, the raft will come off by using even force closest to the corner between the part and raft
-
For more complex parts, the raft may require some poking and prodding from the spatula- use gloves to avoid cuts
-
If the raft is fused to the part, re-slice the part with a larger raft-to-model spacing
-
Supports can be removed using pliers or picks and patience
-
Supports that are fused to the part and difficult to remove may require additional post-processing, or need to be re-sliced with larger spacing
-