-
-
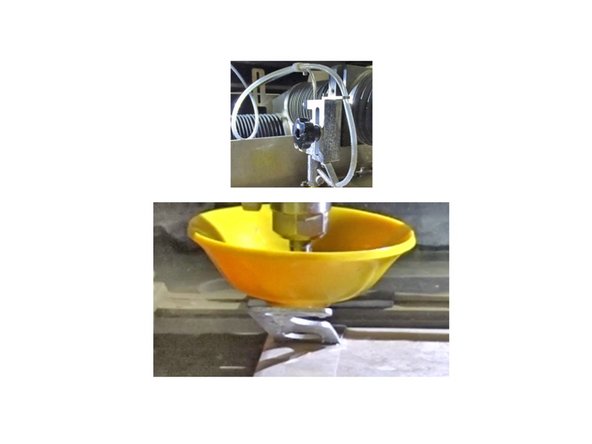
You would be getting trained on Protomax Water Jet.
-
Picture of the Machine is shown.
-
Power Switch is shown in the picture
-
-
-
We charge hourly, and also charge for the garnet per pound
-
$36/hr of cutting + $1/lb
-
$20/hr of cutting + $1/lb ( For student teams)
-
We charge to the nearest Half hour and Pound of garnet
-
-
-
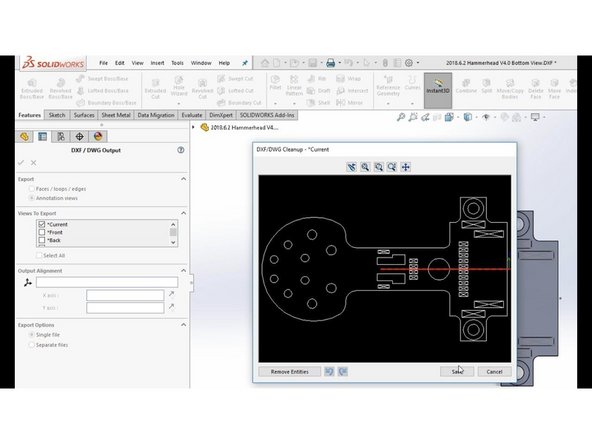
The water Jet takes a DXF file format
-
It ends in .dxf
-
While exporting a CAD file you can choose DXF
-
You can refer to the picture shown
-
-
-
Transfer the DXf file to the laptop conected to the Machine
-
You can make a Folder in documents/downloads, with your name for convenience
-
-
-
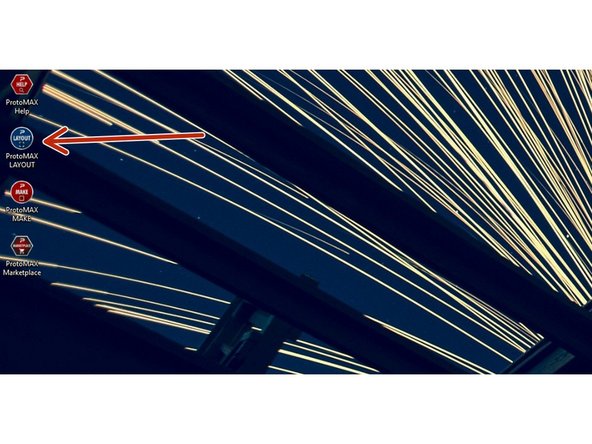
To prepare the DXF, we need to import it to Protomax Layout
-
The program is shown in the picture. It should be on the Desktop.
-
-
-
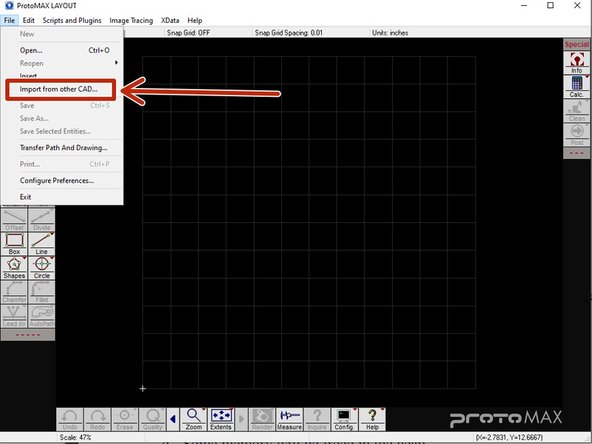
Once the software is opened.
-
Go to the FILE tab
-
And click the option shown in the picture
-
-
-
Once You have imported the .dxf file
-
You can get started
-
-
-
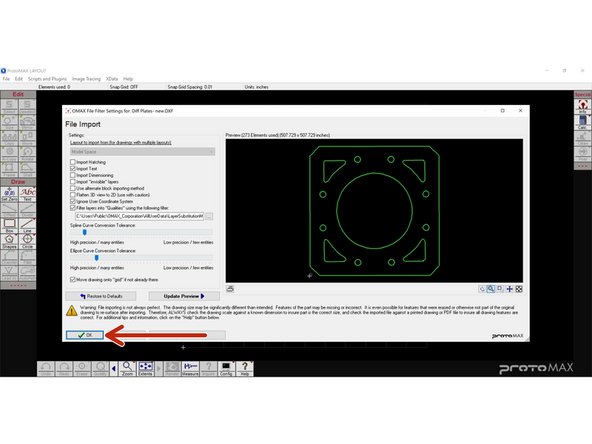
Usually one deosn't need to change anything on this page
-
But, if you have custom settings for your part regarding precision, first please ask for help before doing anything.
-
-
-
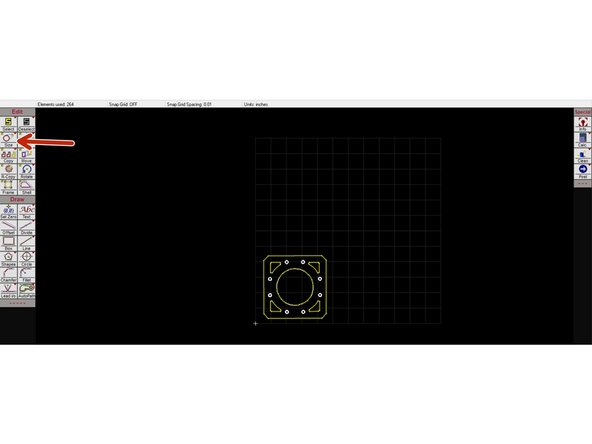
If you want re-size your dxf drawing on the water jet bed.
-
You can use the re-size tool.
-
As shown .
-
-
-
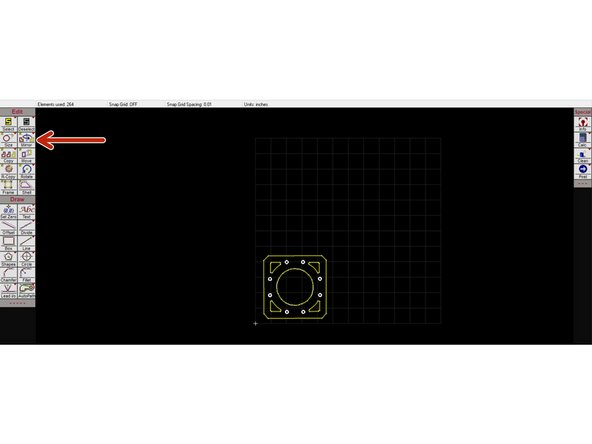
You can use this to mirror your drawing.
-
As shown
-
-
-
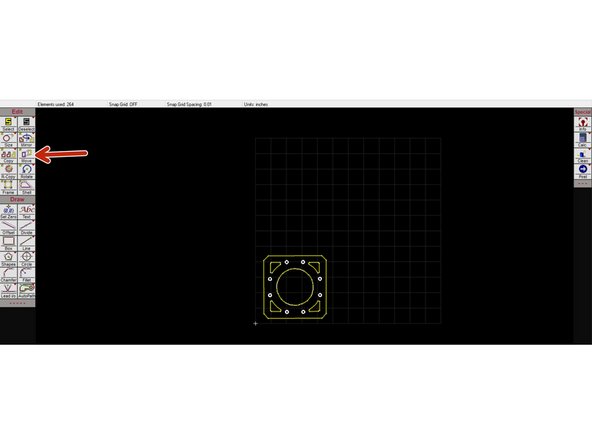
When you insert the drawing, the part is placed randomly
-
Therefore, you can use this tool to place it, wherever you on the grid.
-
Placement also depends on where you want to start with your part on the material.
-
-
-
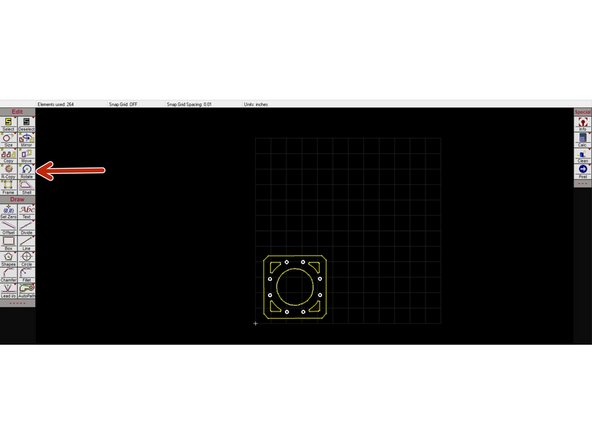
Can be used to rotate the part
-
The tool is shown.
-
-
-
After you have made changes to the part's position and the properties.
-
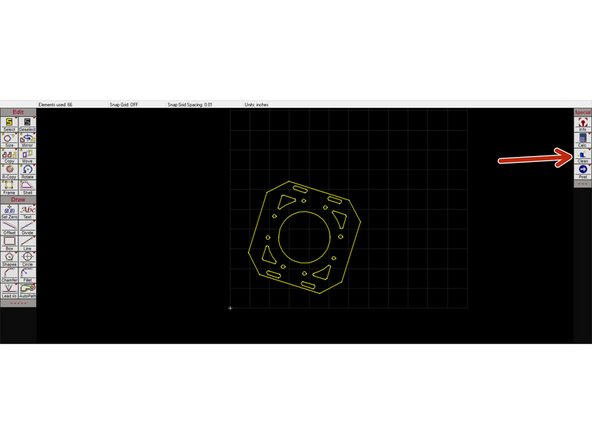
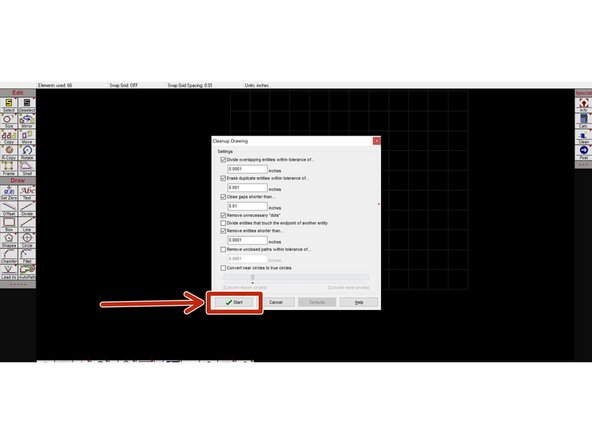
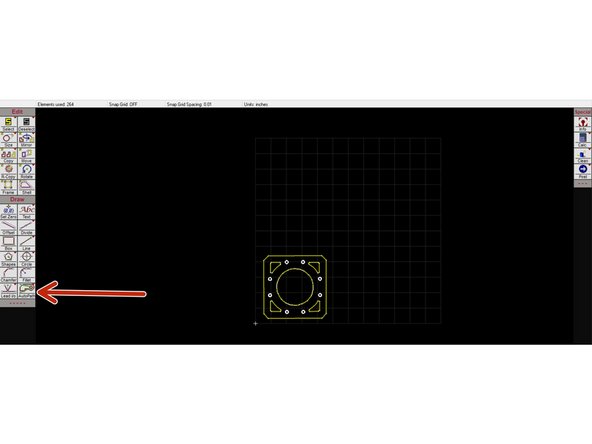
You Have to clean the part
-
Follow the steps in the pictures
-
Repeat the cleaning step at-least two times, to make sure the part is clean of openings.
-
-
-
Once you have cleaned the part
-
you can add the path for the water jet
-
-
-
You would add the autopath, by selecting the following choice
-
-
-
After you have added the path to the file
-
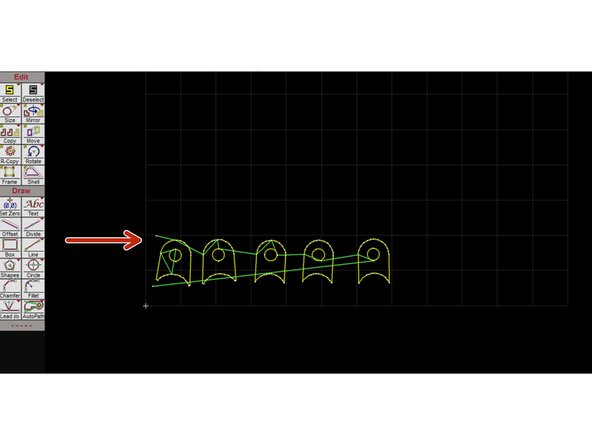
You have to check if the path is correct or broken.
-
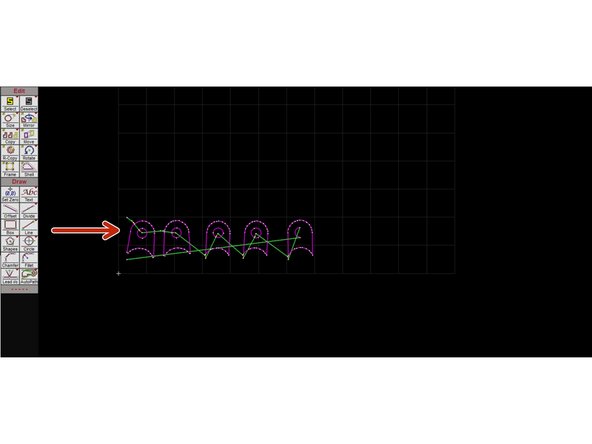
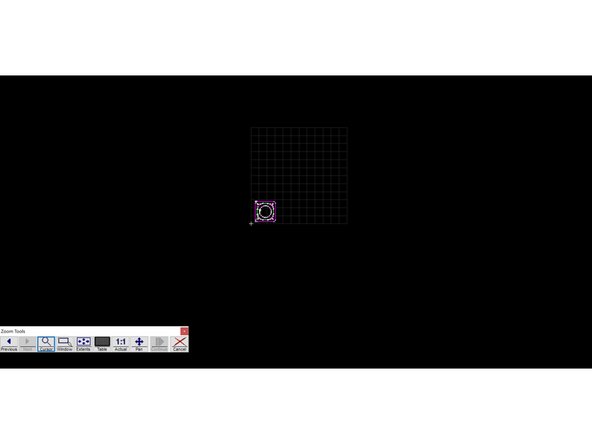
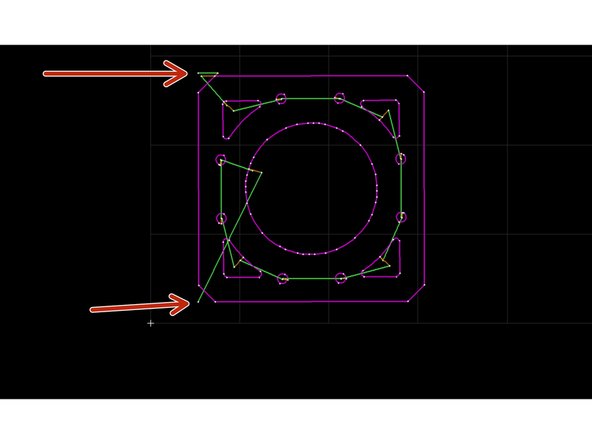
The path would look unusual, something like the picture shown
-
The first picture shows the path which is wrong, as the drawing has open ends
-
The second picture shows the correct path, because you need to clean the part before you autopath.
-
Which would then create a path which is clean
-
-
-
If you have a part, which would eventually fall off, after it has been cut by the water jet
-
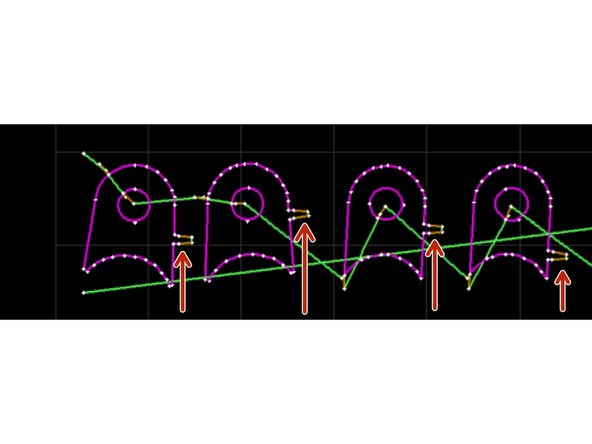
Then one need to add tabs to the part
-
This step can only be done, after you have cleaned the part, and added autopath
-
Hold CTRL-T, to enable the tabs option
-
Then you can add tabs, as shown in the picture
-
-
-
Once everything is done
-
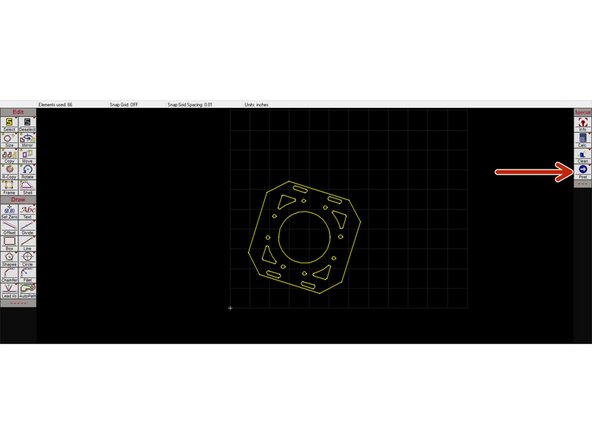
you can select the "Post" option on the right hand of the screen.(As shown!)
-
-
-
After you have selected the post option
-
you would be taken to another pop screen
-
Where its going to ask you to choose the starting position for the cut
-
The screen could look like this
-
-
-
You can choose the start point, only off the part
-
The options are shown in the picture, for this part
-
You can choose the start point
-
Then you will be redirected to another window
-
-
-
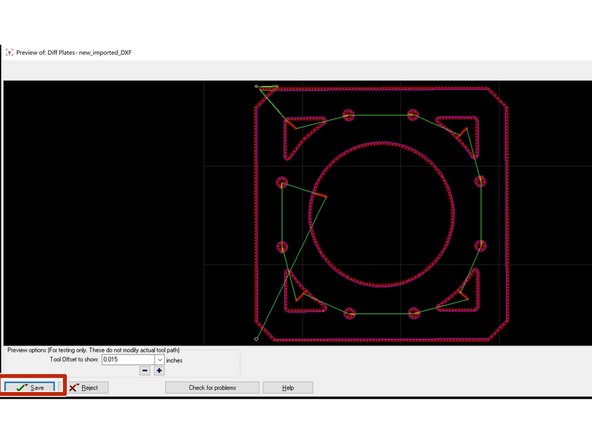
If you have any settings that you want for the toolset, you can change it
-
Otherwise, we just speed through this window
-
And leave the settings as is
-
Select save and then proceed
-
-
-
The Picture shows the icon, of the software on the desktop of the laptop.
-
-
-
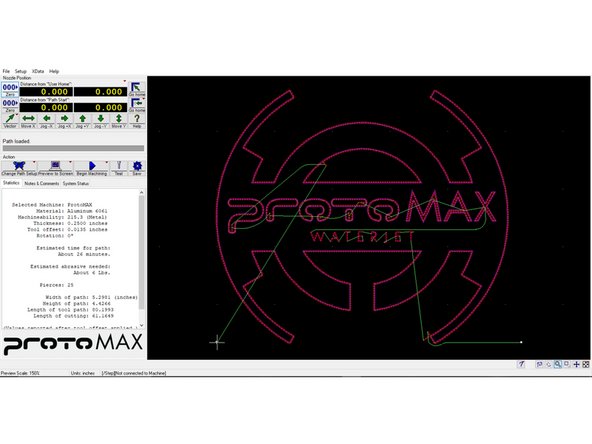
This is where you import your LAYOUT file that was edited before
-
You can also control the psoition of the Nozzle using this software
-
This is basically a control center for the machine
-
-
-
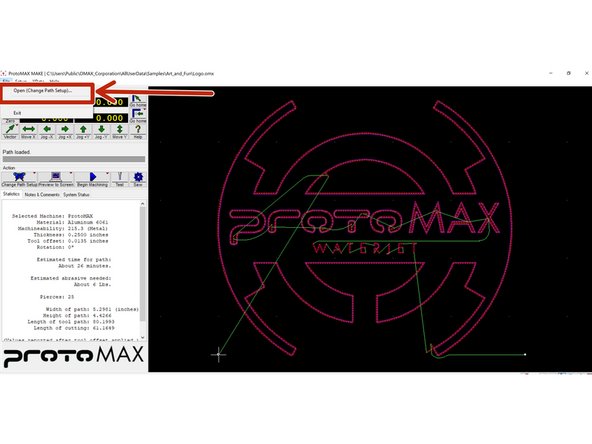
You have to go to FILE
-
Choose " Open (change path file) "
-
-
-
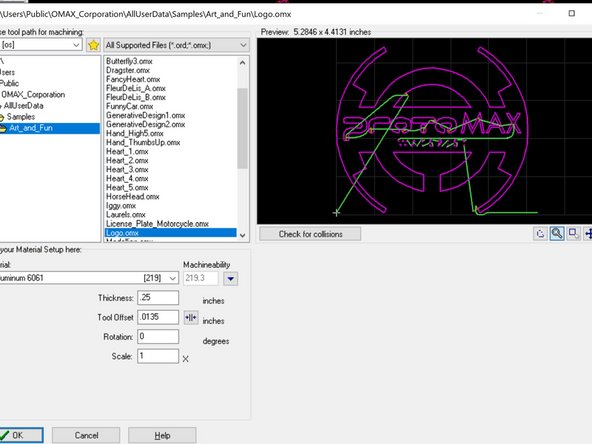
Choose the Layout file from your local directory/file
-
-
-
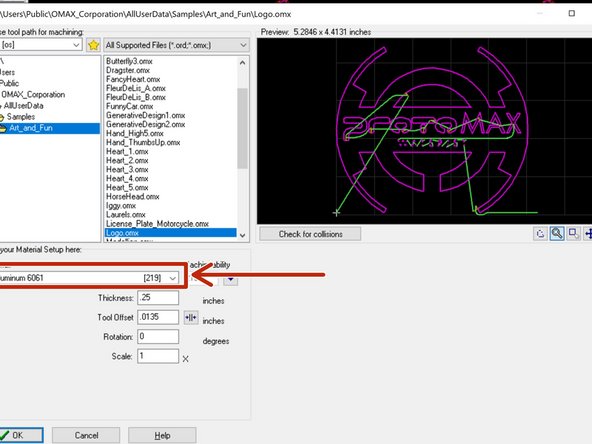
Click the drop down menu
-
in order to choose the material that you are using
-
-
-
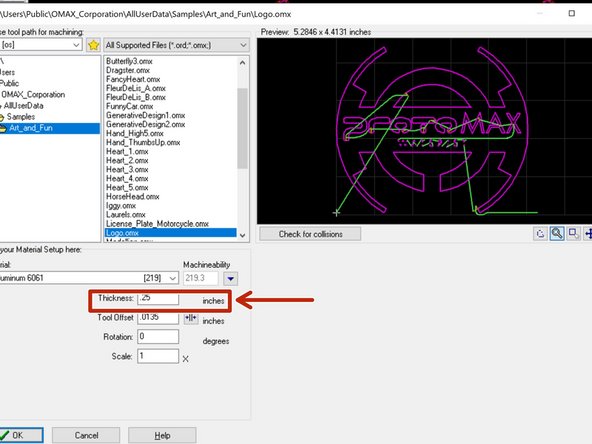
This is the thickness of the material in INCHES
-
Input the thickness of the material you are using for your part
-
-
-
This is how precise the cut of the water jet would be
-
You would choose the offset accordingly
-
-
-
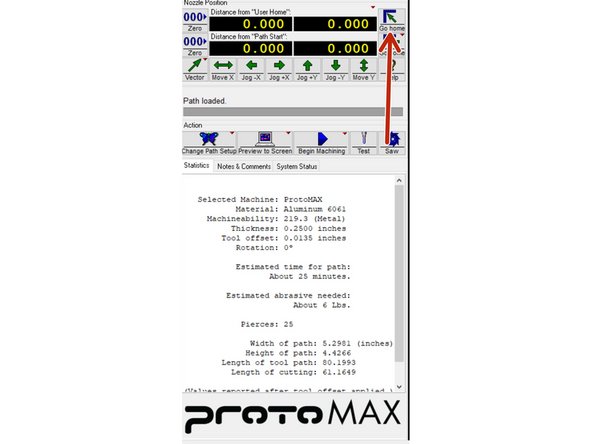
After importing the part
-
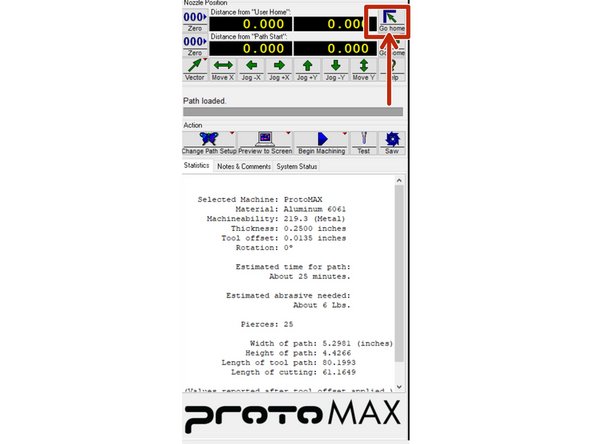
You have to HOME the nozzle in order to move forward with the process
-
It would take the nozzle to the machine home, where the cut would start
-
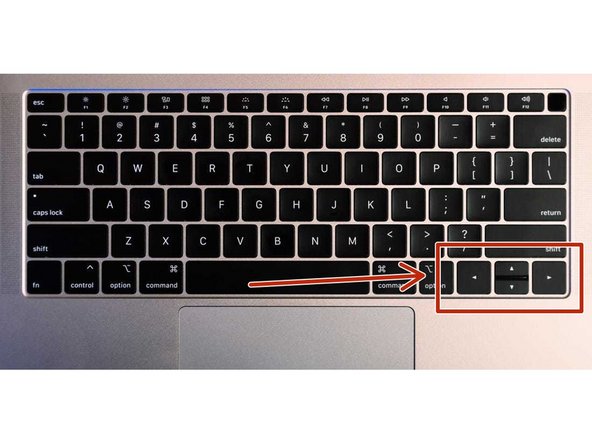
However, after when the machine is done homing the nozzle. You ca create your own custom starting position using your computer arrow keys to navigate the nozzle shown in picture 2
-
-
-
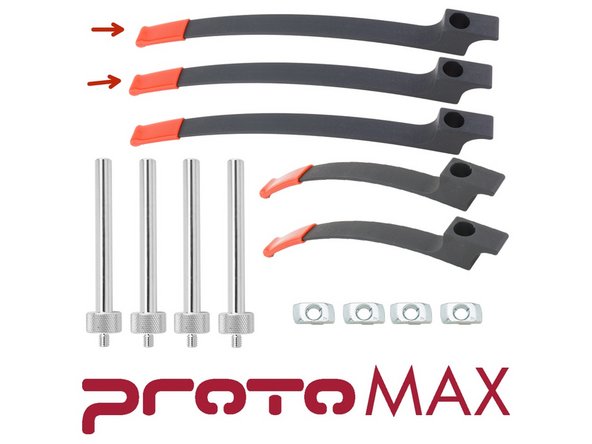
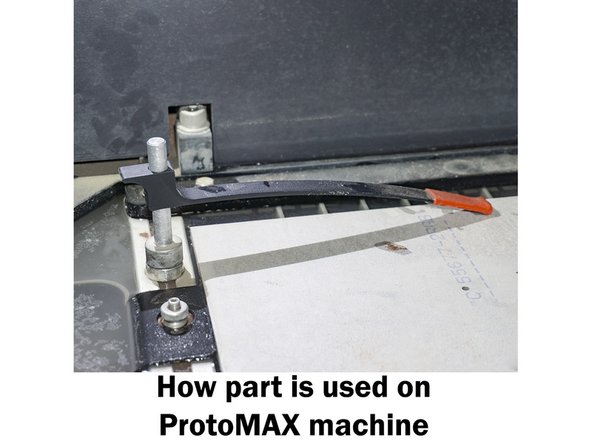
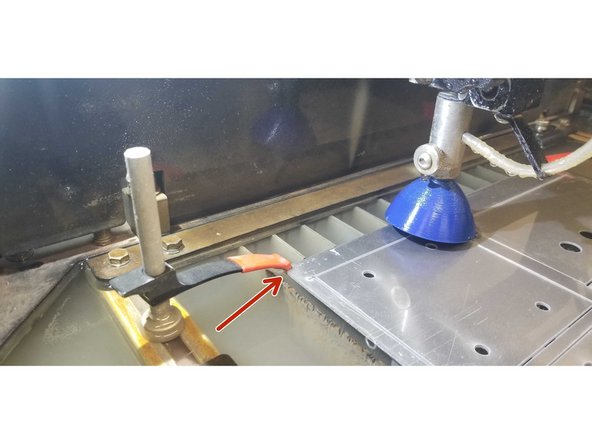
These are clamps
-
Which are used to secure the part on the Water jet cutting bed
-
The first picture shows the clamps, and spokes that secure the clamps on the edges of the bed
-
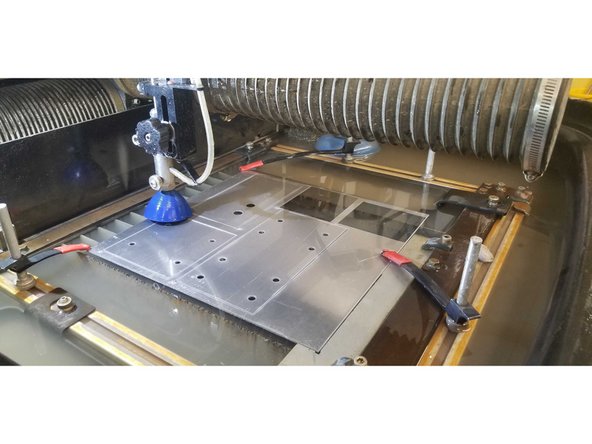
Picture 2 shows how it should look.
-
You have to make sure the clamp is not in the cutting path too.
-
-
-
As you can see the clamps are out of the cutting path
-
you have to make sure, that it is. Otherwise the clamps would get damaged
-
-
-
after you are done with the calibration for the height of the nozzle
-
You can make sure that the water level is fine in the machine
-
The recommended water level, should be just below the material, or just above the material
-
-
-
After you have secured the part, you have to calibrate the nozzle height manually.
-
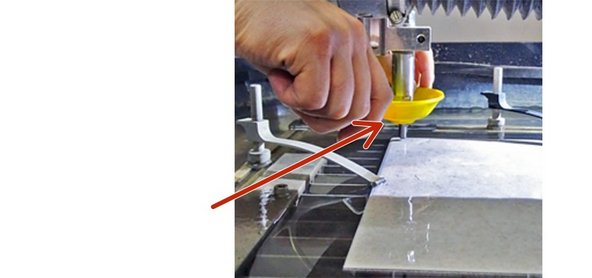
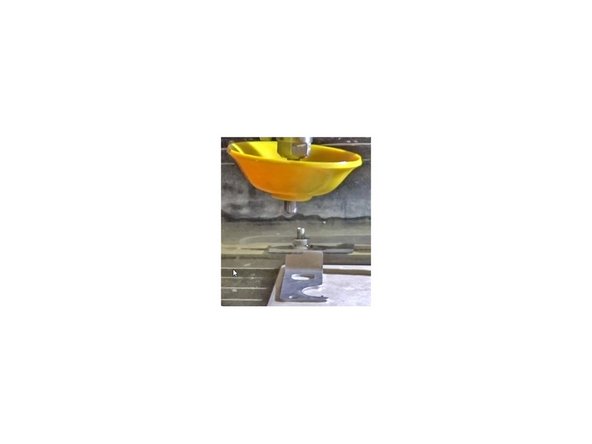
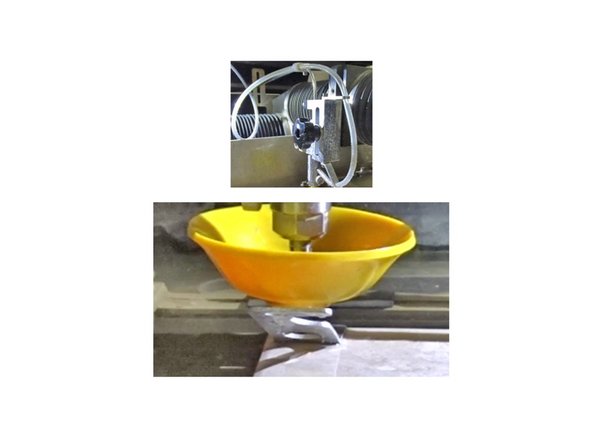
Loosen the nozzle height adjustment knob allowing the installation of the nozzle splash guard. Position the splash guard in its up position, allowing the nozzle tip to be viewed while setting the stand-off. Always use a splash guard!
-
-
-
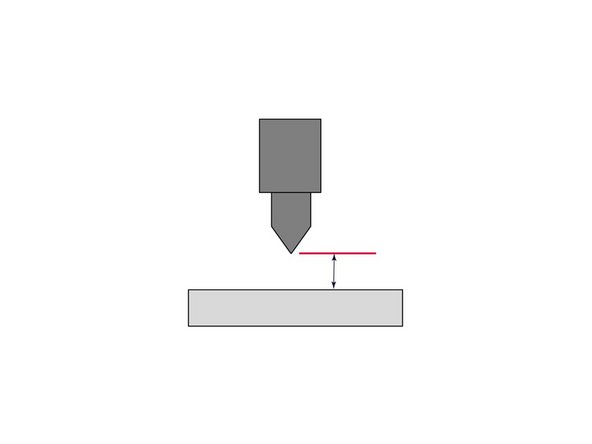
The nozzle stand-off for the ProtoMAX must be set to .075 in. using the provided feeler gauge.
-
-
-
Set the feeler gauge down on the material just below the nozzle tip.
-
Tighten the nozzle height adjustment knob to lock the nozzle position in place at the .075 in. stand-off height.
-
Remove the feeler gauge. The stand-off height is now correctly set.
-
-
-
MAKE software
-
First Home the Nozzle using the MAKE button shown
-
Then Use the Arrow keys on the keyboard to move the nozzle to the home position which is particular to your part.
-
-
-
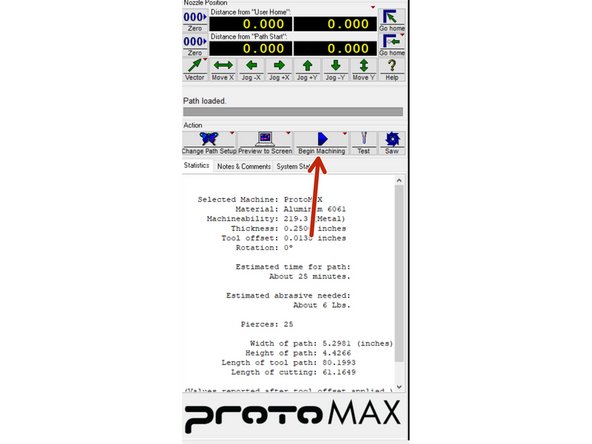
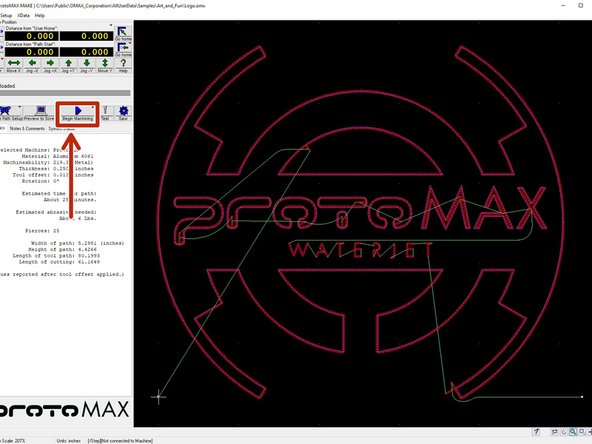
You would select the Begin Machining
-
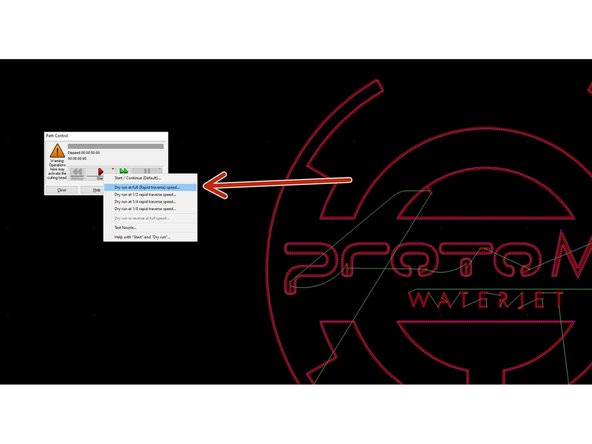
Choose the option to Dry Run at FULL. Picture 3 shows the options
-
-
-
You have to make sure that the dry run is ideal for your part
-
You also have to make sure that the nozzle is not going over the supports, or off the material.
-
After the dry run, Click "Go Home", so that you can start from the home and not the end of the path
-
-
-
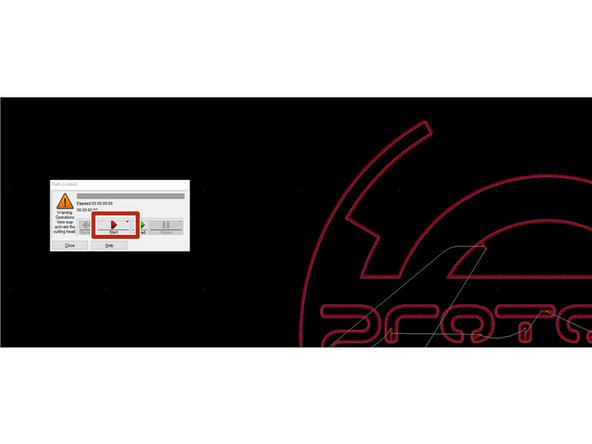
You would choose the option shown in picture 1
-
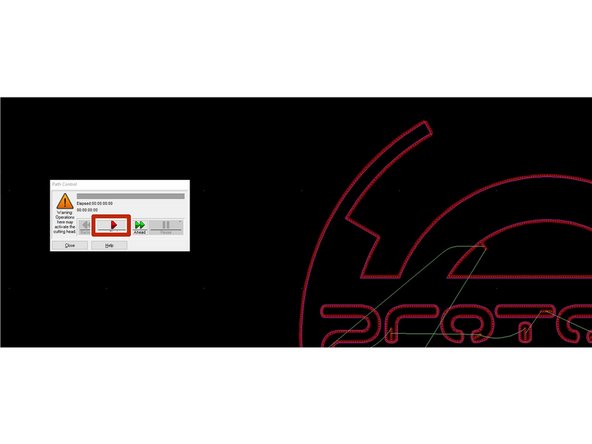
Then start the machining process, as shown in picture 2
-
-
-
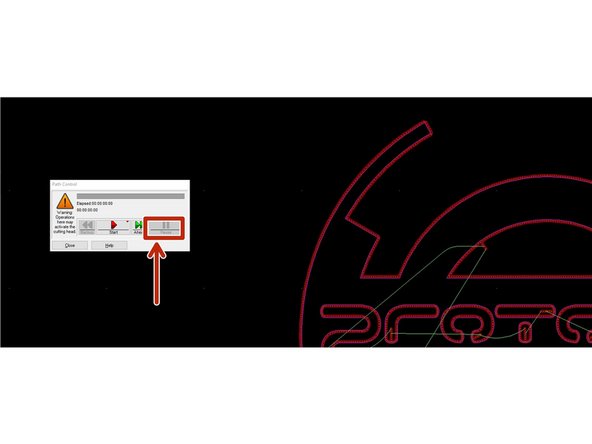
If something goes wrong, while the nozzle is cutting the material
-
Like the material, which was cut previously, come in the path of the nozzle
-
or the water level is too high, and you have to open the hood, to reduce the water level.
-
You should hit pause and then continue...
-
-
-
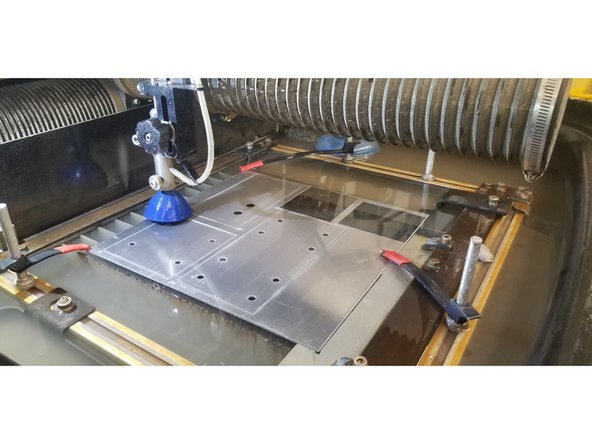
After the cut is done
-
You can take out the material and the part
-
If the part had tabs you can remove the whole material and extract the part using other tools in the shop
-
-
-
After you are done
-
You can use the water hose to clean the water jet bed, so that there is no garnet.
-
make sure the clamps are off
-
Also reduce the water level of the machine to just bellow the slats
-
Student competition teams: Failure to leave the machine clean will result in access being revoked
-
-
-
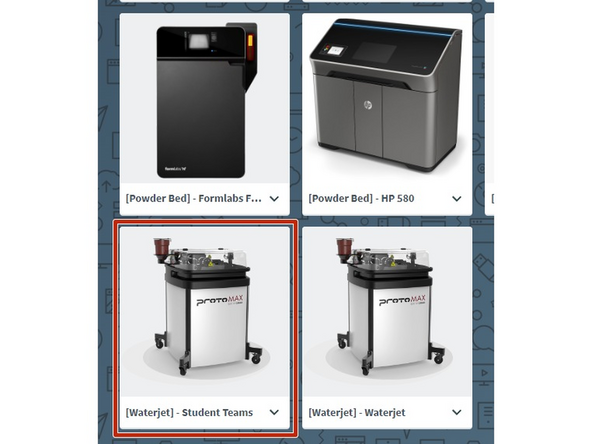
If you are using this machine for a student competition team, you must submit an order in papercut and track its usage.
-
Select the [Waterjet] - Student Teams
-
Specify what team you are affiliated
-
Machine runtime in minutes, rounded up to the nearest quarter hour
-
Lbs of garnet used
-
Failure to track usage will result in access being revoked
-
-
-
There is a Dozuki for this
-
Please refer to that
-
Cancel: I did not complete this guide.
3 other people completed this guide.




![Select the [Waterjet] - Student Teams](https://d3t0tbmlie281e.cloudfront.net/igi/umd/TNGUoqGZlf5XCPCR.medium)
