
Introduction
This guide will introduce you to all the different menus and icons you will see while operating the ProX 200.
-
-
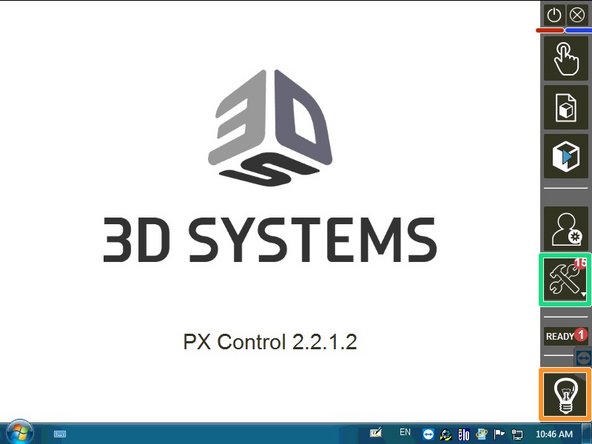
The ProX 200 runs on Windows OS
-
Double click PX Control to open the machine control application
-
Make sure the user is selected as ADJUSTER
-
Password 4123
-
Touch SET
-
Touch LOG IN
-
Different users have different levels of control
-
-
-
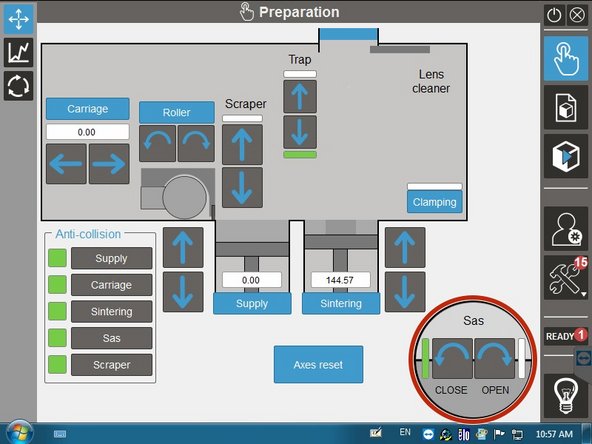
This menu lets you operate the various internal mechanisms
-
Green boxes mean the mechanism is operating properly
-
Red and orange boxes mean there is an error that needs to be fixed
-
CLAMPING lets you engage the suction cup on the build plate to hold it in place
-
SUPPLY lets you control the height of the powder supply (MAX 160)
-
SINTERING lets you control the height of the build plate (MAX 160)
-
-
-
SAS lets you OPEN and CLOSE the sealed door on the front of the machine for transferring powder and tools
-
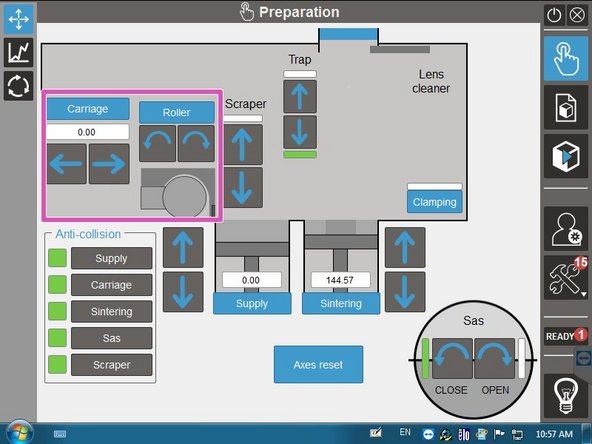
CARRIAGE lets you move the recoater left and right. ROLLER lets you rotate the recoater roller
-
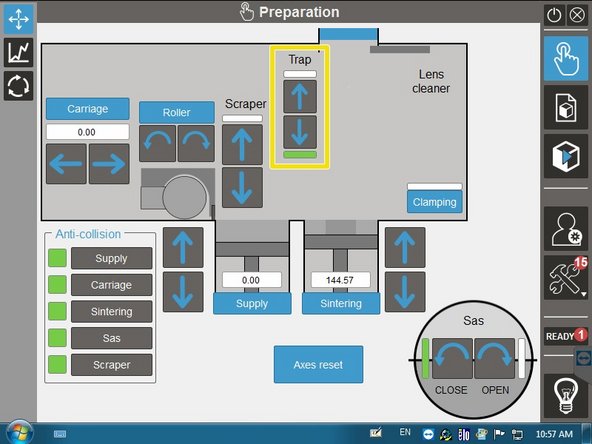
TRAP lets you open and close the protective covering over the mirror system which is used during argon purging
-
-
-
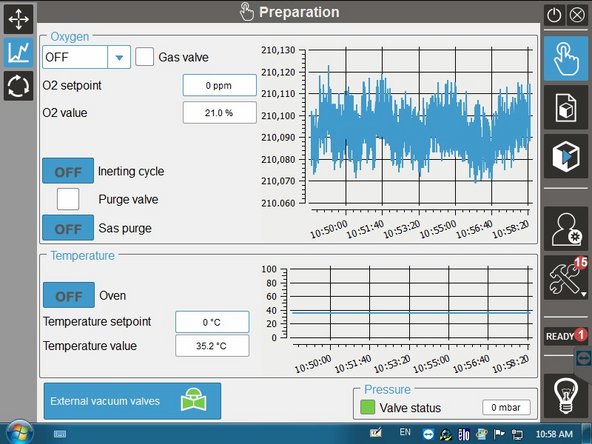
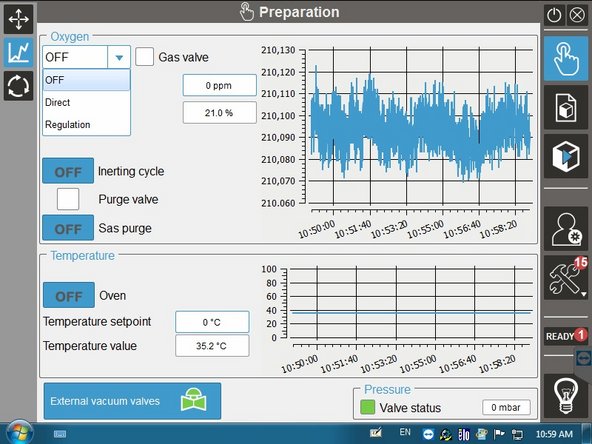
This menu lets you monitor and control the purging process.
-
Items you will control:
-
Setting the oxygen ppm level
-
Opening and closing the external vacuum valves
-
Setting the air flow to DIRECT
-
Turning the inerting cycle ON
-
The graph is a helpful visual during the purge cycle to see the oxygen level
-
-
-
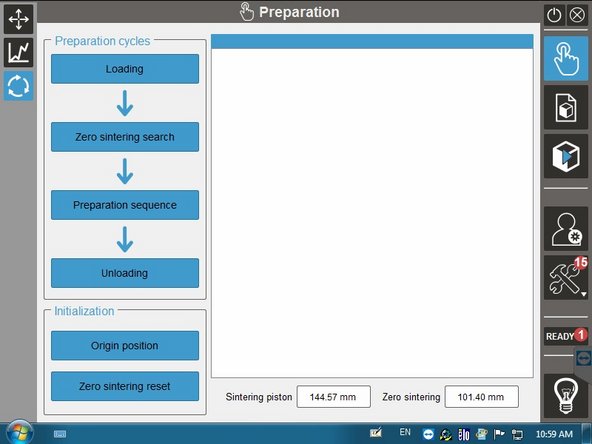
This menu lets you run the preparation layer steps after loading the build plate
-
LOADING lets you load the build plate
-
ZERO SINTERING SEARCH automatically sets the build plate to the proper height for the preparation layer
-
PREPARATION SEQUENCE lets you manually adjust the first layer to visually make sure you have an even distribution of powder
-
-
-
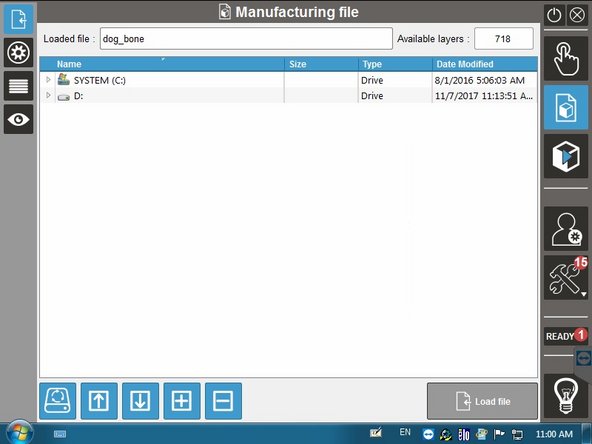
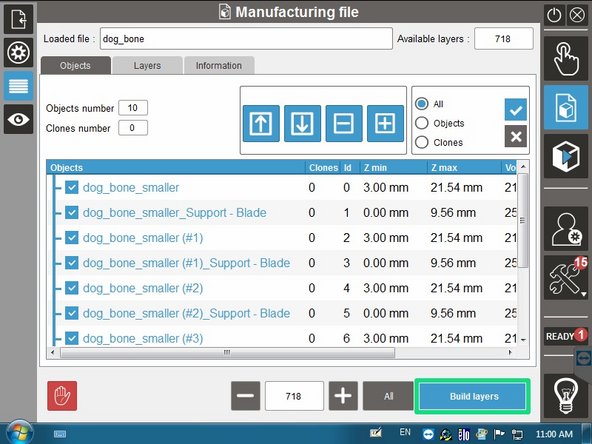
This menu lets you load and view the build file
-
You can search through the shared directory to find the file to upload
-
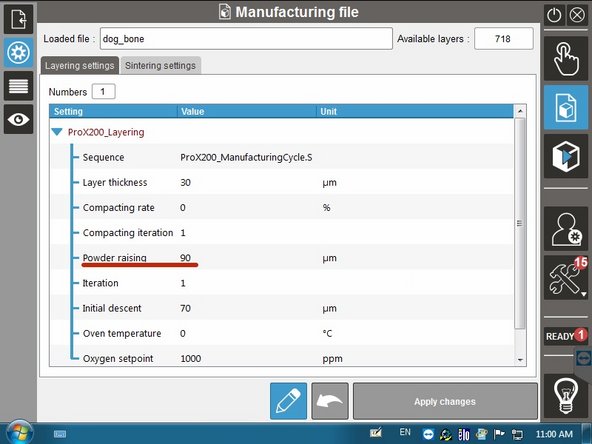
The settings tab allows you to view some basic settings for layering and sintering
-
You can adjust the POWDER RAISING if you need to reduce the amount of powder being used for a build
-
The objects tab lets you see the different components in the build file (part file, support file, etc.)
-
BUILD LAYERS allows the selected objects to be converted to the final build file
-
The eye tab shows a visual of the build file
-
-
-
This menu shows the progress of the build and the atmospheric conditions
-
These buttons allow you to manually layer and sinter as well as starting the build
-
-
-
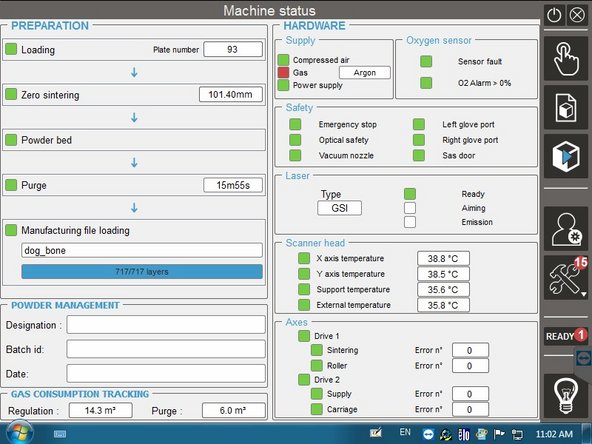
This menu shows the status of the machine. You need all green boxes to start the build
-
-
-
The power button turns the machine off
-
The close button exits out of PX Control
-
The tools menu is for service technicians only
-
This button turns the internal light on
-


Cancel: I did not complete this guide.
5 other people completed this guide.