Introduction
This guide will lead you through preparing the ProX 2oo to start running a build. You will also need to read the Lens Cleaning Dozuki for in depth cleaning procedures.
-
-
Attach the build plate to the base plate using (4) 4mm screws
-
Build plate grain direction must be perpendicular to recoater direction of travel. (Vertical to front of machine)
-
Clean build plate and base using IPA
-
Place build plate in open SAS
-
-
-
After opening the SAS to the machine, gently place the build plate and base on the build platform
-
The inscribed FRONT should be facing you and the gear teeth should easily slot into place
-
Select CLAMPING to activate the suction cup
-
The build plate will not sit evenly if there is powder in the gear teeth which will be evident in the preparation layer
-
-
-
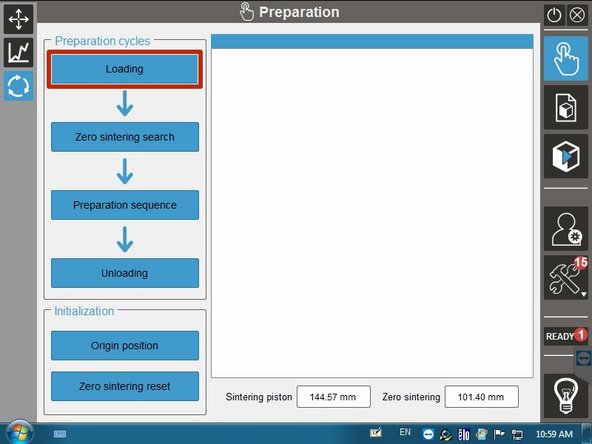
Navigate to the Preparation Menu and touch Loading to start the process
-
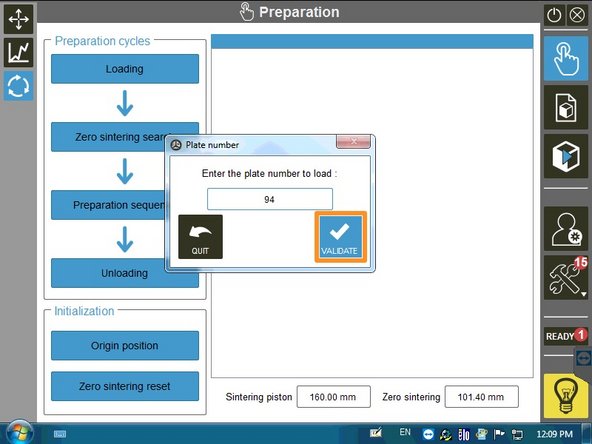
We do not currently mark the plate number so just touch Validate
-
-
-
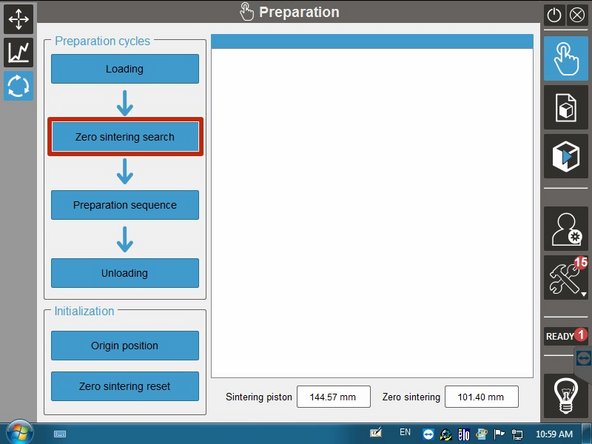
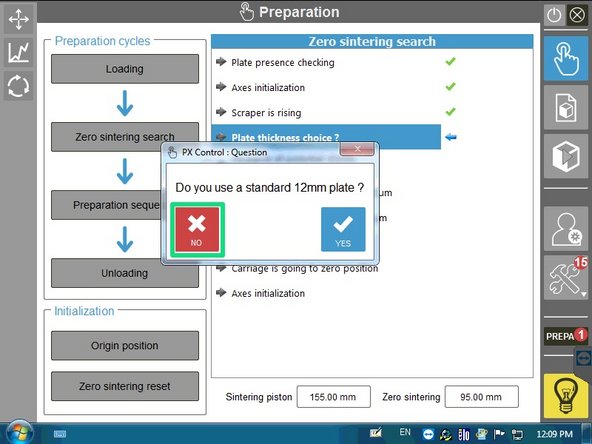
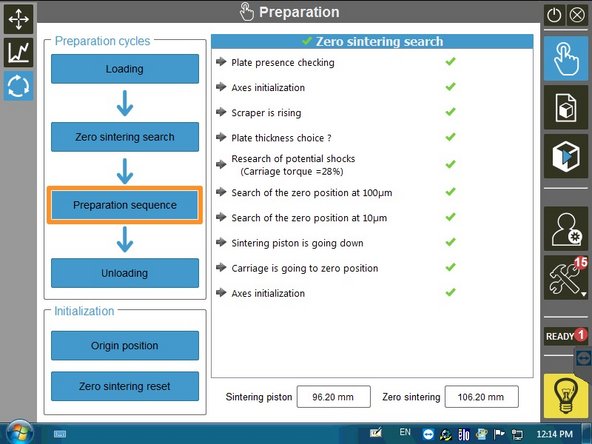
Touch Zero Sintering Search to start the leveling process
-
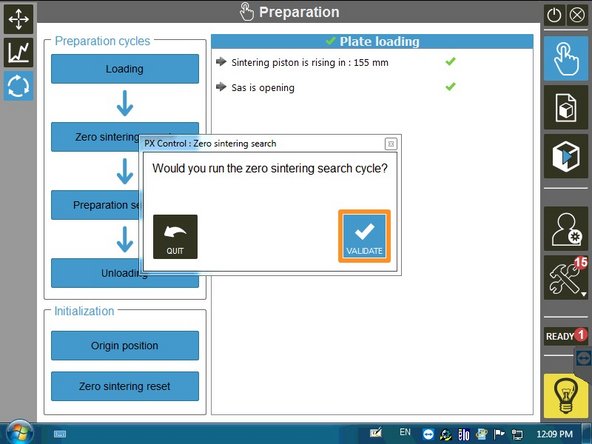
Touch Validate
-
Touch NO because we do not use a 12mm plate
-
-
-
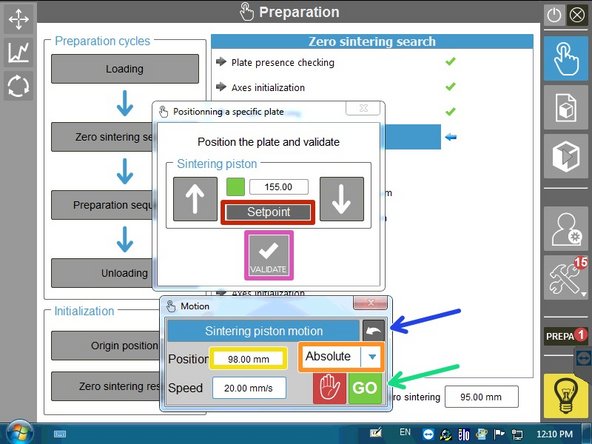
Touch Setpoint to set the height for the top of the build plate
-
Change the drop down menu to Absolute
-
Set the value to 98 mm
-
Touch GO to move the sintering piston
-
You have to touch the back arrow to exit this menu
-
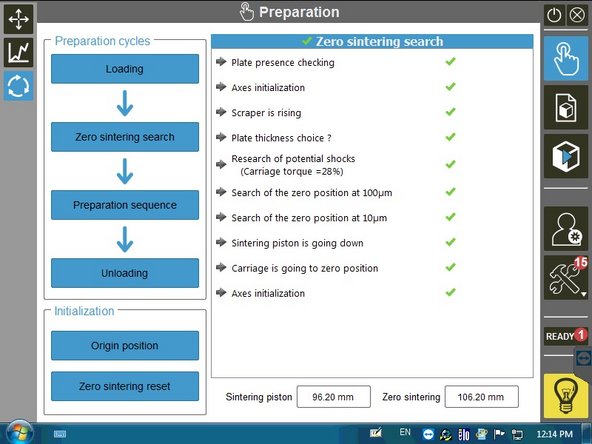
Touch Validate to initiate the automatic zero sintering process
-
The machine will run through the zero sintering procedure to level the build plate for the preparation layer
-
The process takes a few minutes
-
-
-
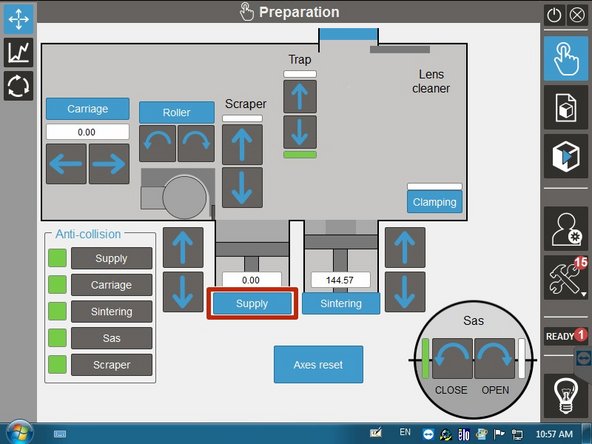
The powder supply should be at an even height with the build platform
-
If it isn't, raise the piston until it is level
-
Touch Preparation Sequence to start the powder layering process
-
Make sure the Layer Thickness is set to 10 um and then touch Validate
-
-
-
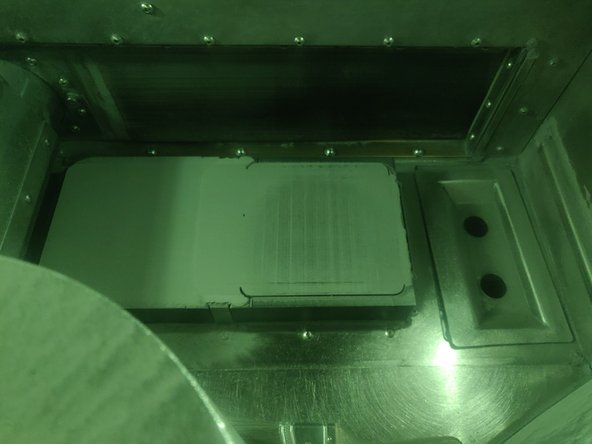
You will repeat the preparation layering steps if the first layer of powder is uneven or has weird patterns
-
You are looking for an evenly distributed thin layer of powder
-
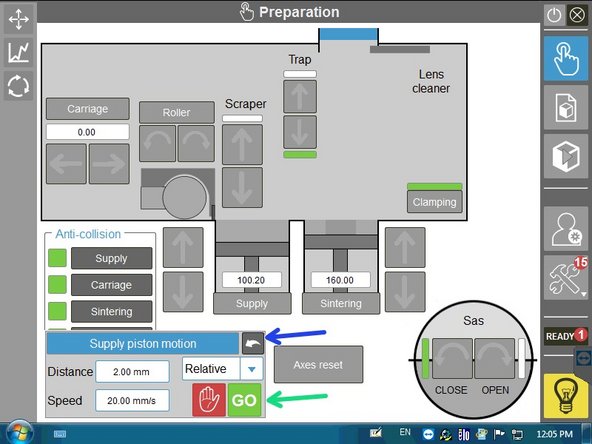
Touch SUPPLY and raise the powder supply up 2 mm using Relative motion
-
Touch GO to move the piston
-
Each time you touch GO the powder supply will move an additional distance
-
You must select the back arrow to exit the menu
-
Go through the Preparation Sequence again
-
You are finished once the powder layer looks even
-
-
-
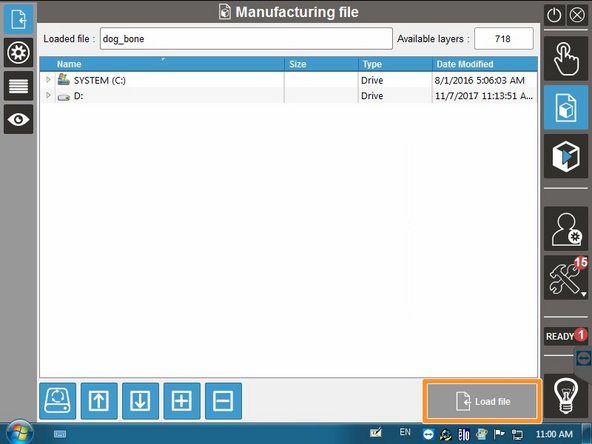
Find the build file from the build menu and then touch LOAD FILE
-
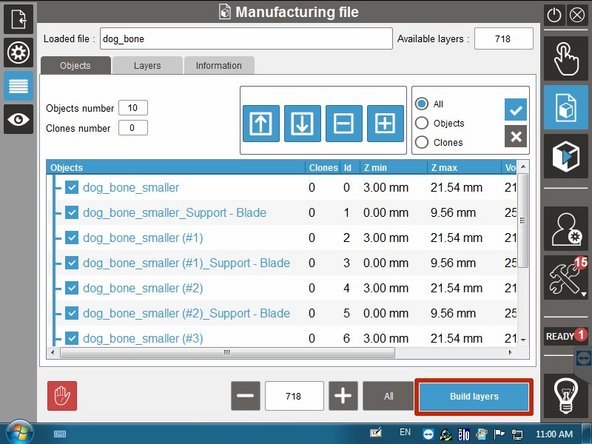
Touch BUILD LAYERS after confirming all associated files are present
-
Support structures are considered as their own objects
-
-
-
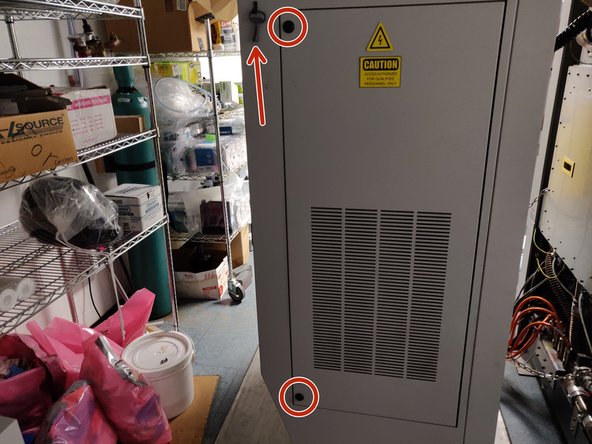
Open up the machine using the square key for the (2) locks
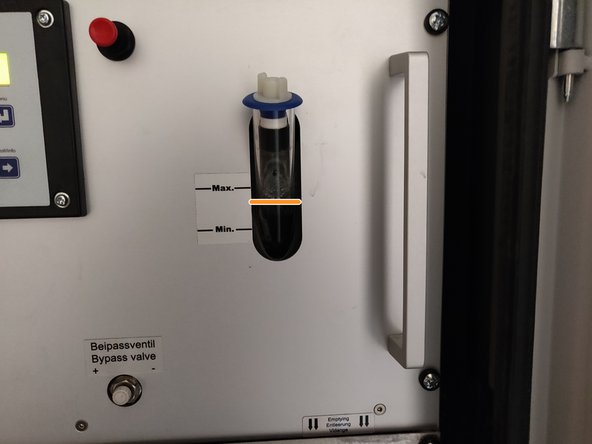
-
The water level should be between the marked levels
-
Add DI water if necessary
-
-
-
View the Lens Cleaning Dozuki
-
-
-
This will take ~2 hours
-
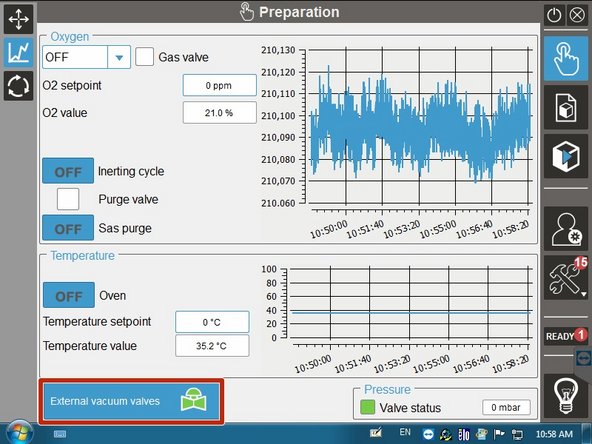
Close all valves by touching EXTERNAL VACUUM VALVES
-
Manually lock the arm holes and make sure to turn the Argon on
-
Set oxygen to DIRECT
-
Change the O2 setpoint to 1000 ppm
-
Touch INERTING CYCLE and set to ON
-
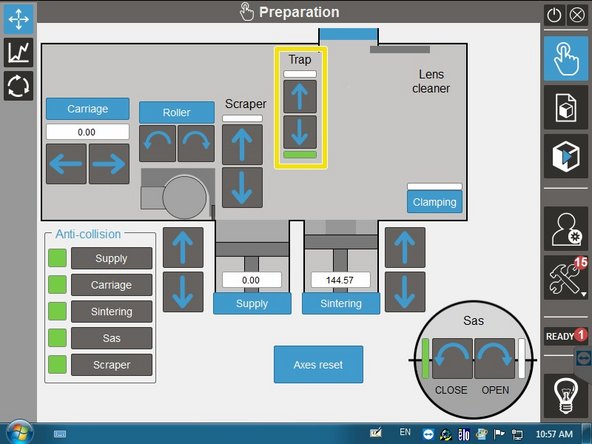
Open and close the lens trap when the oxygen value is at 2000 ppm for about 3 seconds
-
This will cause a small spike in oxygen, but will go back down to 1000 ppm
-
-
-
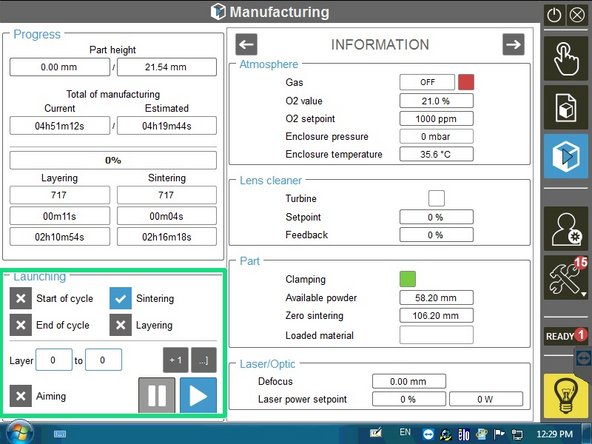
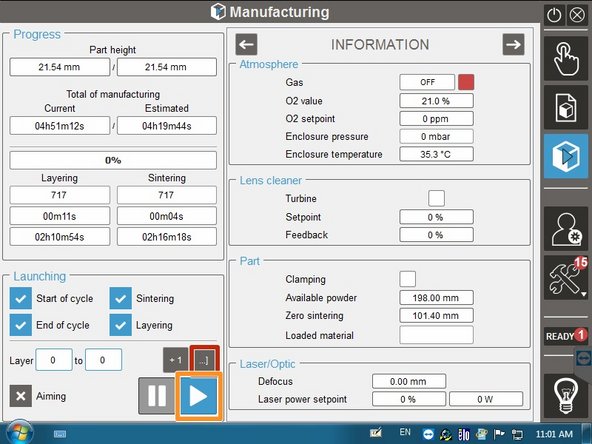
The preparation layer is layer 0. Turn off all LAUNCHING commands except Sintering. Then touch PLAY to Sinter 0
-
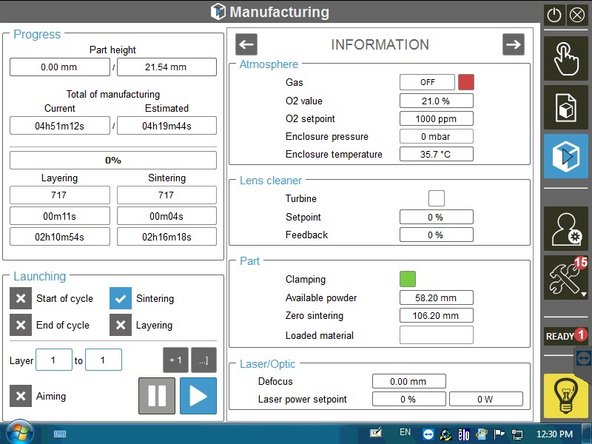
Touch +1 to move to the next layer. Turn on Layering and turn off Sintering
-
Touch PLAY to Layer 1
-
Turn off Layering and turn on Sintering. Now Sinter 1
-
Repeat 3-5 times until it looks good
-
-
-
Select build to end and sinter to end
-
All Launching commands should be selected
-
Touch PLAY to run the build
-