Introduction
Regular cleaning and maintenance is critical when operating the Fortus; completing a few simple tasks can prevent larger issues and keep the machine running smoothly.
This guide includes all of the standard procedures that should be completed after each print.
-
-
Remove the print from the oven by lifting up on the build sheet
-
The build sheet, print, and all oven surfaces will be hot. Gloves are required
-
If the print used soluble supports, see this guide. If the print used breakaway supports, see this guide
-
-
-
Remove any debris from the platen using a soft brush and a vacuum
-
Ensure that no debris gets in the vacuum port in the center of the platen
-
Vacuum the rest of the Z stage around and behind the platen
-
Inspect the platen o-ring for any cracks or wear and replace if necessary
-
Inspect the tip sensor plunger for any material residue and clean with a razor blade if necessary
-
No amount of material is acceptable on the tip sensor plunger
-
-
-
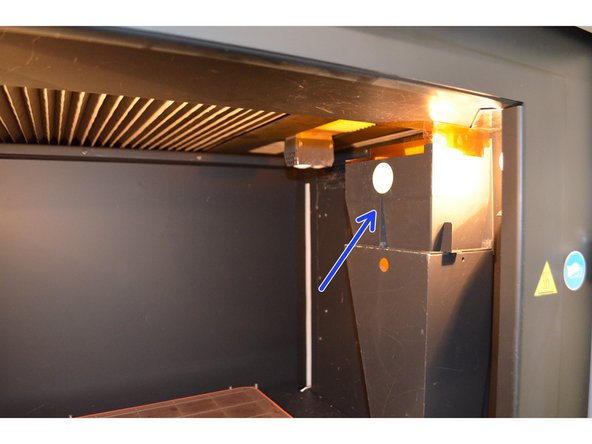
Remove debris chute hood by lifting straight up
-
Remove purge block and flicker/brush assemblies by lifting straight up and off their locating pins
-
Keep track of which assembly was on which side and replace them accordingly
-
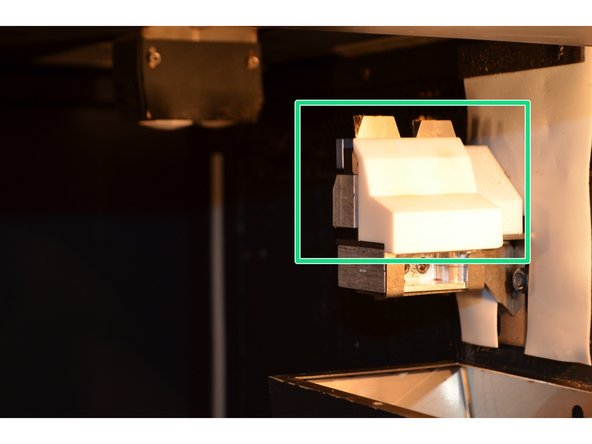
Clean all parts and the surrounding areas using a vacuum, soft brush, and pick
-
Inspect the hood and tip cleaning assembly as described in this guide
-
-
-
This step is easiest if done before replacing the tip cleaning assembly and debris chute hood
-
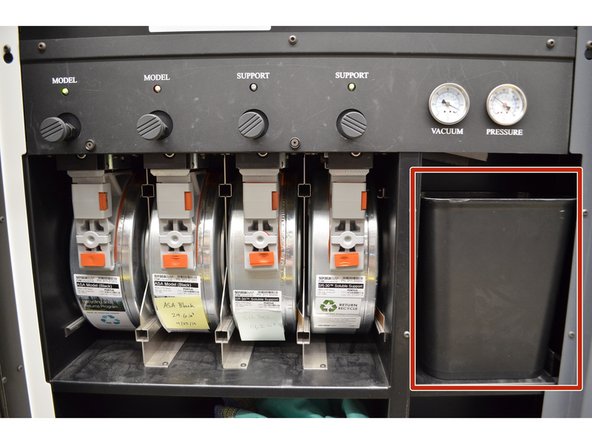
Remove the purge waste bucket by lifting the bucket and rotating it counter-clockwise. The contents can be put in the general lab waste
-
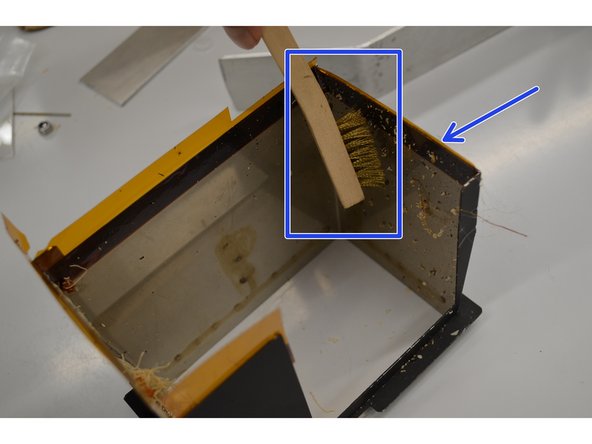
Use the long wire brush to clean the inside of the debris chute, reaching up from the bottom or down from the top as necessary
-
Vacuum or sweep any debris that was displaced, then replace the waste bucket, tip cleaning assembly, and debris chute hood
-
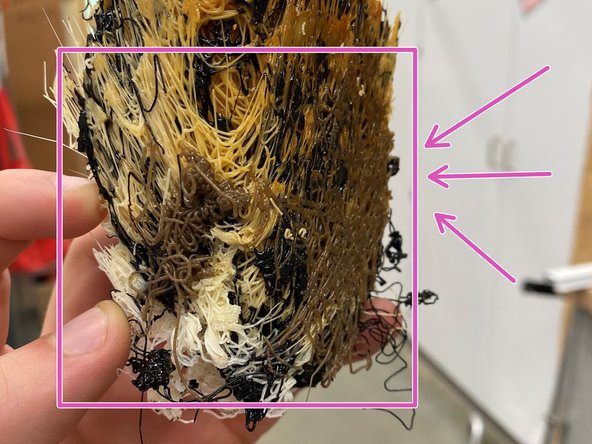
If the chute is not properly cleaned, material will build up and clog the chute as pictured.
-
Material that has clogged the chute is extremely difficult to dislodge. Do not forget this step.
-
-
-
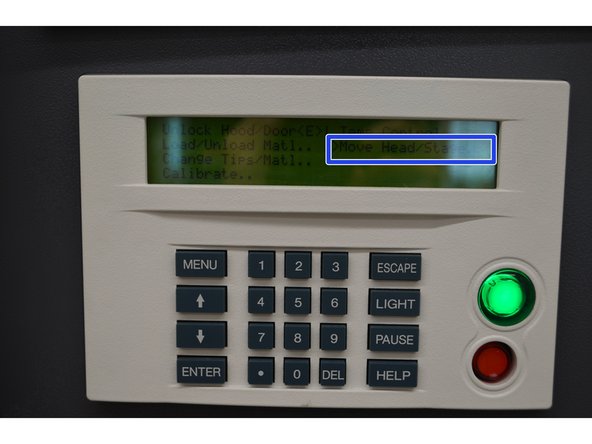
With the oven door closed, navigate to Operator Control > Move Head/Stage > Move Relative in the control panel
-
Hold down the 3 key until the Z stage has reached the top of its travel
-
To speed this up, make sure that the Set Distance field is 1.000 inch and not 0.100 inch
-
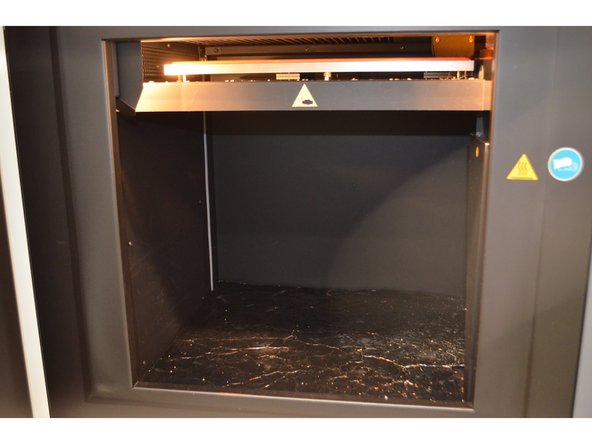
Open the oven door and vacuum beneath the Z stage
-
If necessary, you can temporarily remove the black foil lining from the bottom of the oven for a more thorough cleaning
-
-
-
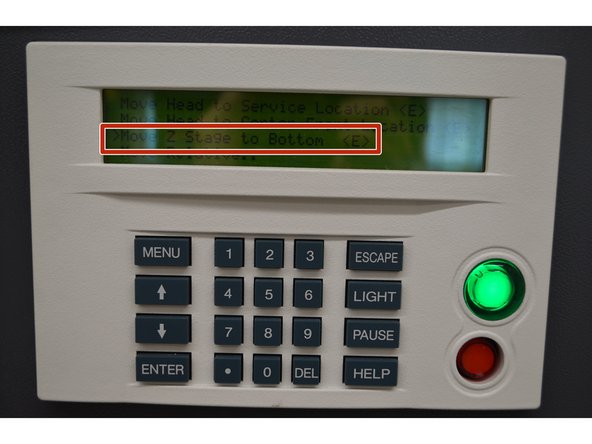
With the oven door closed, navigate to Operator Control > Move Head/Stage
-
Select Move Z Stage to Bottom
-